
F 350 4WD Pickup V8-351 5.8L VIN H EFI (1997)
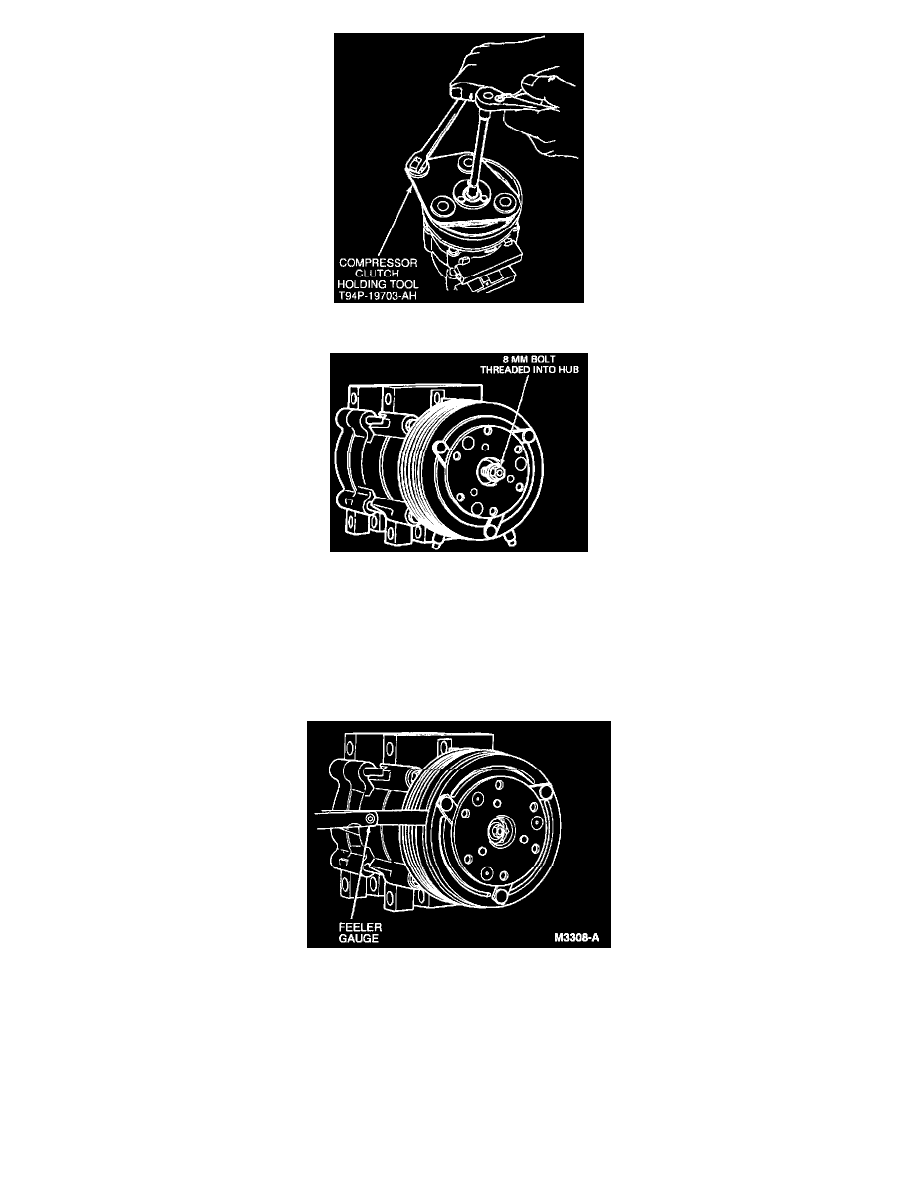
3. Use Compressor Clutch Holding Tool T94P-19703-AH to hold the A/C clutch in position while removing the clutch bolt.
4. Pull the A/C clutch and shims from the A/C compressor shaft. If the A/C clutch cannot be removed, screw the clutch bolt into the clutch pulley hub
to force the A/C clutch from the shaft.
5. Start by placing the smallest nominal thickness shim inside the A/C clutch spline opening and slide the A/C clutch onto the end of the A/C
compressor shaft.
6. Install the clutch bolt into the end of the compressor shaft. Use Compressor Clutch Holding Tool T94P-19703-AH to hold the A/C clutch and hub
in position while tightening the clutch bolt. Tighten the A/C clutch bolt to 11-13 Nm (8-10 lb-ft).
CAUTION: Do not use air tools to tighten the bolt.
7. Recheck A/C clutch air gap between clutch hub and pulley mating surfaces with a feeler gauge. The air gap should be between 0.35 and 0.85 mm
(0.014 and 0.033 inch). Check at three locations equally spaced around the A/C clutch pulley.
8. If A/C clutch air gap is not within specification, repeat Steps 3 through 7. Install the correct shim to achieve the desired air gap.