
F 350 4WD Pickup V8-351 5.8L VIN H EFI (1997)
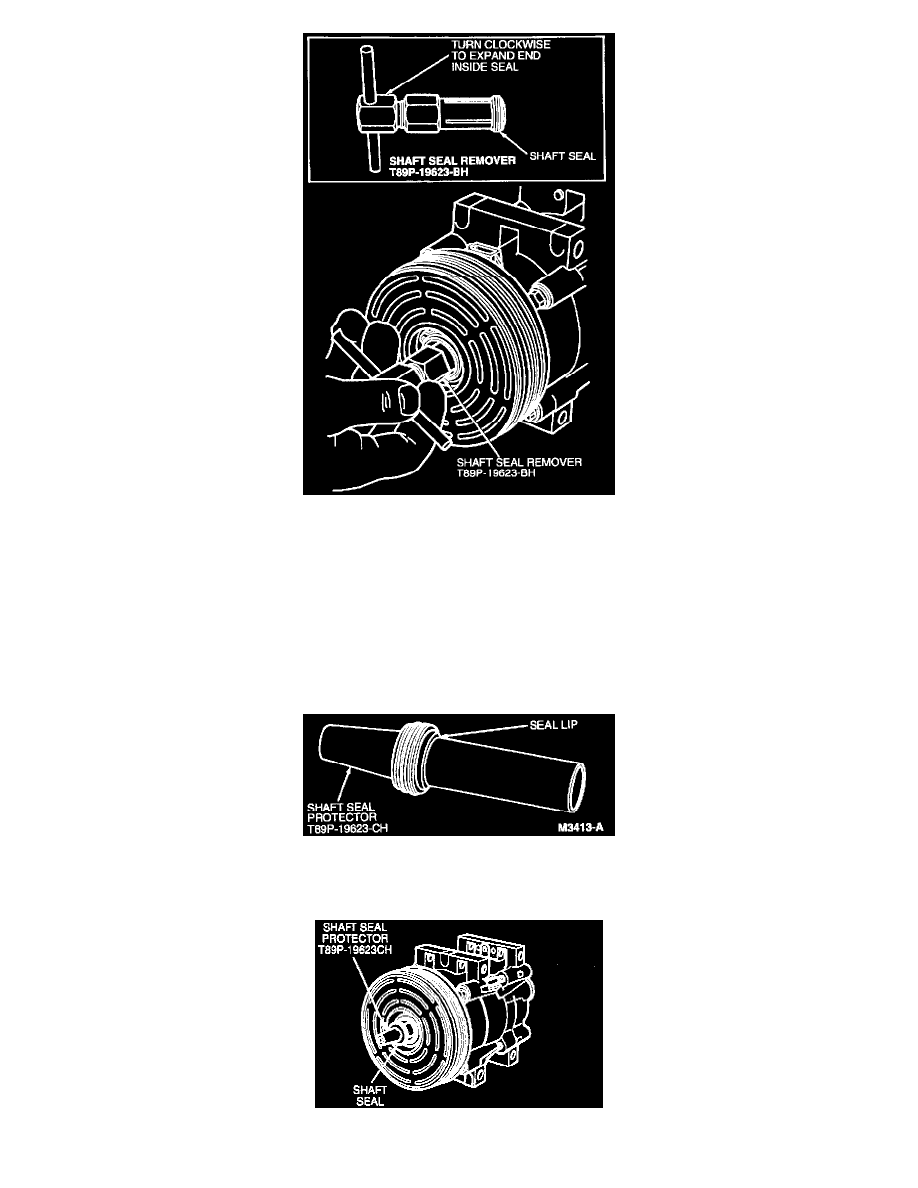
d. Position Shaft Seal Remover T89P-19623-BH over compressor shaft and push tool into nose of A/C compressor and down against shaft seal.
Engage end of tool with internal diameter of shaft seal. While holding the hex part of the tool, turn tool handle clockwise to expand tool tip
inside seal inner radius. Then, pull shaft seal from the A/C compressor with the tool.
INSTALLATION
1. Obtain a new Shaft Seal kit. Carefully remove the contents of the kit from the package. A plastic shaft seal protector is included with each kit.
Inspect the protector for any burrs or other damage. Do not use the protector if it is damaged. Obtain another shaft seal kit, if necessary, and use
the protector from it.
2. Using a clean lint free cloth, clean the compressor shaft and the seal pocket inside the compressor nose.
CAUTION: Do not allow any dirt or foreign materials to enter the A/C compressor.
3. Dip Shaft Seal Protector T89P-19623-CH and shaft seal in clean refrigerant oil for R-134a Systems F2AZ-19577-AC (Motorcraft YN-12B) or
equivalent meeting Ford specification WSH-M1C231-B. Position the shaft seal on the protector with the lip of the seal pointing toward the large
end of the protector.
4. Place the shaft seal protector with shaft seal over the end of the compressor shaft.