
F 350 4WD Pickup V8-351 5.8L VIN H EFI (1997)
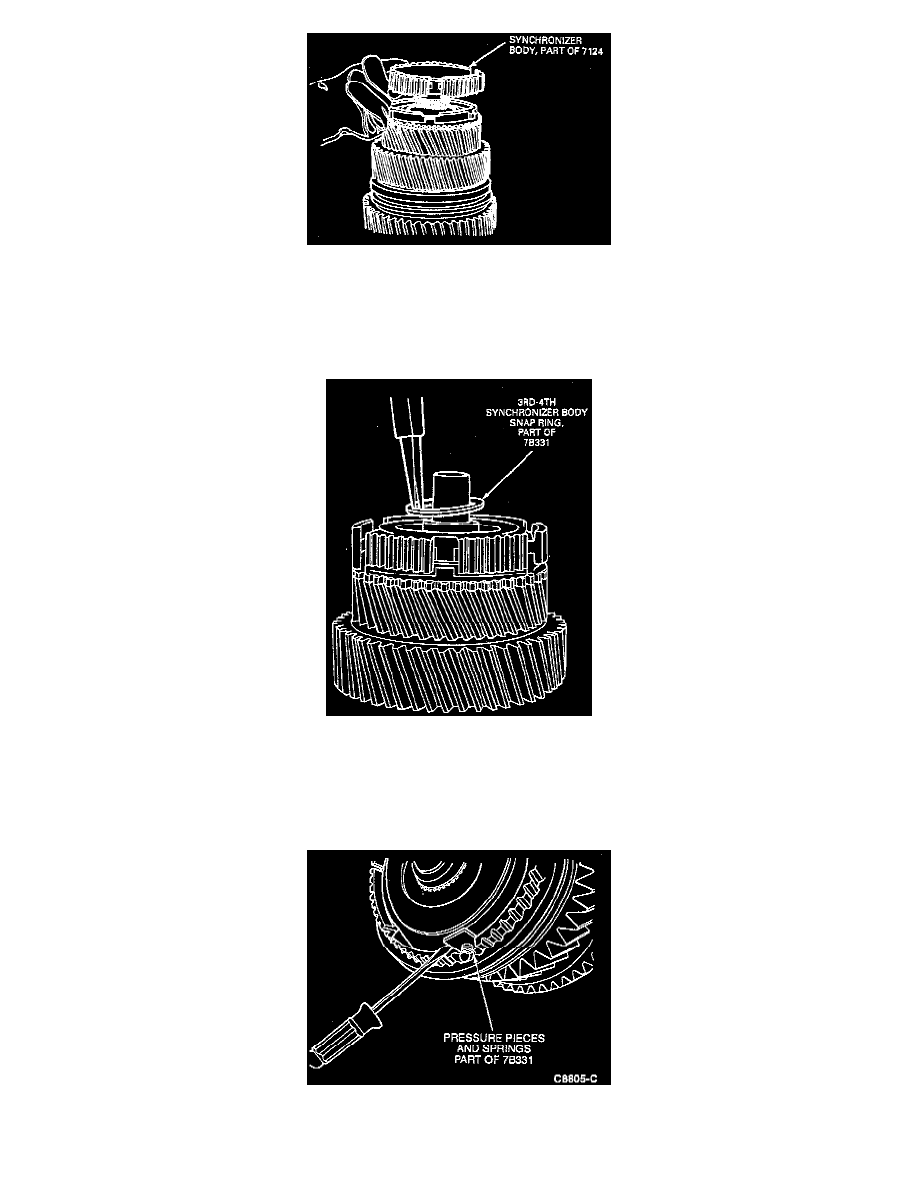
38. Heat the 3rd-4th synchronizer body with Rotunda Precision Metal Gear/Bearing Heater 164-R3900 or equivalent to a maximum 160° C (320° F).
Position the synchronizer body on the mainshaft so that the short lugs on the synchronizer ring (part of synchronizer) engage in the shallow gaps in
the synchronizer body. Lightly tap the synchronizer body down until it stops against the synchronizer ring (part of synchronizer). The recess in the
synchronizer body must face upwards.
CAUTION: Do not heat the synchronizer for more than 15 minutes.
39. Install a new snap ring on the mainshaft next to the 3rd-4th synchronizer body (part of small parts repair kit). Clearance between the snap ring and
the synchronizer body should not be more than 0.1 mm (0.004 inch).
40. Check the end play of the 3rd gear. It must be between 0.15 and 0.35 mm (0.00591 and O.O1378 inch).
41. Position the sliding sleeve over the synchronizer body (both part of synchronizer) with the smaller of the two grooves facing down. In three
positions on the sliding sleeve, three teeth have been cut away. Align these three areas with the three shallow gaps in the synchronizer body and the
three lugs on the synchronizer ring (part of synchronizer). Slide the sliding sleeve (part of synchronizer) down until it rests against the 3rd gear.
42. Insert three compression springs with each pressure piece (part of small parts repair kit) in the recesses of the synchronizer body.