
F 350 4WD Pickup V8-351 5.8L VIN H EFI (1997)
Wiper Motor: Service and Repair
REMOVAL
1. Remove windshield wiper pivot arms.
2
Remove bottom windshield moulding.
3. Remove the five screws through the access holes across the cowl top vent panel.
4. Open hood and disconnect battery ground cable.
NOTE: When the battery has been disconnected and reconnected, some abnormal drive symptoms may occur while the Powertrain Control
Module (PCM) relearns its adaptive strategy. The vehicle may need to be driven 16 km (10 miles) or more to relearn the strategy.
5. Remove the ten screws across the vertical surface attaching the cowl top vent panel to the cowl top.
6. Close the hood part way and carefully lift the cowl top vent panel from the cowl top.
7. Disconnect or remove the radio antenna or lead wire as required.
NOTE: Antenna will disconnect when cowl grille is removed. If antenna becomes disconnected from cowl top vent panel, refer to Antenna.
8. Disconnect the washer hose. Remove the cowl top vent panel.
9. Remove the metal shield above the windshield wiper motor.
10. Remove windshield wiper adapter and connecting arm clip connecting windshield wiper mounting arm and pivot shaft to windshield wiper motor
drive arm.
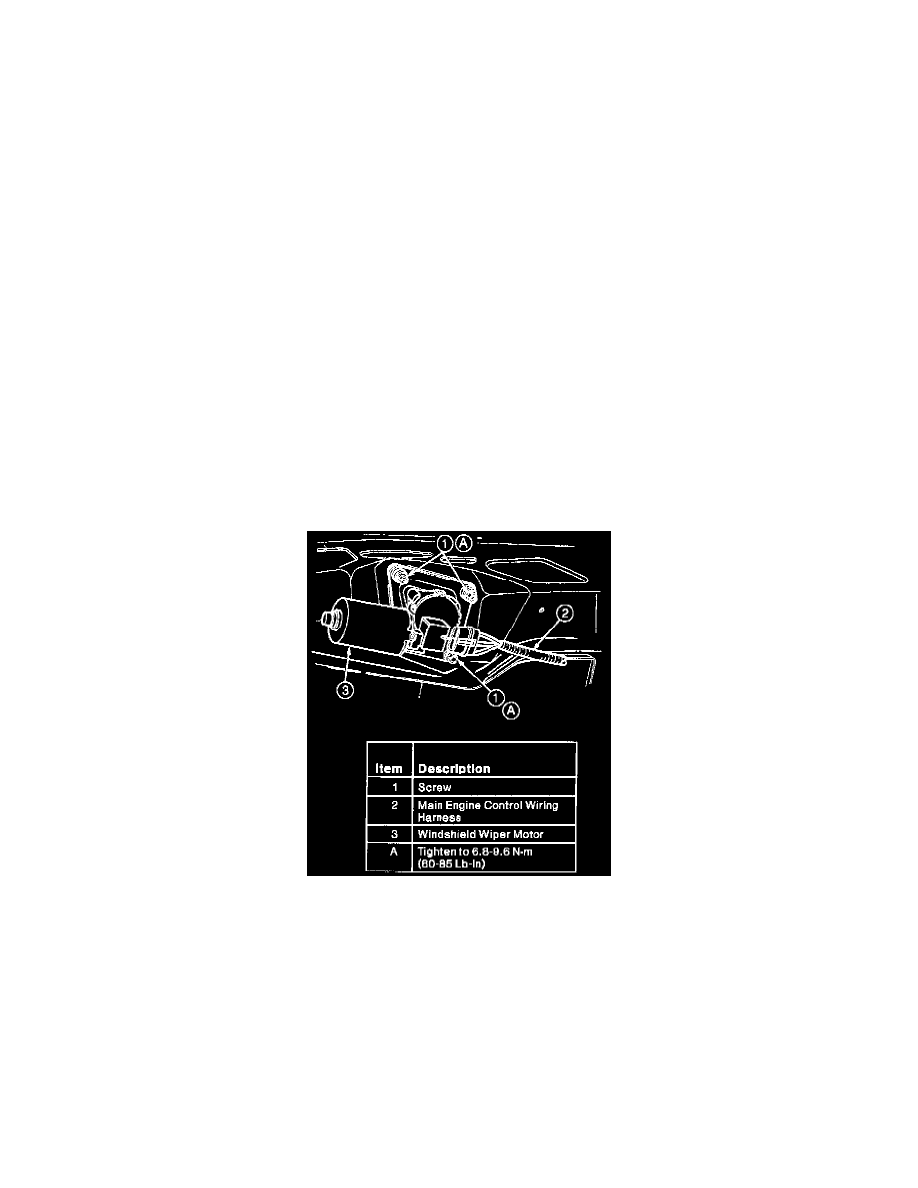
11. Disconnect the electrical connector to windshield wiper motor.
12. Remove bolts attaching windshield wiper motor to the cowl top.
13. Remove windshield wiper motor from vehicle.
INSTALLATION
1. Follow removal procedure in reverse order. Before installing the wiper arms, cycle windshield wiper motor using wiper switch to make sure the
wiper linkage is in the park position.
2. Tighten windshield wiper motor attaching screws to 6.8-9.6 N-m (60-85 Lb-In).