F 350 4WD Pickup V8-7.3L DSL (1988)

Control Assembly: Service and Repair
Control Assembly, HVAC
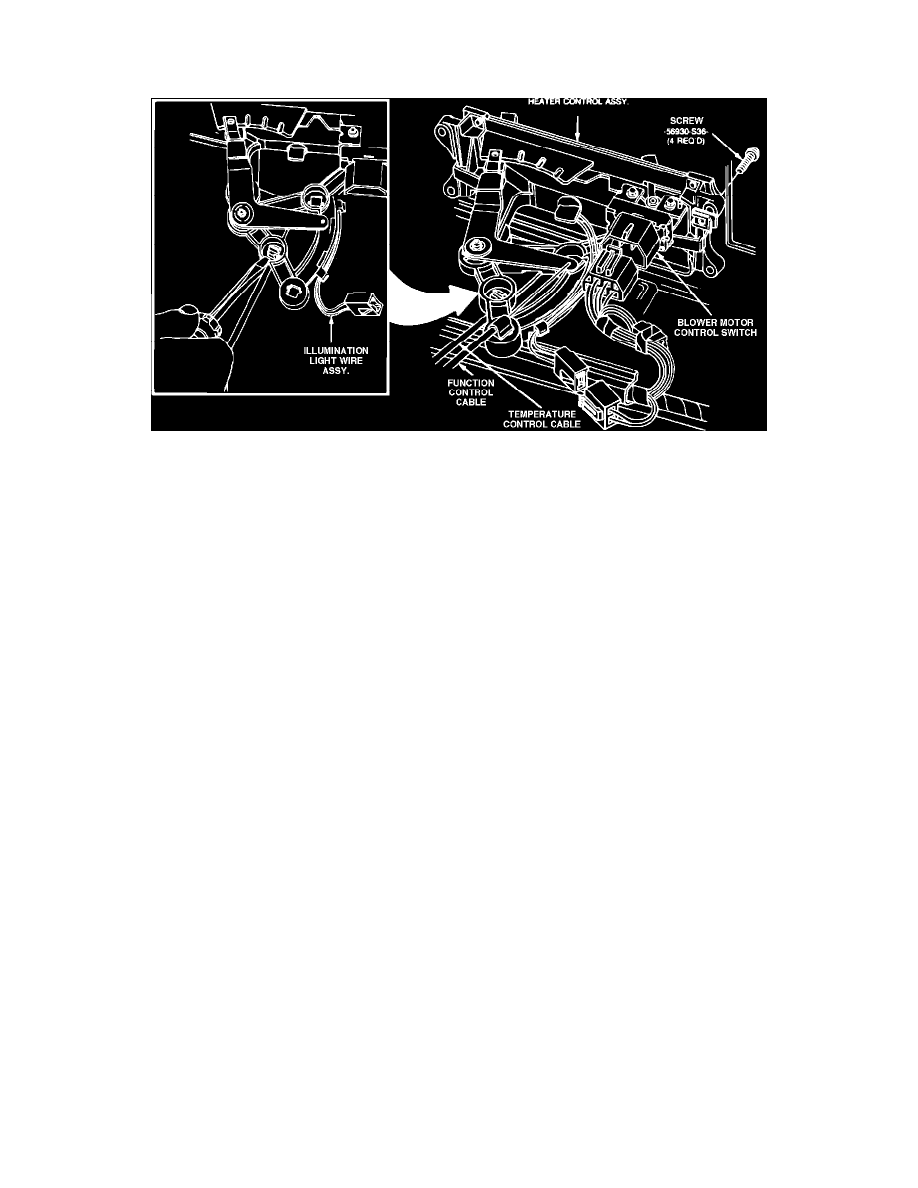
Fig. 9 Control assembly removal
1.
Disconnect battery ground cable.
2.
Pull center finish panel away from instrument panel to expose heater control attaching screws, Fig. 9.
3.
Remove four screws attaching control assembly to the instrument panel.
4.
Pull control assembly through opening far enough to allow removal of electrical connectors from blower switch and control lamp.
5.
Disconnect vacuum harness from outside air control.
6.
Working from bottom of control assembly with a screwdriver or needlenose pliers, release function control cable snap in flag from control bracket.
7.
Pull sufficient cable through instrument panel to allow cable to be held vertical to control assembly, then remove cable from function control lever.
8.
Working from above control assembly, release temperature control snap in flag.
9.
Rotate control assembly 90°, disconnect temperature control cable from temperature control lever, then remove control assembly from instrument
panel.
10.
Reverse procedure to install.
