
F 350 4WD Pickup V8-7.3L DSL (1988)
Shifter A/T: Service and Repair
REMOVAL
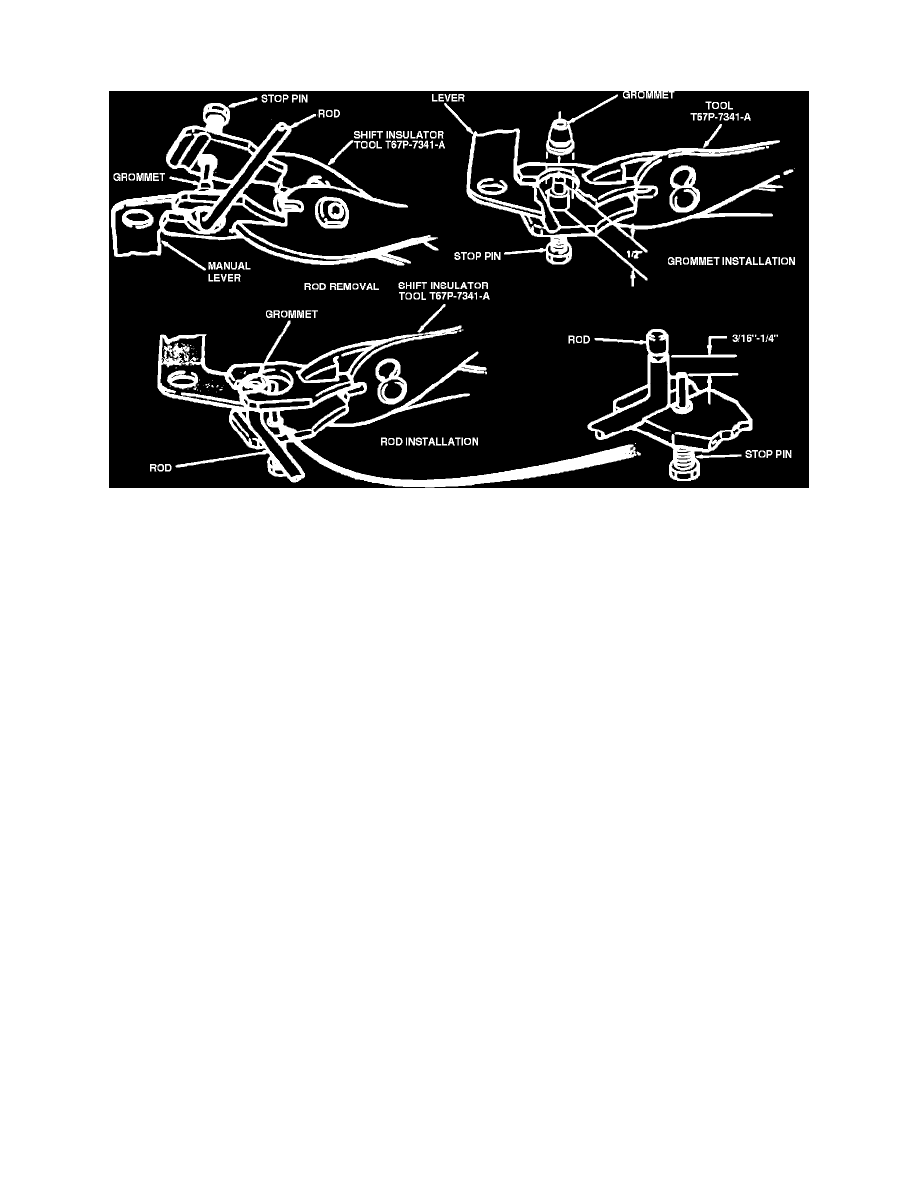
Fig. 6 Replacement Of Shift Linkage Grommet
NOTE: Some lever assemblies incorporate an oil impregnated plastic grommet in the end of the lever arm. The special tool shown, in the Removing Or
Installing Shift Linkage Grommet image, is required to install the grommet in the manual lever, and to install the manual linkage rod into the grommet.
Remove and install the grommet as follows:
1. Place the lower jaw of the tool between the manual lever and control rod.
2. Position the stop pin against the end of the control rod and force the rod out of the grommet.
3. Remove grommet from manual lever by cutting off the large shoulder with knife.
NOTE: The grommet must be removed from the manual lever and a new one installed each time the rod is disconnected.
INSTALLATION
1. Before installing a new grommet, adjust the stop pin to 1/2 inch and coat the outside of the grommet with lubricant. Then place the grommet on
the stop pin and force it into the manual lever hole. Turn the grommet several times to be sure it is properly seated.
2. Readjust the stop pin to the height shown in the Removing Or Installing Shift Linkage Grommet image. The pin height is determined by the length
of the rod end which is to be installed into the grommet.
CAUTION: If the pin height is not adjusted, the control rod may be pushed too far through the grommet, causing damage to the grommet
retaining lip.
3. With the pin height properly adjusted, position the control rod on the tool and force the rod into the grommet until the groove in the rod seats on
the inner retaining lip of the grommet.
NOTE: Be sure the rod protrudes through the grommet approximately 1/4 inch after installation.