F 350 4WD Pickup V8-7.3L DSL Turbo VIN F (1994)

2.
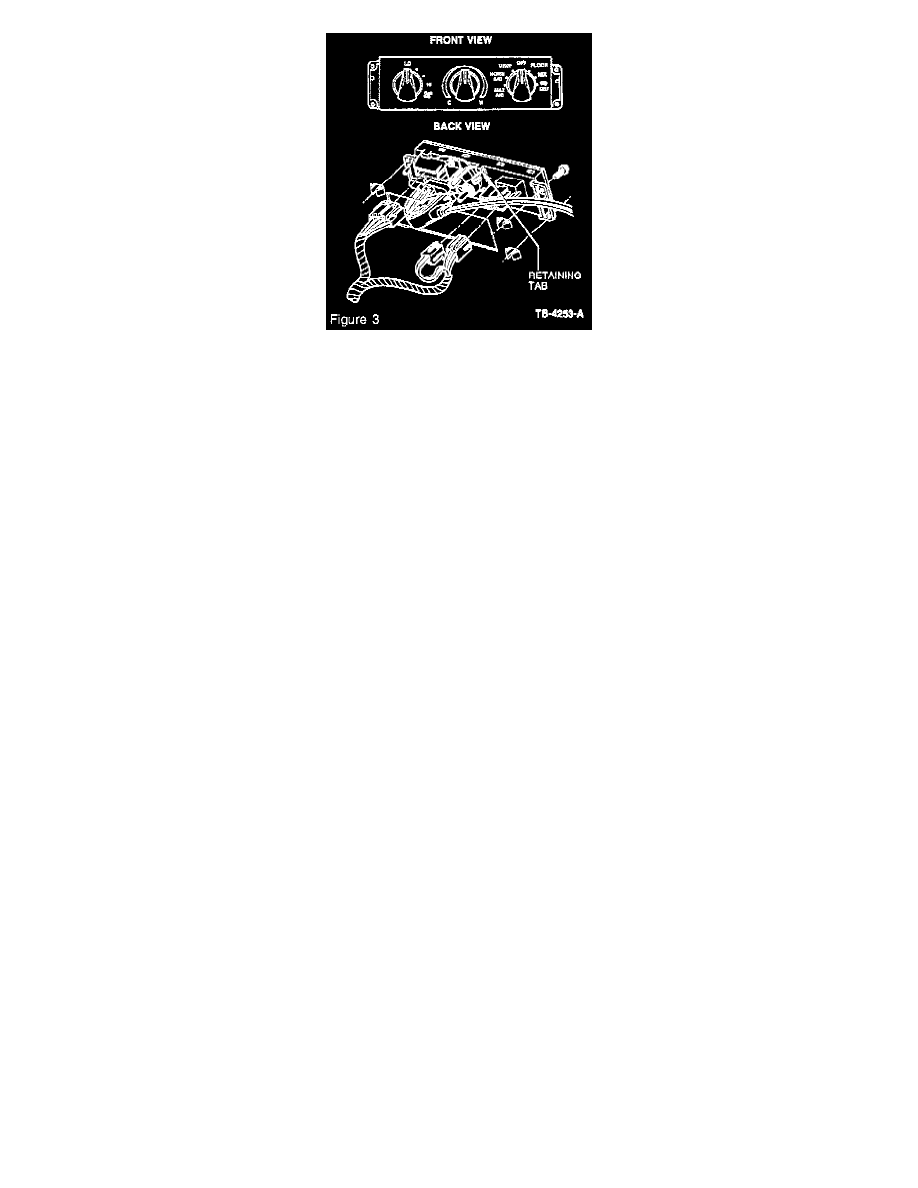
At the small end of the cable (control head), remove the temperature control bracket from the cable by releasing the three (3) snaps using Tool
T94P-18532-A or a thin blade screwdriver to allow the cable to be pushed back through the instrument panel toward the control head. Refer to
Figure 3.
3.
Be sure the new pull/pull cable is in the full warm position. Check the molded-in arrow at the control head portion of the cable. Normally the cable
is shipped in the "full warm" position.
4.
At the plenum, position the cam end of the cable over the post. Make sure the temperature door arm can move into the slot of the cam and push
down until the cam is engaged on the post. An audible click can be heard. If it is necessary to remove the cam cable head, use moderate finger
pressure on the plastic tab at the top of the cam cable head, moving it back so the cam may be pulled out off the post. Refer to Figure 1.
5.
Place the twin cables in the center slots of the A/C plenum chamber support bracket. If adjustment is needed later, the cables can be moved to the
other adjacent slots. Refer to Figure 1.
6.
Route new cable through the instrument panel following the same path as the old cable.
7.
Check the new temperature control bracket to be sure it is in the "full warm" position. The tab should be in the slot in the bracket.
8.
Push the temperature control bracket onto the control assembly and turn it to catch under the retaining tab. Secure with the new screw previously
saved. Refer to Figure 3.
9.
Place the knob on the temperature control.
10.
Push the cable head onto the temperature control bracket (make sure gear pilot centering hole is lined up correctly) until the three (3) lock into
position (you should hear a click of three (3) tabs). Refer to Figure 3.
11.
Install temperature control assembly in instrument panel.
12.
Swiftly rotate temperature control knob to each extreme (cool-warm) and listen for the sound of the temperature door closing in both directions. If
no audible close is heard, move the cable into different slots at the A/C plenum chamber support bracket covered in Step 4 of the Installation
Procedure until there is an audible close in each direction.
13.
Bring vehicle to operating temperature and verify proper heating and cooling by measuring the temperature of the discharge air at the outlets.
14.
At A/C plenum chamber support bracket, secure cable to bracket with a tie strap to keep cable in place.
