
F 350 4WD Super Duty V10-6.8L (2002)
2.
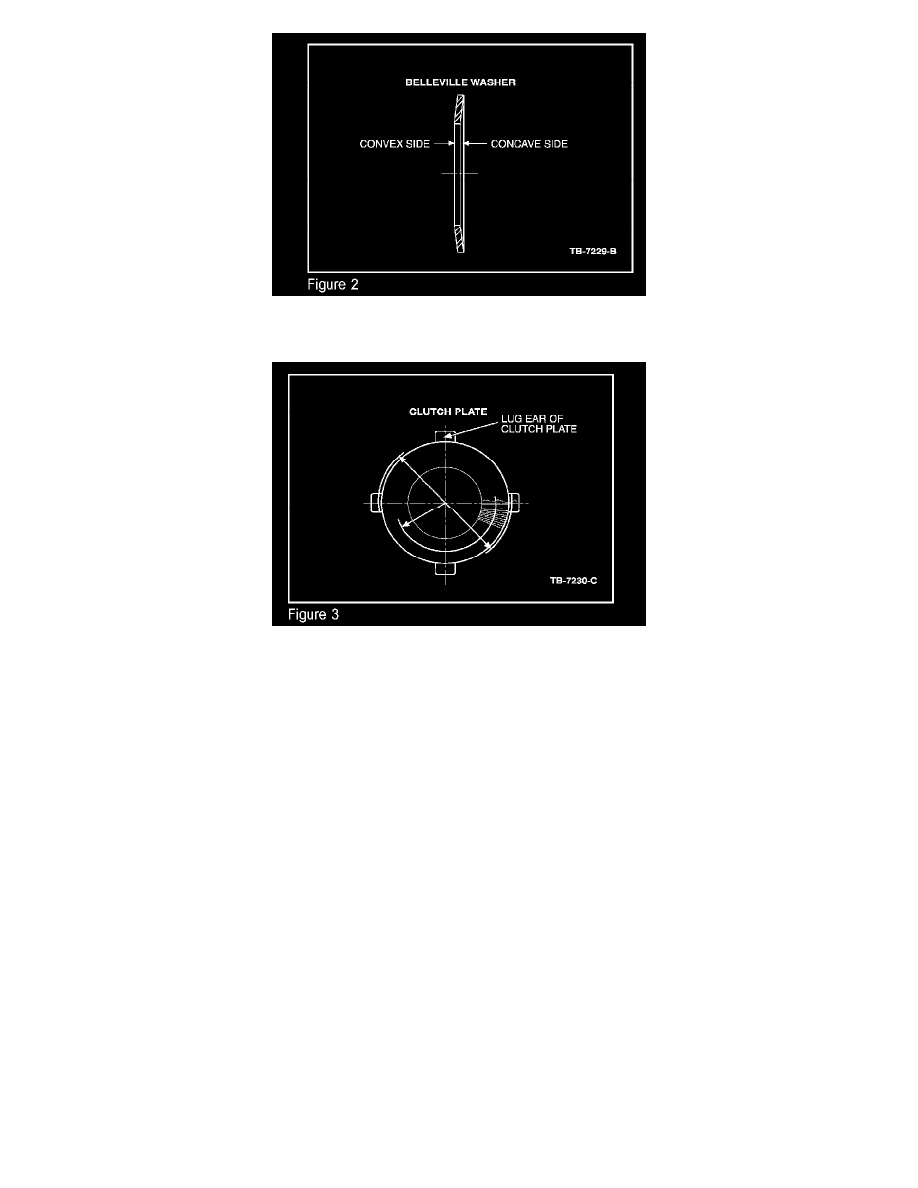
Assemble clutch pack into flange half in exactly the same arrangement as removed. The convex side of the belleville washer should be visible
(Figure 2).
3.
Make sure the clutch plate lugs (Figure 3) enter the slots in the case. Also make sure the clutch pack bottoms out on the case.
4.
Install the flange half side gear into the clutch pack in the flange half.
5.
Install pinion mate shaft and pinion mate gears. Make sure pinion mate shaft is correctly installed according to the alignment marks made during
disassembly.
6.
Install button half side gear with splined hub end facing vertical.
7.
Lubricate the second clutch pack in the same manner the flange half clutch pack was lubricated, refer to Step 1. Install clutch pack to the side gear
with the belleville washer's convex side touching the side gear back face.
8.
Correctly align and assemble button half to flange half. Install case body screws finger tight.
9.
Tighten body screws alternately and evenly. Torque screws to 122-136 N.m (90-100 lb-ft.).
REINSTALLATION OF DANA 80 LIMITED SLIP DIFFERENTIAL INTO AXLE:
1.
Verify that spacers are still present in their original differential bearing bore.
2.
Install differential into the carrier housing. Use rubber mallet if necessary to seat the differential into the carrier.
3.
Install the bearing caps, aligning the letters with those on the carrier housing. Tighten the bolts to 95-122 N.m (70-90 lb-ft.).
4.
Remove the differential housing spreader.
5.
Install dial indicator.
6.
Recheck the backlash to verify reading taken at the beginning of the procedure.