
F 350 4WD Super Duty V8-5.4L (2009)
Installation
All vehicles
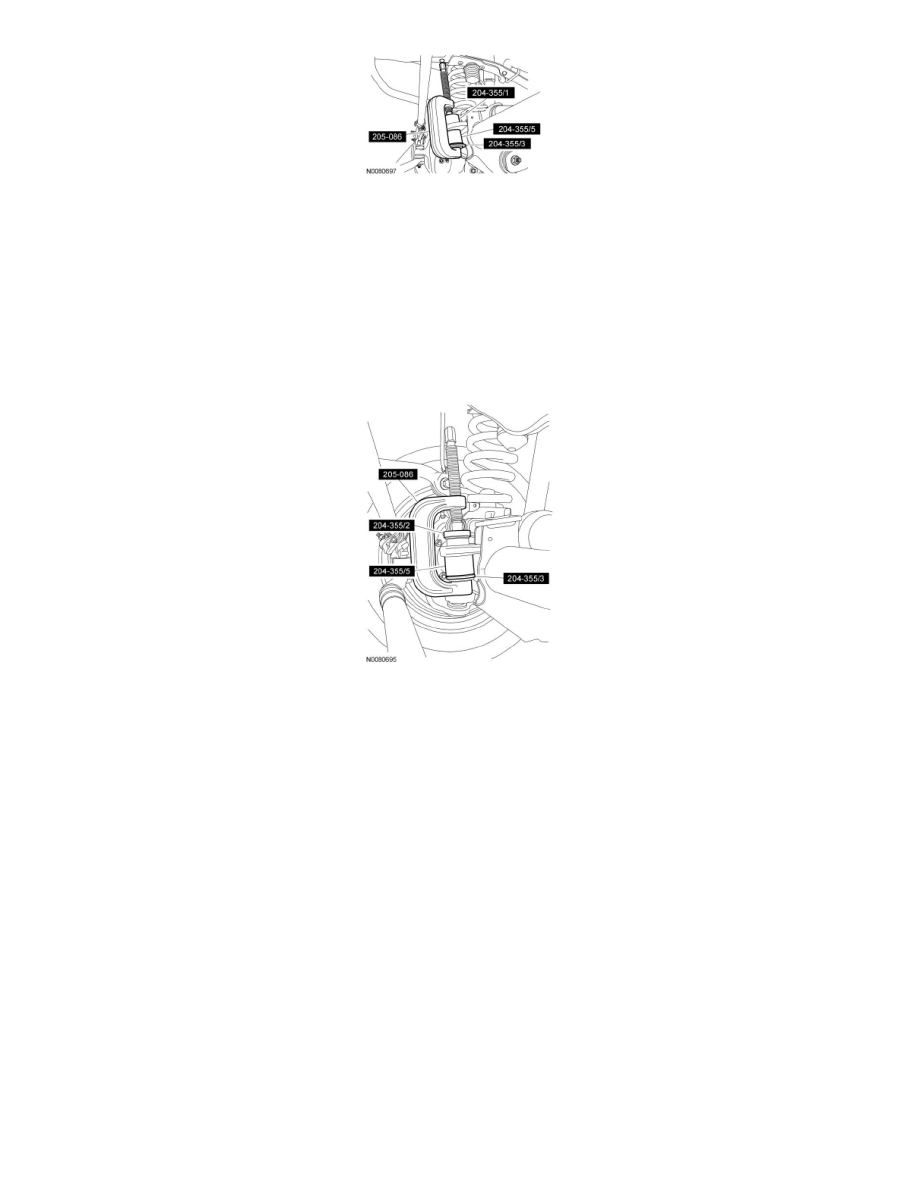
1. Position the ball joint into the bracket.
2. NOTICE: The grease fitting must be removed from the ball joint prior to installation or damage to the grease fitting can occur.
NOTICE: The ball joint is installed with the dust boot attached to the ball joint. Do not damage the ball joint boot during installation.
Using the C-Frame and Screw Installer/Remover and the Ball Joint Remover/Installer, install the ball joint.
3. If removed, install the ball joint grease fitting.
4. Using the jackstand, raise the front axle until the weight of the vehicle is supported by the jackstand.
5. Install the new shock absorber lower bolt and flagnut.
-
Tighten the bolt to 150 Nm (111 lb-ft).
Early build vehicles
6. Install a new stabilizer bar link lower bolt.
-
Tighten to 150 Nm (111 lb-ft).
Late build vehicles
7. Install a new stabilizer bar link upper nut.
-
Tighten to 80 Nm (59 lb-ft).
All vehicles
8. Install the track bar. For additional information, refer to Track Bar See: Track Bar.