
F 450 2WD Super Duty V8-6.0L DSL Turbo VIN P (2006)
Removal
1. With the vehicle in NEUTRAL, position it on a hoist. For additional information, refer to Maintenance/Service and Repair.
2. Prior to removing the exhaust manifold, inspect the exhaust manifold for warpage with a feeler gauge between the manifold and the cylinder head.
Record the measurement and compare with the specifications.
3. Remove the 2 LH exhaust manifold-to-turbocharger adapter pipe nuts.
4. Disconnect the exhaust pressure (EP) sensor tube from the LH exhaust manifold.
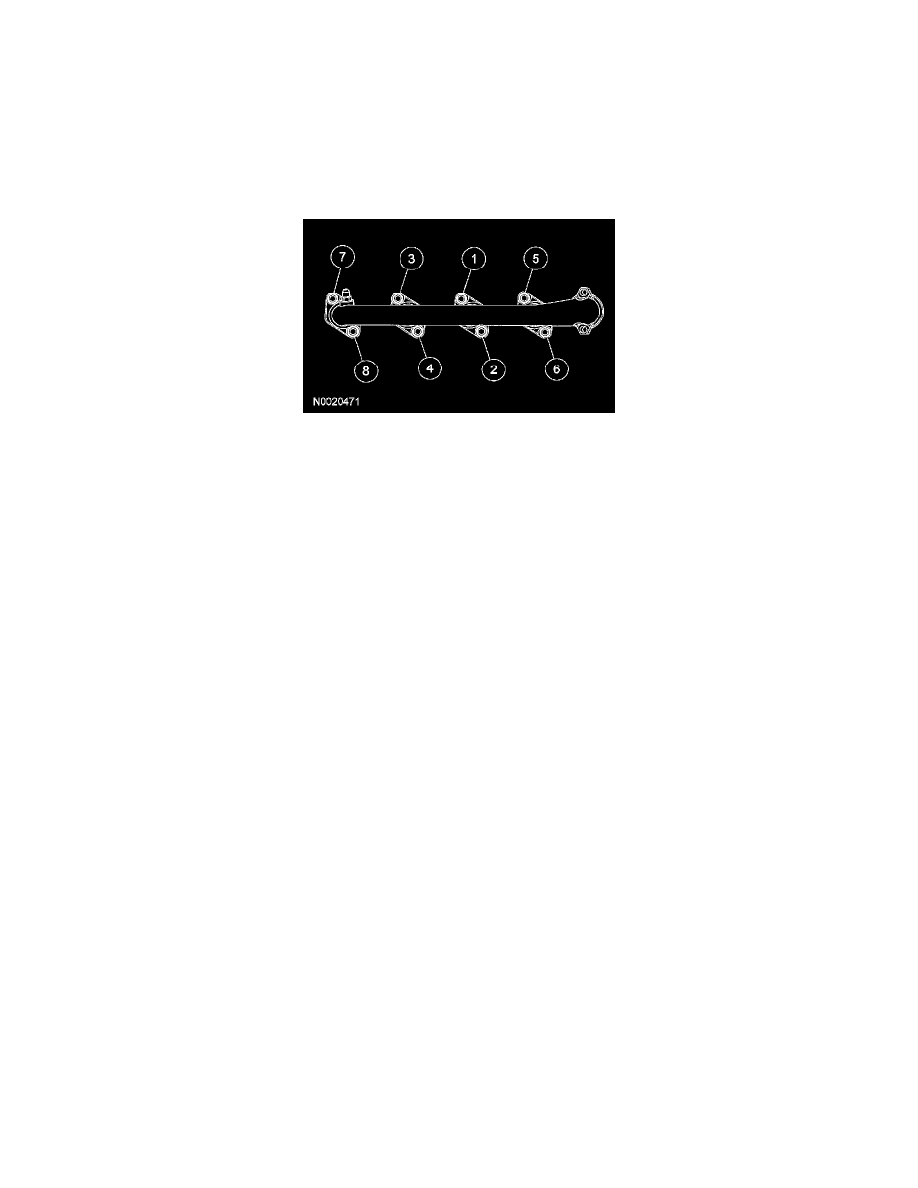
5. Remove the 8 bolts, 8 spacers and the LH exhaust manifold.
Installation
1. NOTE: Start installing the bolts with the second bolt from the rear on the top. The hole diameter is smaller, therefore allowing alignment of the
remaining bolts.
NOTE: When installing the exhaust manifolds, only use prevailing torque hex flange bolts with an interference fit.
NOTE: Apply anti-seize lubricant to the bolt threads prior to installing the bolts.
Install the LH exhaust manifold and tighten the bolts in the sequence shown.
^
Tighten to 38 Nm (28 ft. lbs.).
2. NOTE: Apply anti-seize lubricant to the bolt threads prior to installing the bolts.
Install the 2 LH exhaust manifold-to-turbocharger adapter pipe nuts.
^
Tighten to 27 Nm (20 ft. lbs.).
3. Connect the EP sensor tube to the exhaust manifold.
^
Tighten to 30 Nm (22 ft. lbs.).