
F 450 4WD Super Duty V8-6.4L DSL Turbo (2008)
Part 2
Removal and Installation
Primary cable A or B
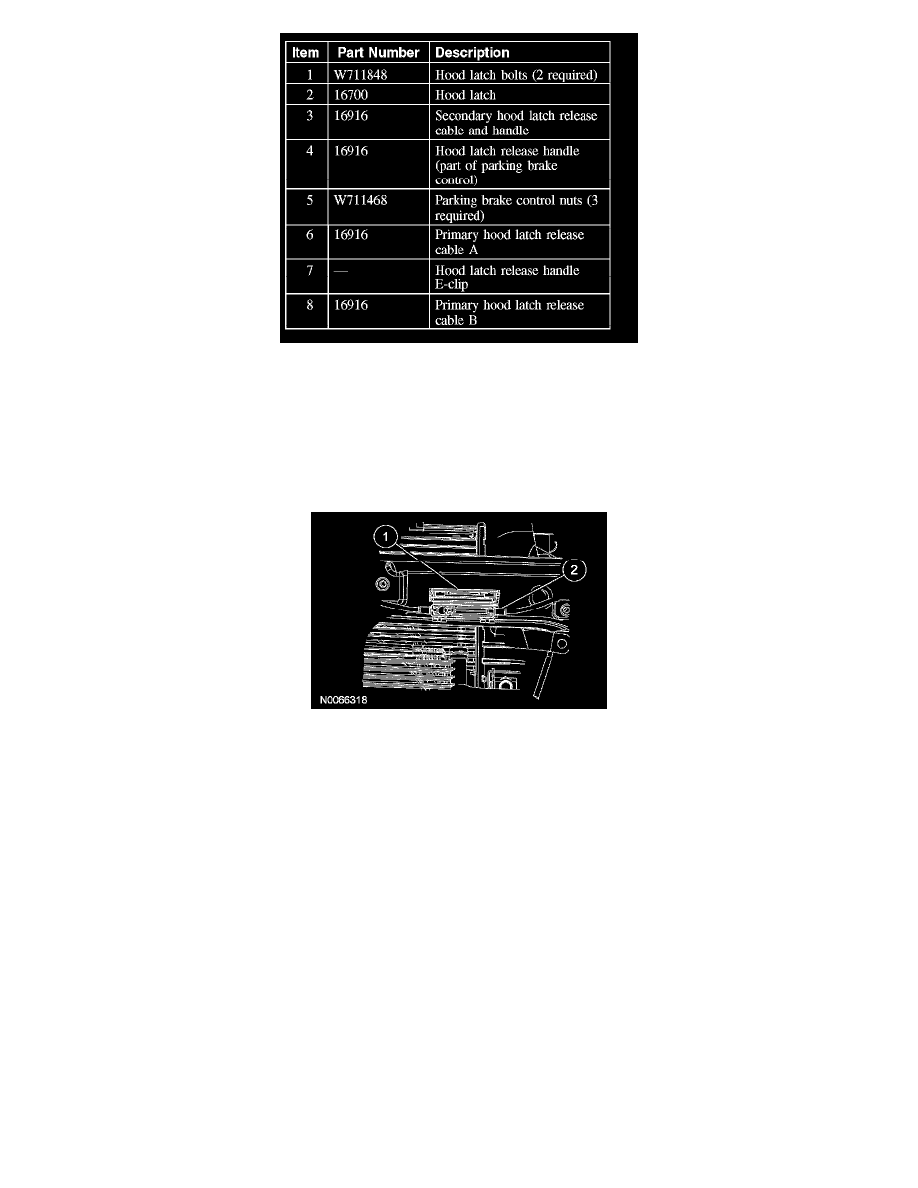
1. Disconnect the primary hood latch release cable A from the primary hood latch release cable B.
1
Open the cable connector cover.
2
Disconnect the primary hood latch release cable A.
Primary cable B
2. Remove the hood latch.
3. Remove the primary hood latch release cable B.
-
Disconnect the primary hood latch release cable B guides.
Primary cable A
4. Disconnect the primary hood latch release cable A guides from the core support.
5. For gasoline engines, remove the air cleaner element.
6. For diesel engines, remove the driver side battery.
7. Remove the degas bottle bolts and position the degas bottle assembly aside.
-
To install, tighten to 19 Nm (168 lb-in).
8. Remove the battery junction box (BJB).
9. Disconnect the primary hood latch release cable A guides from the left inner fender.