
F 550 2WD Super Duty V10-6.8L (2009)
Removal and Installation
All vehicles
1. Drain the engine cooling system.
2. Remove the oil cooler. For additional information, refer to Oil Cooler See: Oil Cooler/Service and Repair.
Four-Wheel Drive (4WD) vehicles
3. Remove the front drive axle assembly.
All vehicles
4. Remove the LH engine support insulator. For additional information, refer to Engine Support Insulators See: Drive Belts, Mounts, Brackets and
Accessories/Engine Mount/Service and Repair/Removal and Replacement.
5. Remove the 3 bolts and position the power steering pump assembly aside.
-
To install, tighten to 25 Nm (18 lb-ft).
6. Disconnect the lower radiator hose from the oil filter adapter and position it aside.
7. Disconnect the degas bottle hose from the oil filter adapter and position it aside.
8. Disconnect the Engine Oil Pressure (EOP) switch electrical connector.
9. Remove the EOP switch.
-
To install, tighten to 18 Nm (159 lb-in).
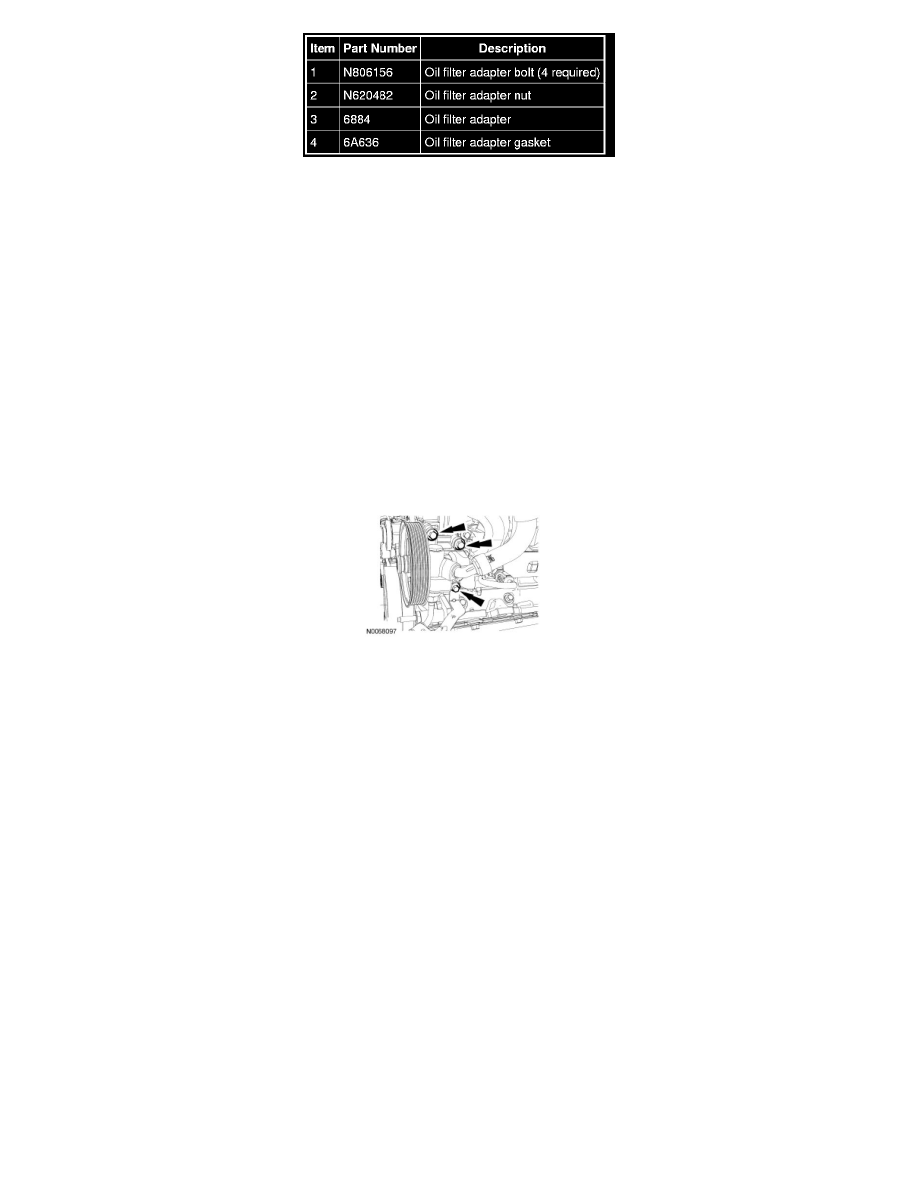
10. Remove the oil filter adapter nut.
-
To install, tighten to 48 Nm (35 lb-ft).
11. Remove the 4 bolts and the oil filter adapter.
-
To install, tighten to 25 Nm (18 lb-ft).
12. NOTICE: Do not use metal scrapers, wire brushes, power abrasive discs or other abrasive means to clean the sealing surfaces. These tools
cause scratches and gouges which make leak paths. Use a plastic scraping tool to remove all traces of old sealant. Failure to follow this
procedure may cause future oil leakage.
Remove and discard the oil filter adapter gasket. Clean the sealing surfaces with silicone gasket remover and Motorcraft metal surface prep.
Follow the directions on the packaging. Inspect the mating surfaces.
13. To install, reverse the removal procedure.