
F 550 2WD Super Duty V10-6.8L (2009)
2. Position the road wheels in the straight-ahead position.
3. If equipped, center the tilt steering column.
4. NOTICE: Turn the steering wheel so that the top is at 90 degrees (at the 9 o'clock position) to the left from the straight-ahead position to
access the driver air bag module wire clips and to prevent damage to the steering column multifunction switch. Failure to follow this
instruction may result in component damage.
Turn the steering wheel so the top of the wheel is 90 degrees to the left (at the 9 o'clock position).
5. If equipped, remove the screw and tilt lever.
6. Remove the 3 screws and steering column lower shroud.
7. Remove the steering column upper shroud.
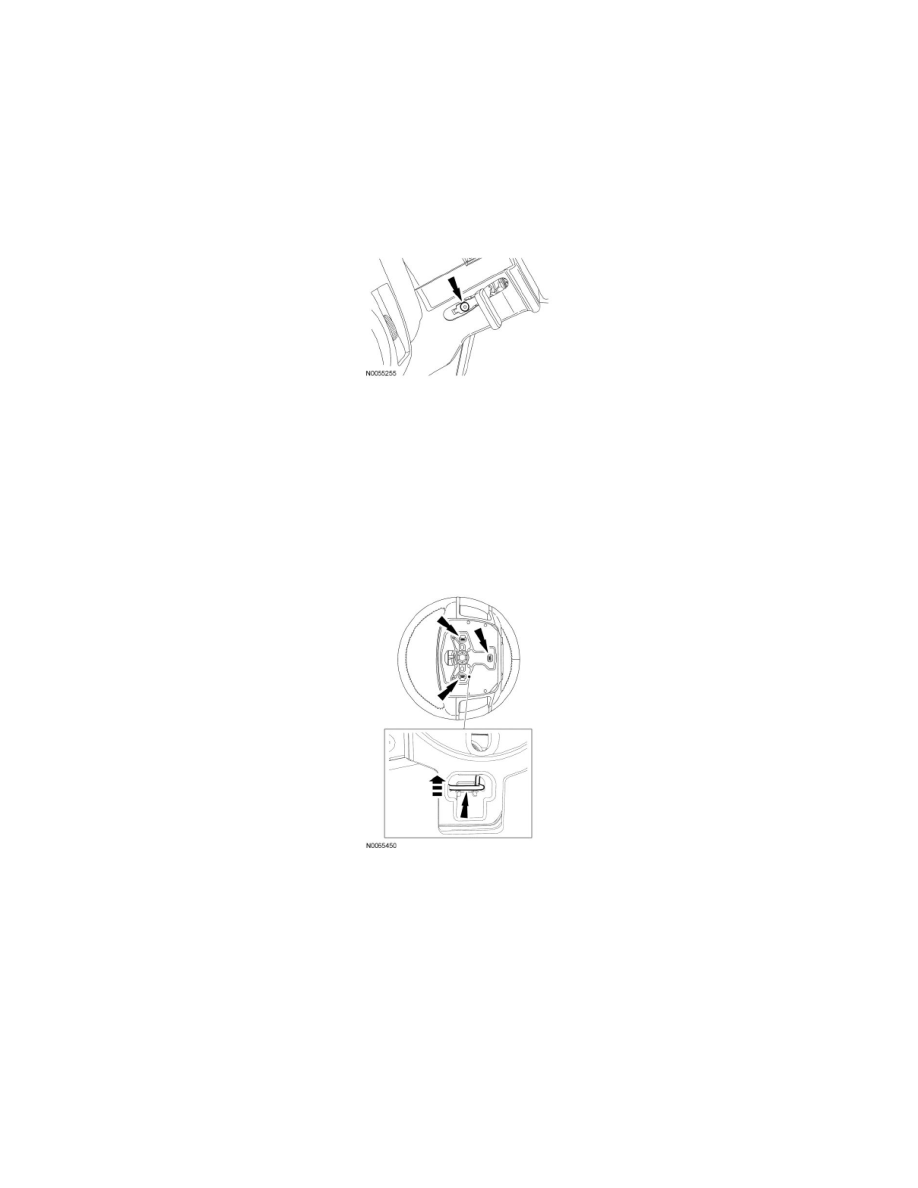
8. NOTE: Use a mirror to view the rear of the steering wheel to locate the 3 driver air bag module wire clips.
Using a screwdriver or suitable tool, release the wire clips from the steering wheel hooks.
-
Access the 3 driver air bag module wire clips through the back of the steering wheel cover and push each wire clip toward the center of the
steering wheel to release.
9. Disconnect the driver air bag module and horn switch electrical connectors and remove the driver air bag module from the steering wheel.
10. Turn the steering wheel so the road wheels are in the straight-ahead position.
Installation
1. Connect the horn switch and driver air bag module electrical connectors.
2. Position the driver air bag module to the steering wheel, lining up the locator pins.
3. Firmly press the driver air bag module to engage the 3 driver air bag module wire clips to the steering wheel.
4. Install the steering column lower shroud.
5. Install the steering column upper shroud.