
F 550 2WD Super Duty V10-6.8L VIN V (2005)
9. NOTE:
-
Make sure that after an automatic locking retraction (ALR) retractor is installed, the retractor is not in the ALR mode of operation when
installed.
-
Prior to installation, make sure that the safety belt webbing is not twisted.
Position the safety belt retractor and install the bolt.
10. Install the driver side door scuff plate.
Regular cab vehicles
11. CAUTION: Do not remove the shipping clip until the shoulder safety belt guide is secured in position. Allowing the safety belt to be
retracted further into the safety belt retractor may cause the safety belt retractor to lock and not release the safety belt.
NOTE: Make sure that after an automatic locking retraction (ALR) retractor is installed the retractor is not in the ALR mode of operation when
installed.
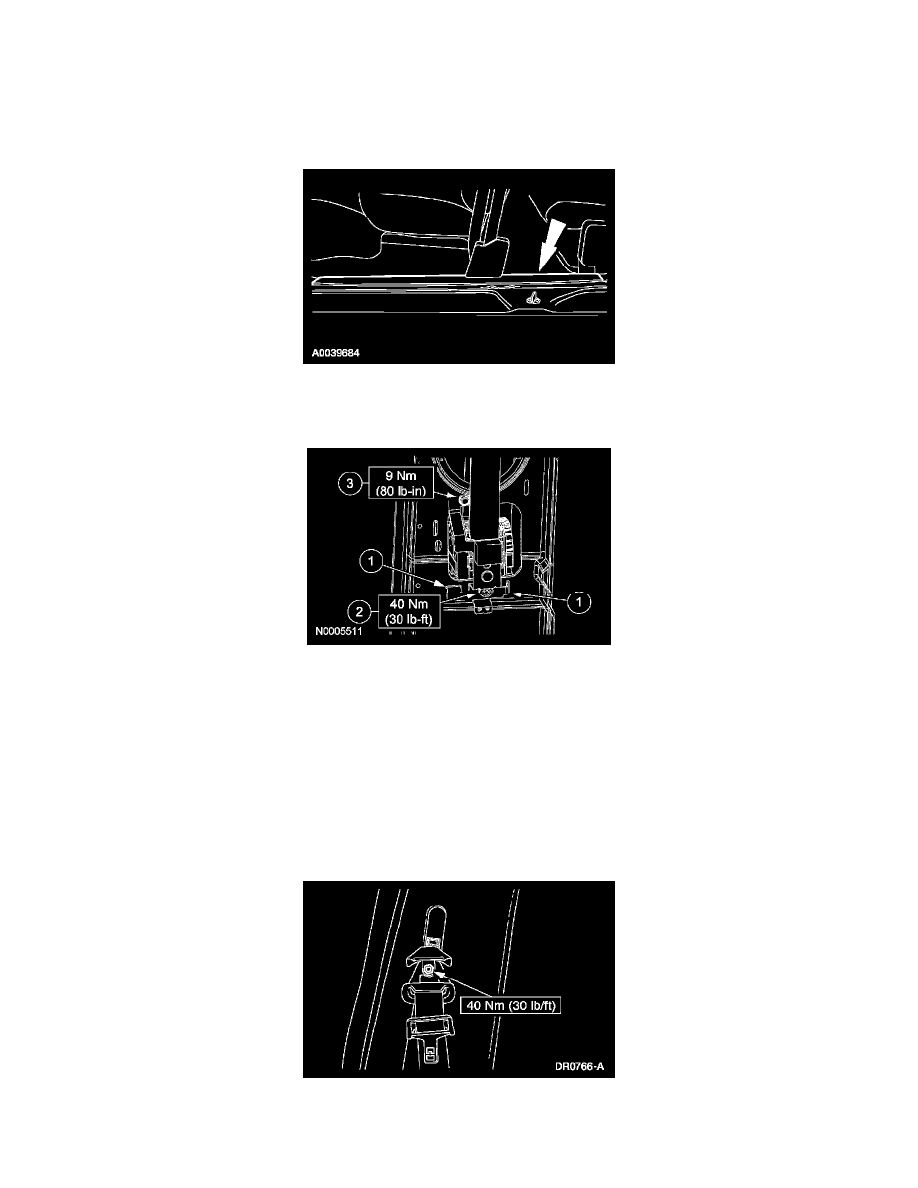
Install the safety belt retractor.
1
Position the safety belt retractor, aligning the tabs into the sheet metal.
2
Using the special tool, install the bolt.
3
Install the bolt.
12. Install the driver side door scuff plate and rear corner trim panel.
13. NOTE:
-
Prior to installation, make sure the safety belt webbing is not twisted.
-
Inspect the shoulder safety belt guide cover for damage. If the shoulder safety belt guide cover is damaged or the cover does not remain closed,