
F 550 2WD Super Duty V8-6.4L DSL Turbo (2008)
All vehicles
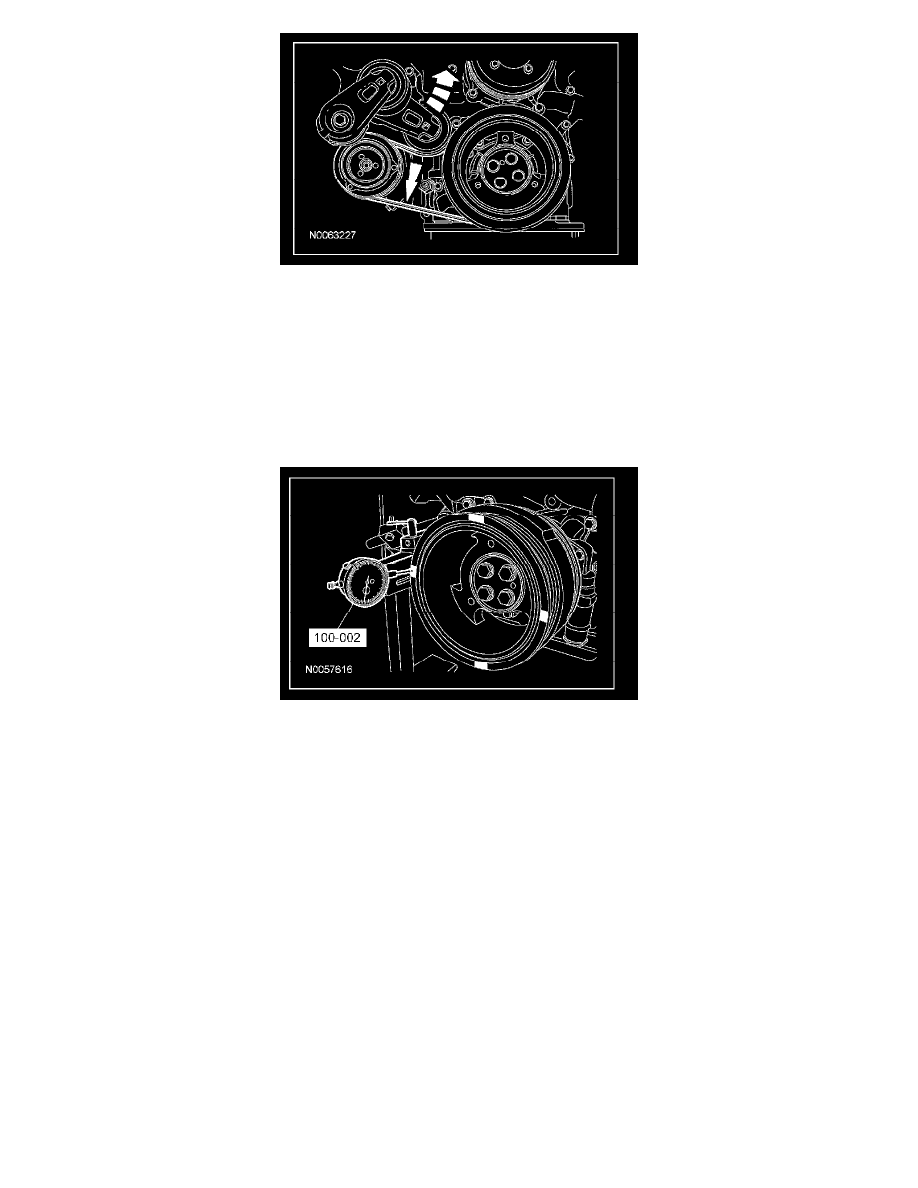
6. Check the crankshaft vibration damper runout.
^
Remove the paint from the face of the crankshaft vibration damper at 4 points, 90 degrees apart.
^
Attach the special tool to the cylinder block. Position the special tool on one of the unpainted surfaces.
^
Using a suitable tool, pry the crankshaft forward. Zero the dial indicator.
^
NOTE: Pry the crankshaft forward only to eliminate possible error caused by crankshaft end play.
Rotate the crankshaft 90 degrees. Pry the crankshaft forward. Record the measurement. Repeat at each unpainted surface.
^
If the runout exceeds specification, install a new crankshaft vibration damper.
7. WARNING: Support the vibration damper during mounting bolt removal. The damper can slide off the nose of the crankshaft. Failure to
follow this instruction may result in serious personal injury.
Remove the 4 bolts and the crankshaft vibration damper.
^
Discard the bolts.
Installation
All vehicles
1. CAUTION: To prevent engine damage, always install 4 new bolts when installing the vibration damper.
NOTE: Apply a light coat of engine oil to the bolts prior to installing the bolts.
NOTE: Use the Strap Wrench to prevent the engine from turning during the tightening of the bolts.
Position the crankshaft pulley and install 4 new bolts in 2 stages, in the sequence shown.
^
Stage 1: Tighten to 68 Nm (50 lb-ft).
^
Stage 2: Tighten an additional 90 degrees.