
F 550 4WD Super Duty V10-6.8L (2009)
time.
5. Tighten the lower ball joint nut to 59 Nm (44 lb-ft).
6. NOTE: Do not loosen the nut to install the cotter pin.
Tighten the upper ball joint nut to 94 Nm (69 lb-ft) and install the cotter pin.
-
If necessary, tighten the nut until the cotter pin can be installed.
7. Tighten the lower ball joint nut to 204 Nm (150 lb-ft).
8. Connect the tie-rod end to the wheel knuckle and install the nut and a new cotter pin.
-
Tighten to 115 Nm (85 lb-ft). If necessary, tighten the nut until the cotter pin can be installed.
9. Install the new main seal onto the axle shaft.
1. Position the main seal onto the axle shaft.
2. Using the Drive Pinion Oil Seal Installer/Remover and Wheel Knuckle Seal Installer, seat the main seal onto the axle shaft.
10. NOTICE: The knuckle bore must be clean enough to allow the Drive Pinion Oil Seal Installer/Remover to seat completely by hand. Do
not press or draw the wheel knuckle seal and axle shaft into place or damage to the seal may occur.
NOTE: Do not apply any lubricant to the surface of the wheel knuckle bore.
Position the axle shaft and main seal in to the wheel knuckle and axle housing.
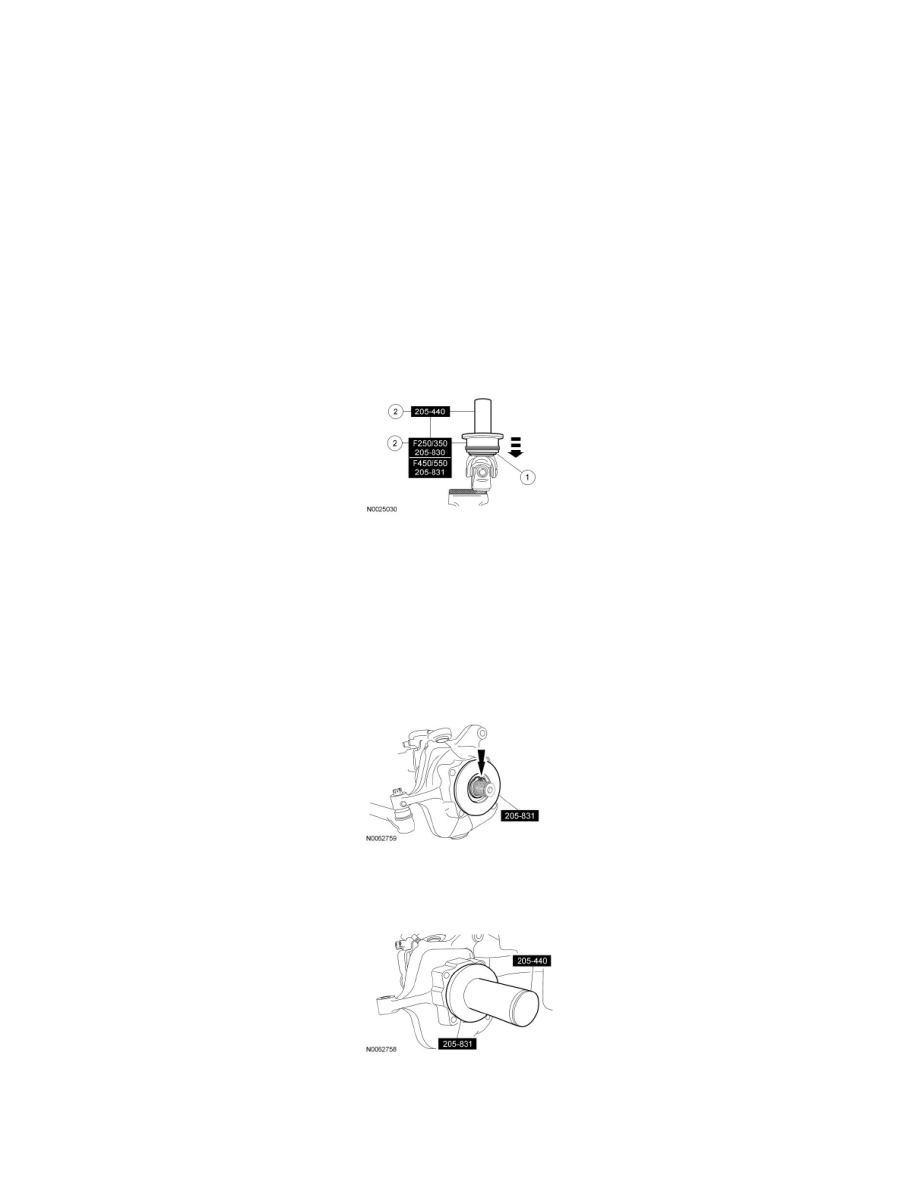
11. NOTE: F-450/F-550 shown, F-250/F-350 similar.
Position the Wheel Knuckle Seal Installer onto the axle shaft and install the snap ring.
12. NOTE: F-450/F-550 shown, F-250/F-350 similar.
Using the Drive Pinion Oil Seal Installer/Remover and Wheel Knuckle Seal Installer, install the wheel knuckle seal and axle shaft.
13. Install the wheel bearing and wheel hub. For additional information, refer to Wheel Bearing and Wheel Hub See: Wheel Bearing/Service and
Repair/Front Suspension.
14. If equipped, connect the pulse vacuum hub hose.