
Fairmont L6-200 3.3L VIN X 1-bbl (1983)
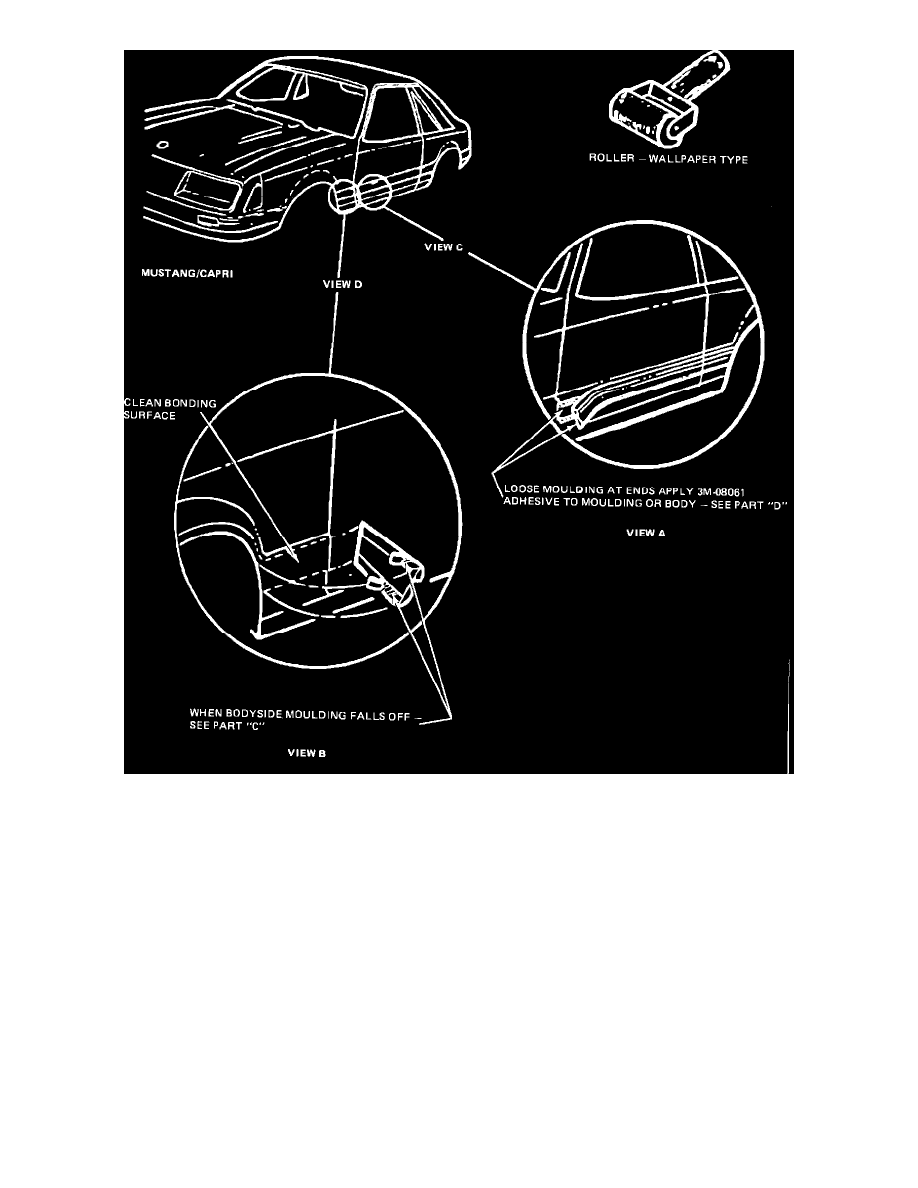
FIGURE 1
Replacment procedure for mouldings that have fallen off, using new replacement moulding (Figure 1, View B).
1.
Clean the vehicle surface with isopropyl alcohol. Make sure the surface is clean and perfectly dry.
2.
Peel off the protective backing paper from new moulding. Do not touch the exposed tape surface. Press moulding firmly to body using the roller to
make sure there are no air pockets between the moulding and the body surface.
NOTE:
WORK IN A WELL VENTILATED AREA AWAY FROM SPARKS OR FLAMES. Do not apply moulding at temperature below 51 ~F (10
~C). In areas where there is damp and freezing climate, moisture in the air pockets could freeze, expand and cause the moulding to pop off the
vehicle. (KEEP ADHESIVE TAPE SURFACE CLEAN AT ALL TIMES.)
ITEMS REQUIRED
SOURCE
Isopropyl Alcohol
Procure locally
3M Plastic and Emblem
Automotive Trades Div./3M
Adhesive (Clear)
23923 Research Dr.
#08061
Farmington, MI 48024
(313) 447-5000