
Festiva L4-81 1.3L SOHC EFI (1989)
Brake Caliper: Service and Repair
Disassembly and Assembly
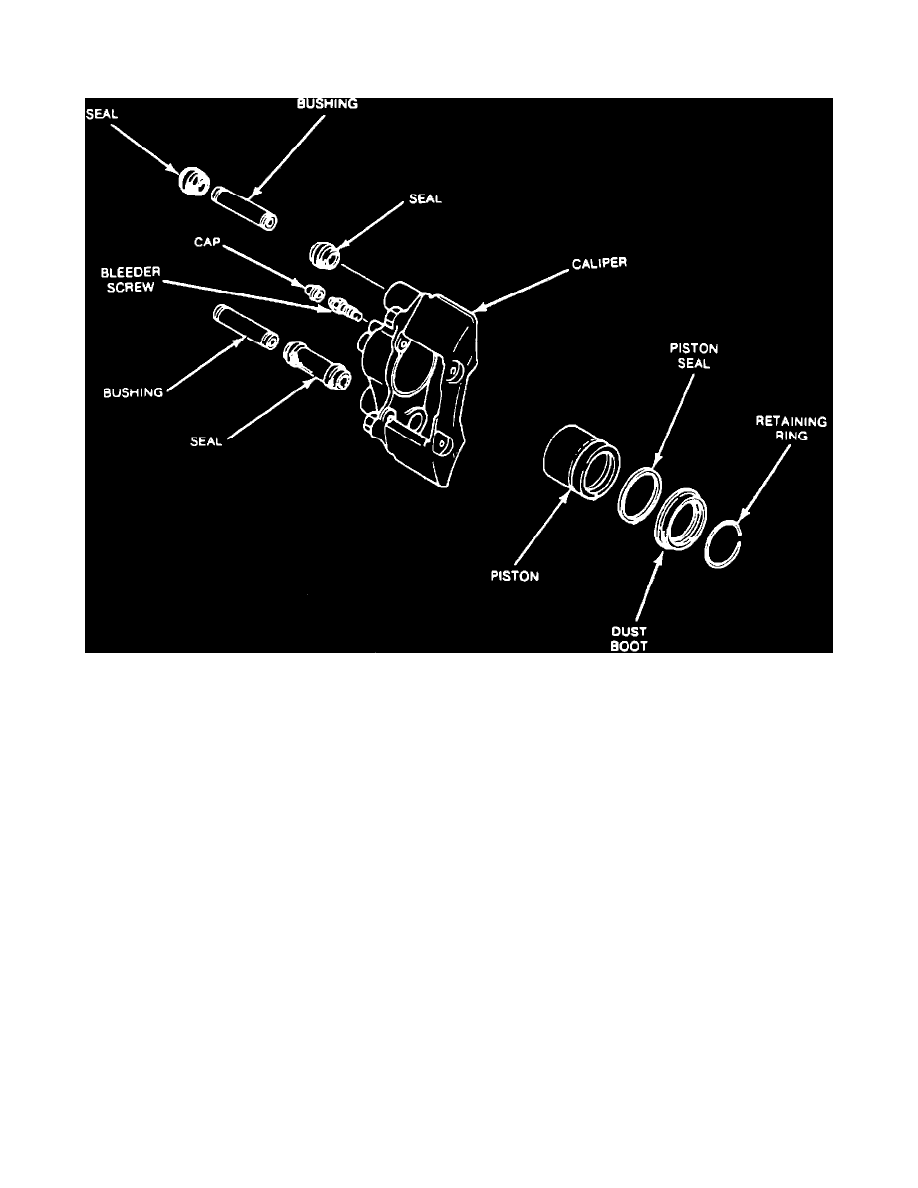
Fig. 11 Exploded View Of Brake Caliper
DISASSEMBLY
1.
Remove brake pads and caliper.
2.
Remove bleeder screw, drain remaining fluid from caliper, then reinstall screw.
3.
Remove dust boot retaining ring, Fig. 11.
4.
Position a block of wood between piston and caliper, then apply compressed air to fluid inlet port and blow piston from caliper bore. Apply only
enough pressure to ease piston out of bore.
5.
Remove dust boot from piston, then using a suitable wooden pick, carefully pry piston seal from caliper bore.
6.
Remove bleeder screw, then the caliper bushings and bushing seals.
7.
Wash all parts in denatured alcohol and dry with compressed air.
INSPECTION
1.
Check piston for scratches, scoring or damage. Replace, if necessary.
2.
Check caliper bore for scratches, scoring or corrosion. Light scratches or slight corrosion can be polished out using crocus cloth.
3.
Check that bleeder screw and bleeder screw bore hole in caliper are fully open.
4.
Check caliper bushings for corrosion and dust boot retaining ring for damage or tension loss. Replace parts as necessary.
ASSEMBLY
1.
Lubricate piston seal with suitable brake grease or clean brake fluid, then install into caliper bore.
2.
Lubricate piston, then partially install into caliper bore. Ensure dust boot groove on piston remains above caliper bore.
3.
Lubricate dust boot with suitable brake grease, then install onto piston.
4.
Press piston fully inward until it bottoms in bore, then install dust boot retaining ring.
5.
Install bleeder screw.
6.
Install caliper bushings and new bushing seals. Lubricate inner surface of bushing seal and outer surface of bushings with suitable brake grease