
Festiva L4-81 1.3L SOHC EFI (1989)
Brake Drum: Service and Repair
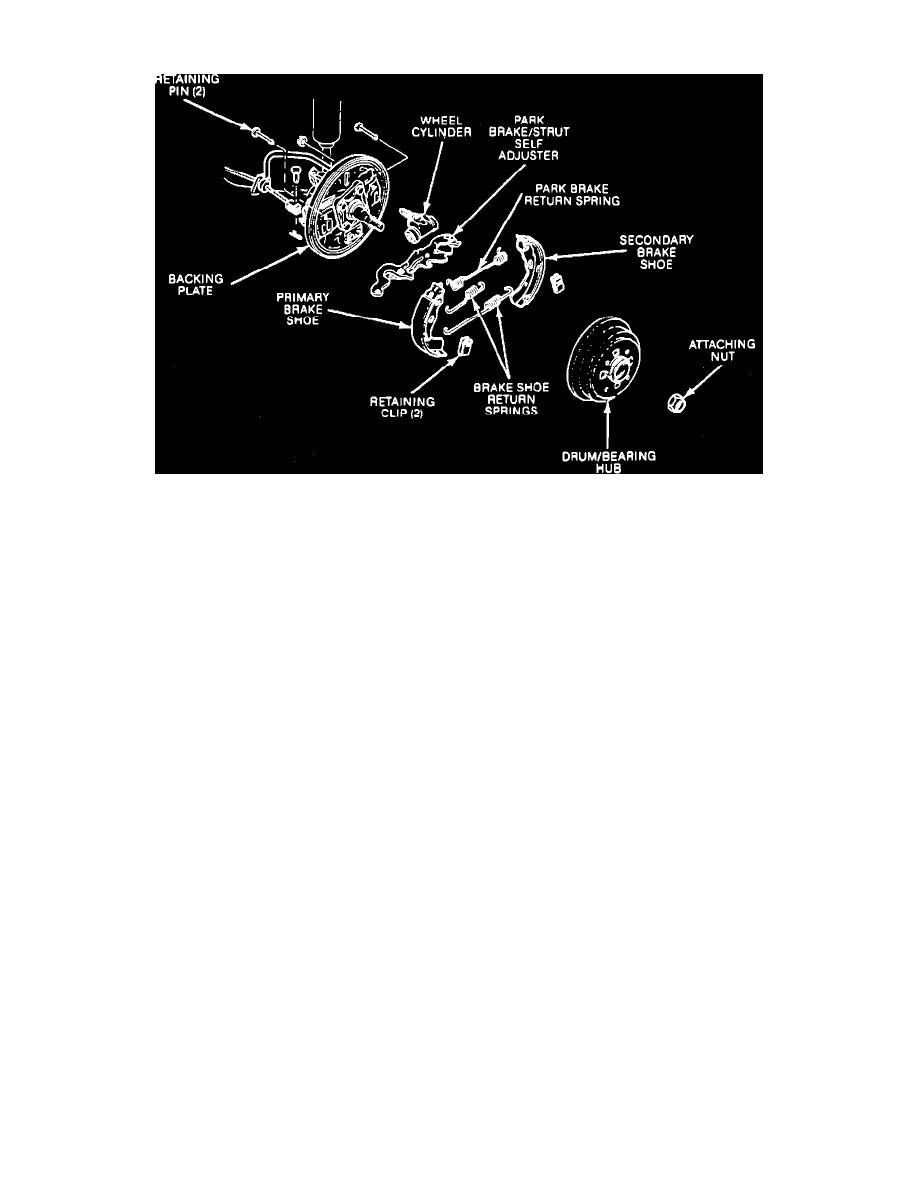
Fig. 1 Disassembled View Of Drum Brake Assembly
REMOVAL
1.
Raise and support vehicle, then remove rear wheel
2.
Remove locknut and brake drum. The locknut on the right side of the vehicle has lefthand threads. Turn locknut clockwise to remove.
3.
Remove hold down clips and retaining pins, Fig. 1.
4.
Remove all return springs, then the primary and secondary brake shoes.
5.
Remove cotter pin, then the clevis pin from parking brake strut/self adjuster. Disengage parking cable from self adjuster.
INSTALLATION
1.
Clean backing plate with a factory approved vacuum cleaner.
2.
Lubricate backing plate shoe pads with suitable high temperature brake grease.
3.
Install and position parking brake strut/self adjuster onto backing plate.
4.
Install upper return spring to primary brake shoe, then position shoe on backing plate and install retaining pin and hold down clip, Fig. 1.
5.
Connect upper return spring to secondary brake shoe, then position secondary shoe on backing plate and install retaining pin and hold down clip.
6.
Install parking brake return spring.
7.
Install lower return spring onto primary and secondary shoes.
8.
Connect parking cable onto self adjuster, then install clevis and cotter pins.
9.
Push on adjuster cam with screwdriver to position self adjuster in fully released position.
10.
Install brake drum and locknut, push brake pedal down several times to set self adjuster, then install rear wheel.
11.
Adjust parking brake as required.