
Festiva L4-81 1.3L SOHC EFI (1989)
Dashboard / Instrument Panel: Service and Repair
1.
Disconnect battery ground cable.
2.
Pry out trim insert in the center of the steering wheel cover.
3.
Remove steering wheel attaching nut, then the attaching screws located to the left and right of the steering column stud.
4.
Remove two screws from the back of the steering wheel spokes, freeing steering wheel cover assembly, with cover bracket and horn buttons.
Disconnect horn wire and remove cover assembly.
5.
Mark steering wheel and steering column shaft for assembly reference and remove wheel with steering wheel puller tool No. T67L-3600-A or
equivalent.
6.
Remove five screws from lower steering column cover, and remove upper and lower steering column covers.
7.
Release wiring harness clip and unplug four harness connectors from the back of the combination switch.
8.
From below the steering column, loosen band clamp securing switch hub to steering column jacket.
9.
Pull combination switch assembly off the steering column.
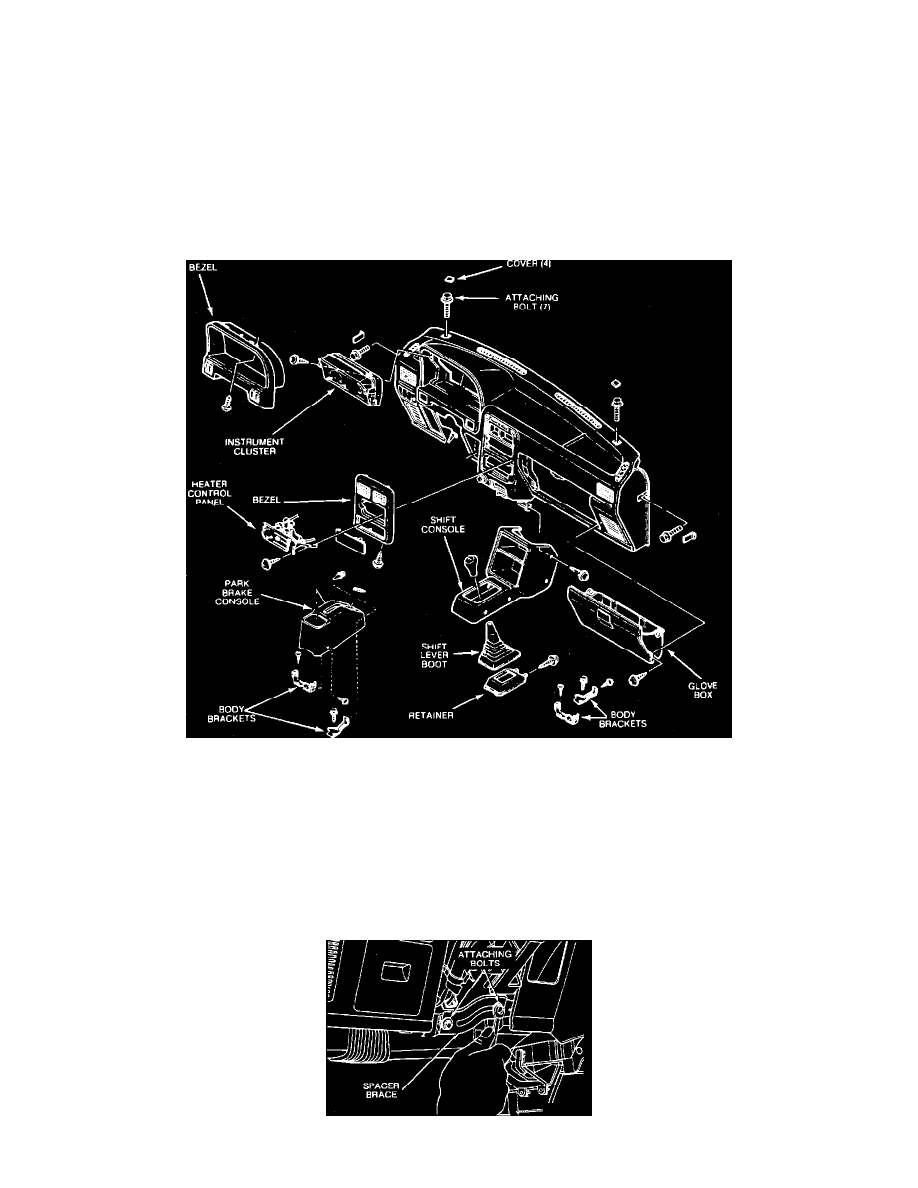
Fig. 29 Exploded View Of I/P. Festiva
10.
Remove screws securing instrument cluster bezel and move bezel rearward, Fig. 29.
11.
Disconnect switch electrical connectors from switches on instrument cluster bezel, then remove instrument cluster bezel.
12.
On models equipped with tachometer, disconnect tachometer at rear of instrument panel.
13.
On models without tachometer,disconnect speedometer cable at transaxle.
14.
On all models, remove instrument cluster attaching screws.
15.
Move cluster rearward and disconnect cluster electrical wiring.
16.
On models without tachometer, disconnect speedometer cable from the instrument cluster.
17.
On all models, remove instrument cluster from vehicle.
Fig. 30 Removing Steering Column Spacer Brace. 1989 Festiva