
Festiva L4-81 1.3L SOHC EFI (1989)
1.
Clean all metal parts in suitable solvent and dry with compressed air.
2.
Check shaft for twisting and/or worn or scored splines, joint components for rust, damage or excessive wear, and boots for cracks, damage or
deterioration.
3.
Replace all components as necessary.
Assembly
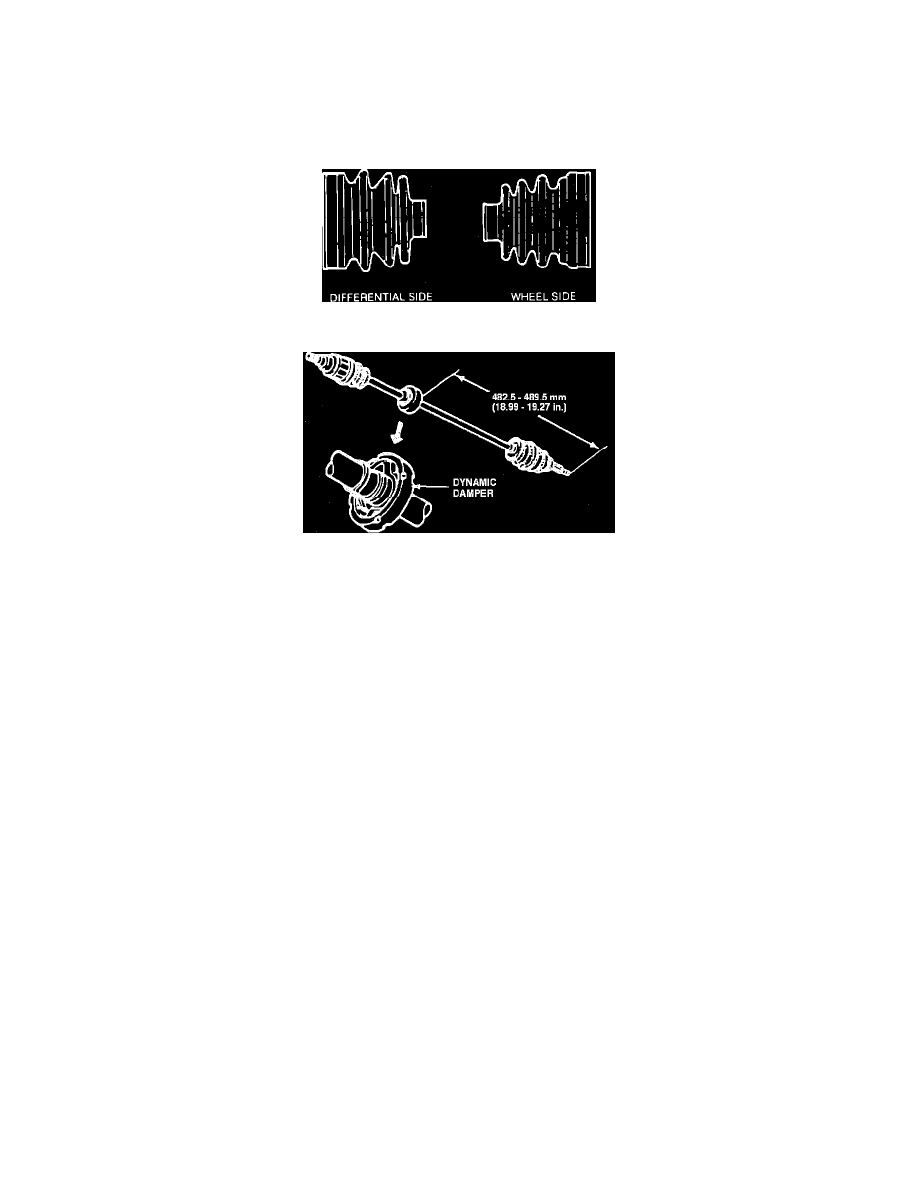
Fig. 3 Boot Identification. Rzeppa Type
Fig. 4 Installing Dynamic Damper (Right Shaft Only). Rzeppa Type
1.
Install new Birfield joint, if necessary.
2.
Place tape on shaft splines, then install wheel side boot. Wheel side and differential side boots are not interchangeable. Refer to Fig. 3 for
proper identification.
3.
If working on right halfshaft, install dynamic damper at a distance of 18.99-19.27 inches from outboard end of shaft, Fig. 4. Ensure outboard joint
is fully engaged onto shaft before taking measurement.
4.
Install differential side boot onto shaft.
5.
Noting marks made during disassembly, reassemble cage, balls and inner plug. Coat all components of joint with molybdenum disulfide grease.
6.
Noting marks made during disassembly, position joint onto halfshaft and retain with snap ring.
7.
Again noting marks made during disassembly, install joint into outer ring. Secure joint to outer ring using new circlip.
8.
Carefully fit boots in grooves on joints, then install new boot bands around boot in opposite direction of halfshaft forward rotation, using pliers to
apply proper tension.
9.
Bend locking tabs down to secure bands, then remove tape from shaft splines.