Five Hundred 2WD V6-3.0L VIN 1 (2006)

Use the opposite side bushing as a guide to install the bushing to the correct depth in the subframe.
AWD vehicles
2. CAUTION: Do not fully tighten the nut at this time.
Position the upper arm into the forward bushing bore and into the rear bushing, then position the upper arm onto the wheel knuckle ball joint stud
and install the ball joint nut.
^
Tighten the nut until snug.
2WD vehicles
3. CAUTION: Do not fully tighten the bolt at this time.
Position the upper arm into the forward bushing bore and into the rear bushing, then position the upper arm onto the wheel knuckle and install the
upper arm-to-knuckle bolt.
^
Tighten the bolt until snug.
All vehicles
4. Loosely install the upper arm-to-subframe rear bolt.
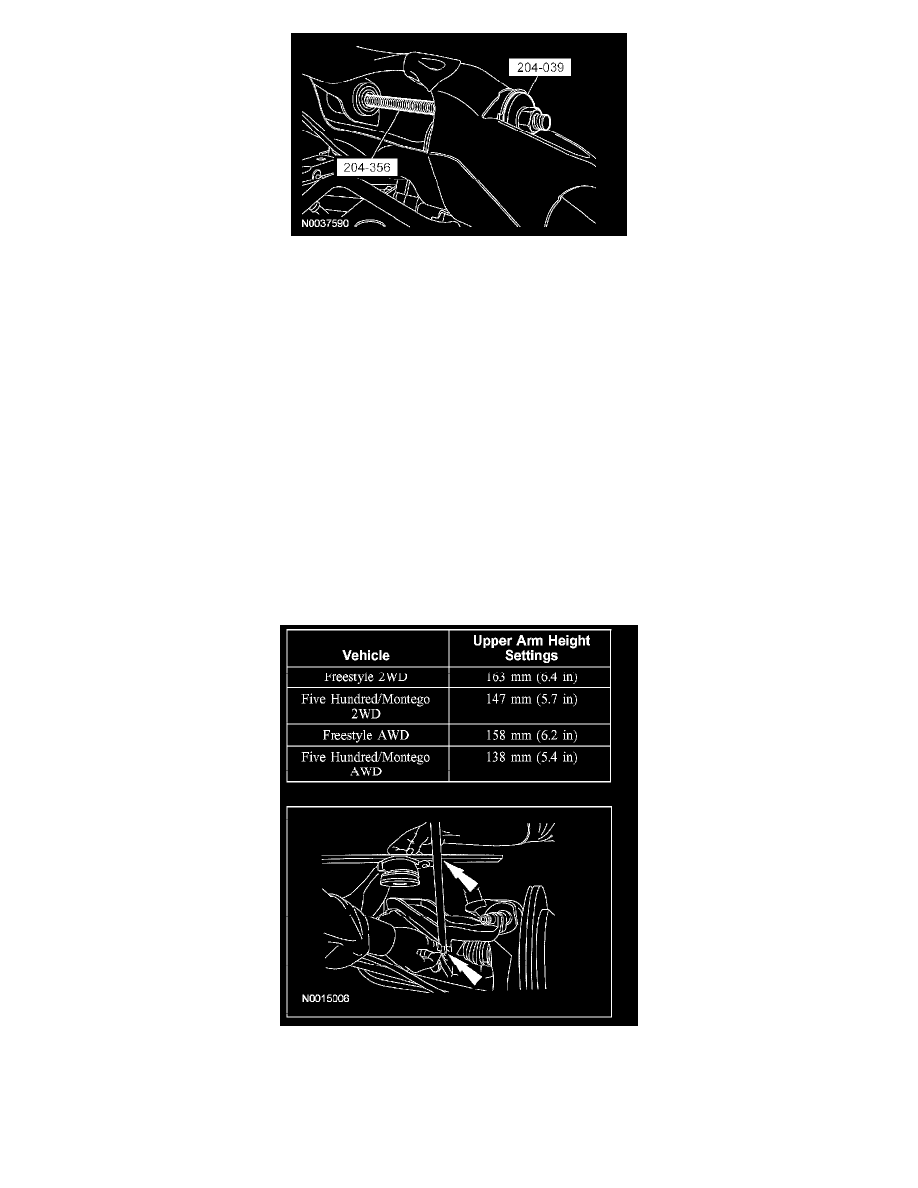
5. While an assistant holds the upper arm, adjust it to the correct height. Refer to the table for correct upper arm height setting specifications.
6. Tighten the upper arm-to-subframe rear bolt to 110 Nm (81 ft. lbs.).
