
Five Hundred AWD V6-3.0L VIN 1 (2005)
2.
Open the rear door and remove the belt moulding screw. See Figure 8.
3.
CAUTION: Use care not to bend the moulding during removal. The fastener at the rear end of the moulding will not reattach to the clip on the
door if the moulding is bent. Adjust (straighten) the moulding if necessary.
Remove the belt moulding by lifting the back end up first and then working the moulding out of the channel.
4.
CAUTION: The surfaces the tape is being affixed to must be clean and dry or the tape will not properly adhere. It will be pushed out of position
when the belt moulding is reinstalled and not provide the water protection it Is designed for. Make certain the surface where the tape will be
affixed is clean of all contaminants (dirt, dust, grime, tape adhesive residue).
Using a clean rag, wipe the door clean around the rear of the channel.
5.
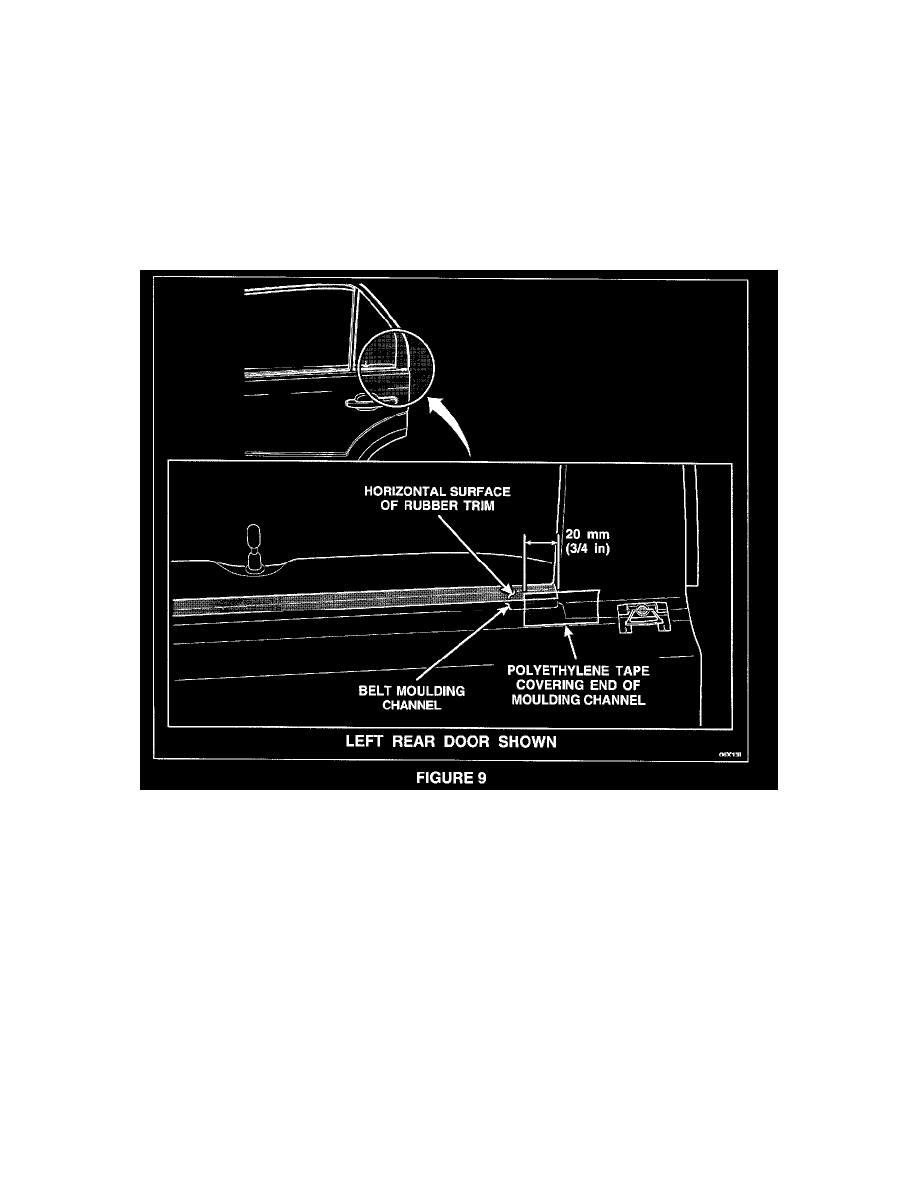
Peel the backing off a piece of supplied polyethylene tape and apply it as follows: See Figure 9.
a)
Position the tape so that it covers approximately 20 mm (3/4 in) of the rear of the channel.
b)
Position the tape so that it is affixed to the horizontal surface of the rubber trim at the bottom of the glass. keep the tape on the horizontal
surface only or it may be visible after the belt moulding is reinstalled.
c)
Press the tape firmly into place.
6.
Reinstall the moulding by first installing the front end of the moulding in the channel then pushing it down and through the polyethylene tape, then
attach the moulding to the clip at the rear of the door. The moulding should sit flush against the door.
7.
NOTE: The kit includes only one (1) extra tape strip.
Check to make sure the tape is not visible after the moulding is installed. If it is, remove the moulding and the tape, clean the area of all adhesive
residue, then repeat Steps 4 through 7 using the extra piece of tape in the kit. Do not reapply the same piece of tape.
8.
Reinstall the belt moulding screw.
9.
Perform Steps 2 through 8 on the other rear door.