
Five Hundred AWD V6-3.0L VIN 1 (2005)
- All Vehicles in this Attachment III.
DOOR TRIM PANEL REMOVAL
1.
Remove the exterior mirror trim cover from the inner door panel, then disconnect the mirror control switch electrical connector.
2.
Remove the front door handle bezel screw cover, the screw and then the bezel.
3.
Remove the two (2) front door handle trim cover screws.
4.
CAUTION: Avoid pulling directly on the upper rear corner (vinyl portion) of the door trim panel during removal to prevent damage to the door
trim panel.
Remove the five (5) front door trim panel screws, then gently pull the door panel straight off the door to disengage the retaining clips.
5.
Disconnect the power window/door lock switch electrical connector.
6.
If equipped with power memory seat, disconnect the power memory seat electrical connector, then remove the front door trim panel from the
vehicle.
7.
Remove the water shield from the door module oval opening.
RAIN HAT INSTALLATION
1.
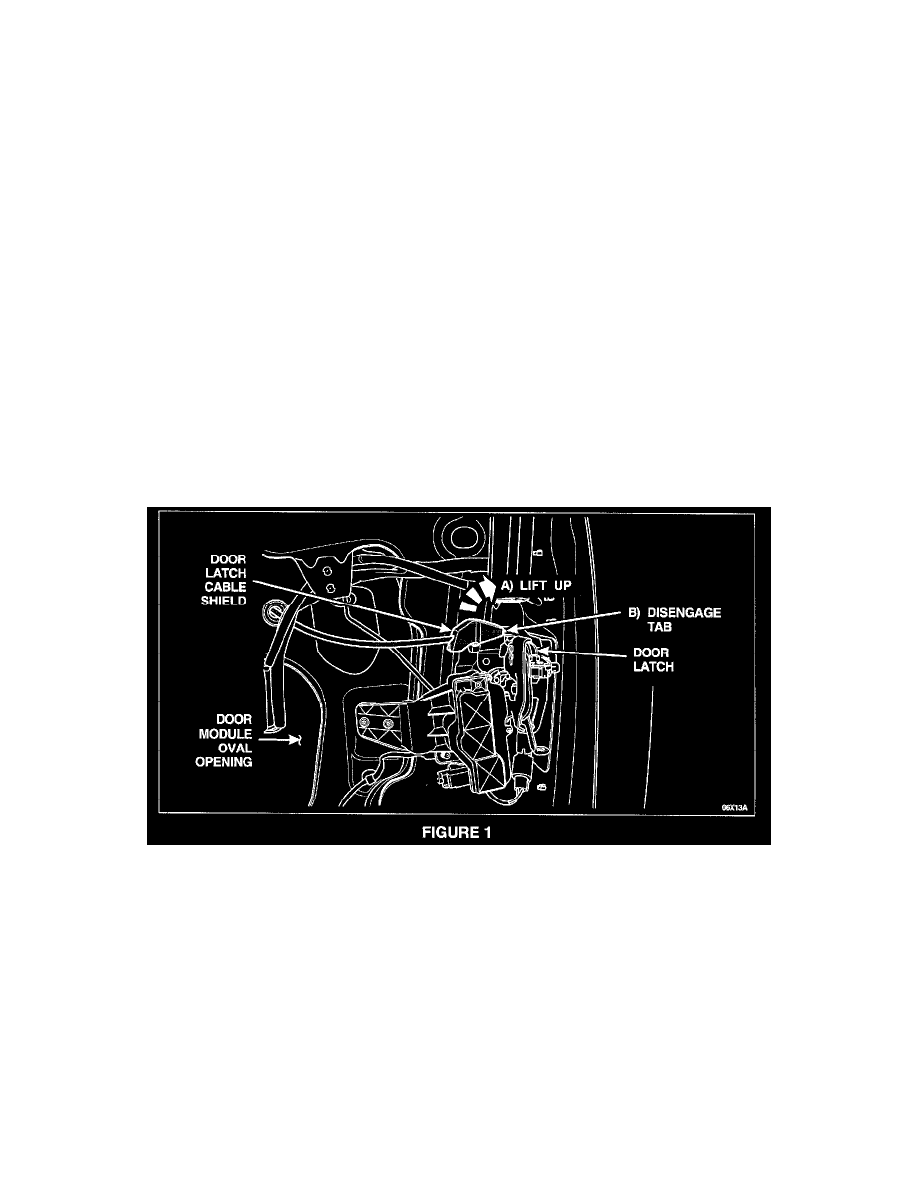
Reach into the opening to locate and remove the existing door latch cable shield as follows:
a)
Lift the shield up off the cable.
b)
Disengage the tab from the latch, then remove and discard the shield. See Figure 1.
2.
NOTE: The rain hats are embossed with an "L" or an "R" to identify on which side of the vehicle they are to be installed. See Figure 2.
NOTE:
BE SURE TO INSTALL THE PUSHPIN INTO THE RAIN HAT FIRST, then install the rain hat onto the door latch.