Five Hundred AWD V6-3.0L VIN 1 (2005)

6.
Locate lower tape pull-tab and remove.
7.
Attach lower molding to vehicle and run your hands along the full length of the molding while applying steady pressure toward the vehicle to
ensure good adhesion of the tape.
8.
Repeat process for other side of vehicle.
REAR DOOR LOWER BODY SIDE MOLDING INSTALLATION
1.
Clean door surface from bottom edge approximately 6" (15 cm) up with a alcohol wipe.
2.
Remove upper tape strip cover using pull-tab provide.
3.
Align lower (thin) edge of molding to lower edge of door (Figure 4).
4.
Align rear edge of molding to rear edge of door (Figure 5).
5.
Roll the molding upward and run your hands along the full length of the molding while applying steady pressure toward the vehicle to ensure good
adhesion of the tape.
6.
Locate lower tape pull-tab and remove.
7.
Attach lower molding to vehicle and run your hands along the full length of the molding while applying steady pressure toward the vehicle to
ensure good adhesion of the tape.
8.
Repeat process for other side of vehicle.
9.
Lower vehicle off hoist.
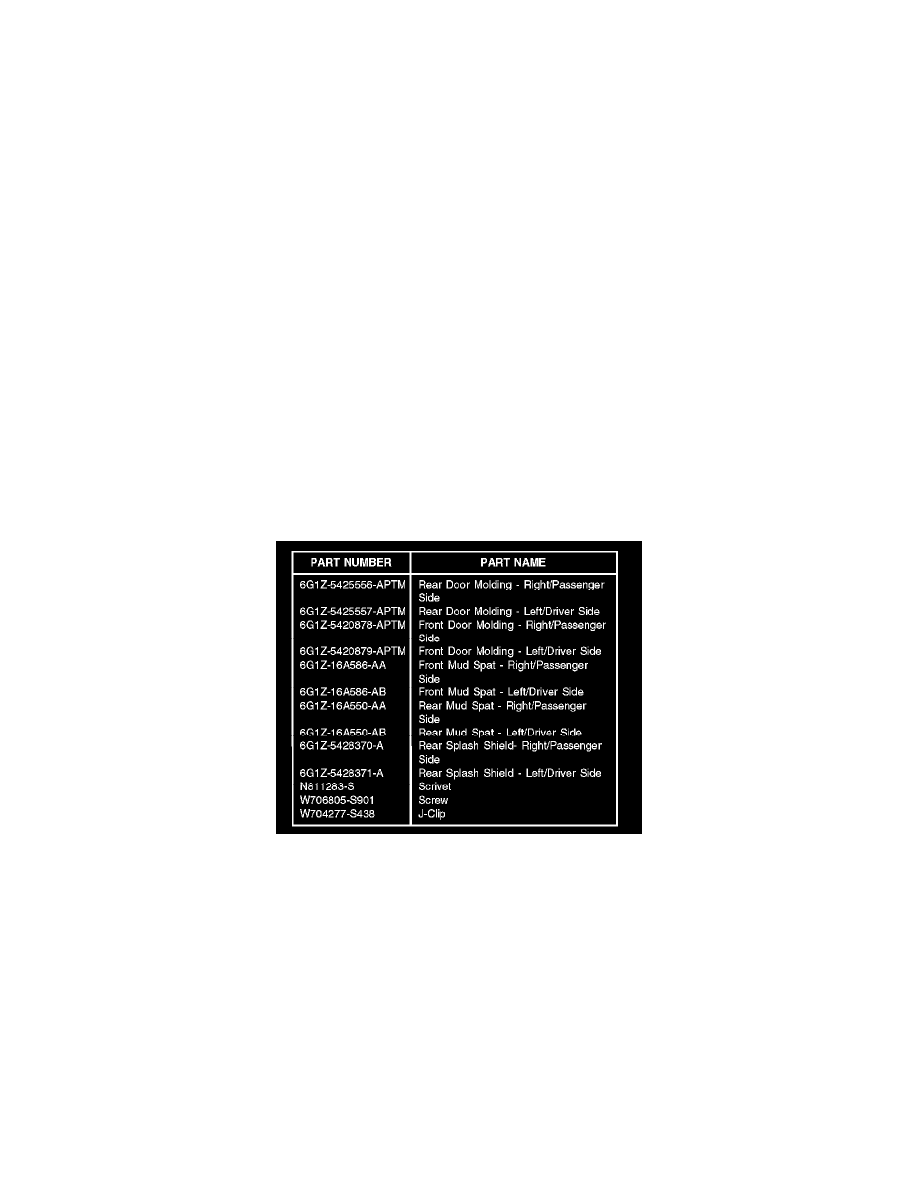
Parts Block
WARRANTY STATUS: Eligible Under Provisions Of New Vehicle Limited Warranty Coverage
OPERATION
DESCRIPTION
TIME
052608A
2005-2006 Five Hundred,
1.1 Hrs.
Montego: Paint 4 Door
Moldings From Kit (May
Be Claimed With Operation
B) (Not To Be Used With
P101)
052608B
2005-2006 Five Hundred,
1.0 Hr.
Montego: Install Door
Moldings And Mud Spats
(May Be Claimed With
