
Five Hundred AWD V6-3.0L VIN 1 (2005)
Position the brake caliper aside.
^
Support the caliper with mechanic's wire.
6.
Remove and discard the brake pads and spring clips from the brake caliper anchor plate.
7.
Measure the thickness of the brake discs. Refer to the Specifications at the beginning of this Attachment III.
^
If there is no brake vibration reported by the customer, the brake disc(s) are not heavily scored and the disc(s) measures above the minimum
thickness specification, it is not necessary to machine or replace the brake disc(s). Proceed to Step 11.
^
If the disc(s) measures at or above the minimum thickness to machine specification and there is heavy scoring on the rotor or the customer
complains of a brake vibration, proceed to the Service Procedure For Machining Brake Disc in this Attachment III.
^
If the disc(s) measures below the minimum thickness specifications, proceed to the next step.
NOTE:
If the brake disc on one side of an axle needs to be replaced or machined, it is necessary to machine the brake disc on the other side of the same axle.
Example: If the brake disc on the right rear side is below the minimum thickness specification but the disc on the left rear side is above the minimum
thickness to machine specification, it is necessary to replace the right rear side disc and machine the left rear side disc. If this vehicle is an AWD
Freestyle, the front axle should be evaluated in the same manner.
8.
Remove the brake caliper anchor plate bolts and discard.
9.
Install disc(s) and new attachment screw(s).
10.
Install brake caliper anchor plate and new bolts. Tighten the bolts to 110 Nm (81 lb-ft).
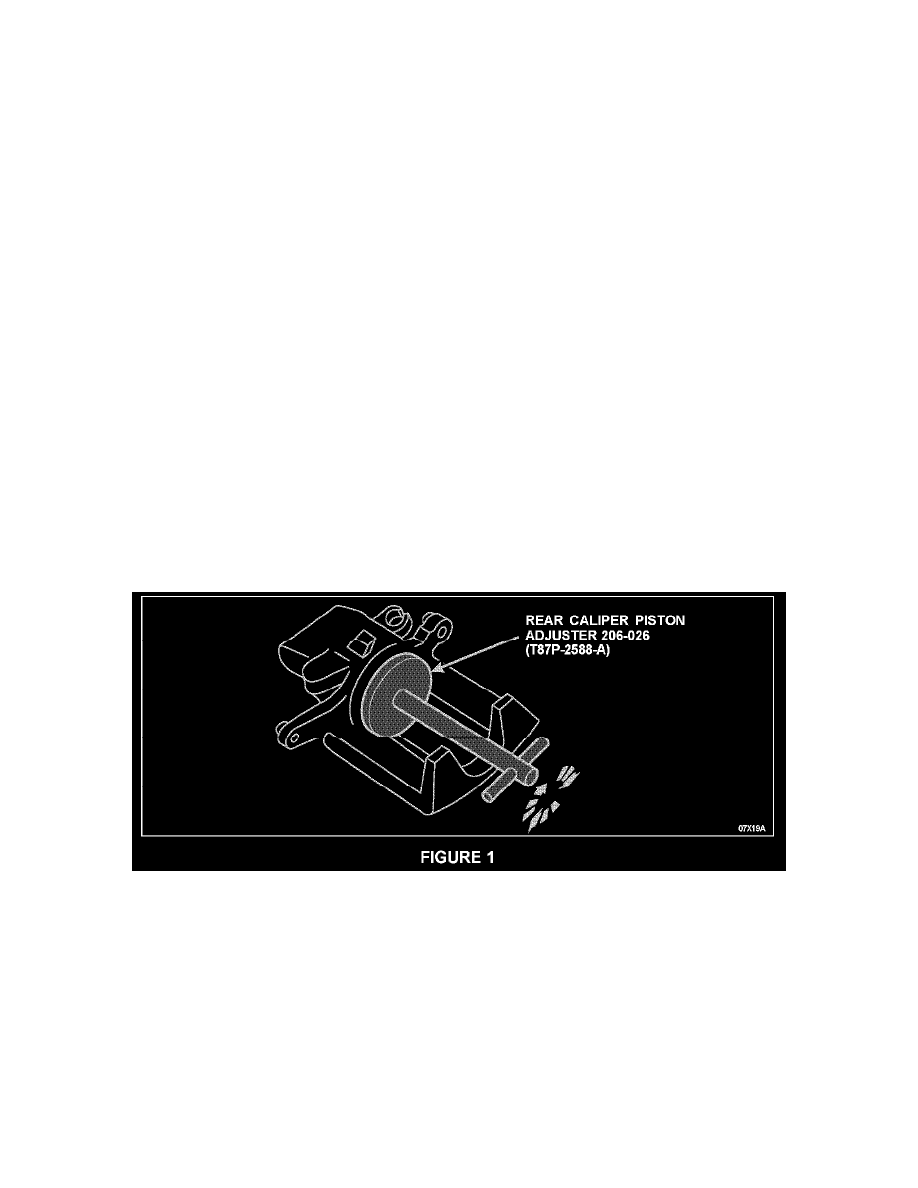
CAUTION:
The LH caliper piston turns clockwise and the RH caliper turns counterclockwise. Turning the caliper piston in the wrong direction will cause the
piston to come out of the caliper, which will require caliper replacement. Caliper replacement is not covered under this program.
11.
Using the Rear Caliper Piston Adjuster 206-026 (T87P-2588-A), compress the brake caliper piston into its cylinder. See Figure 1.
12.
Clean the residual adhesive from the brake caliper fingers and pistons using Metal Brake Parts Cleaner PM-4-A Or PM-4-B (US); CPM-4
(Canada).
CAUTION:
Do not allow grease, oil, brake fluid or other contaminates to contact the brake pad or caliper mating surface.
NOTE:
Install all the new hardware supplied with the brake kit.
13.
Install the new spring clips and brake pads.
14.
Position the brake calipers and install the bolts. Tighten the bolts to 31 Nm (23 lb-ft).