
Five Hundred AWD V6-3.0L VIN 1 (2005)
Installation
1. Clean the valve cover, cylinder head and front cover sealing surfaces with silicone gasket remover and metal surface prep. Inspect and install a
new gasket as necessary.
2. NOTE: The valve cover must be installed and the bolts and stud bolts tightened within 4 minutes of sealant application.
Apply a 5 mm (0.19 inch) dot of silicone gasket sealant to the front cover-to-cylinder head joints.
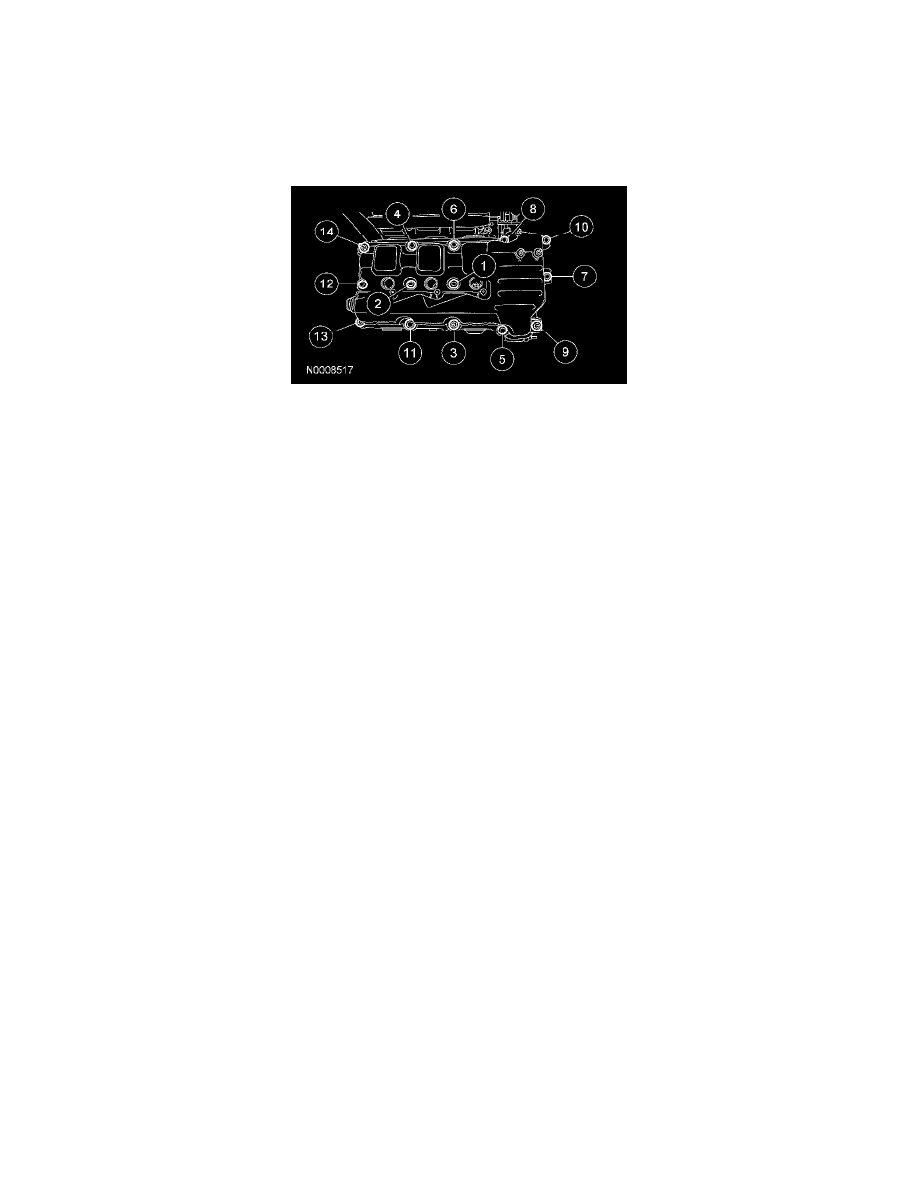
3. Position the valve cover and install the 9 bolts and 5 stud bolts.
^
Tighten in the sequence shown to 10 Nm (89 inch lbs.).
4. Attach the 2 wiring retainers to the valve cover stud bolts.
5. Attach the wiring conduit to the valve cover stud bolts and install the 3 nuts.
^
Tighten to 6 Nm (53 inch lbs.).
6. Position the PSP tube bracket to the backside of the RH cylinder head and install the bolt.
^
Tighten to 7 Nm (62 inch lbs.).
7. Install the 3 power steering fluid reservoir bracket stud bolts into the valve cover.
^
Tighten to 7 Nm (62 inch lbs.).
8. Position the power steering fluid reservoir bracket and install the nut.
^
Tighten to 9 Nm (80 inch lbs.).
9. Position the PSP tube bracket and install the bolt.
^
Tighten to 7 Nm (62 inch lbs.).
10. Position the power steering fluid reservoir and install the 2 nuts.
^
Tighten to 9 Nm (80 inch lbs.).
11. Install the PCV tube.
12. If equipped, connect the PCV valve electrical connector.
13. Install the RH ignition coil-on-plugs.
14. Install the upper intake manifold.