
Five Hundred AWD V6-3.0L VIN 1 (2005)
9.
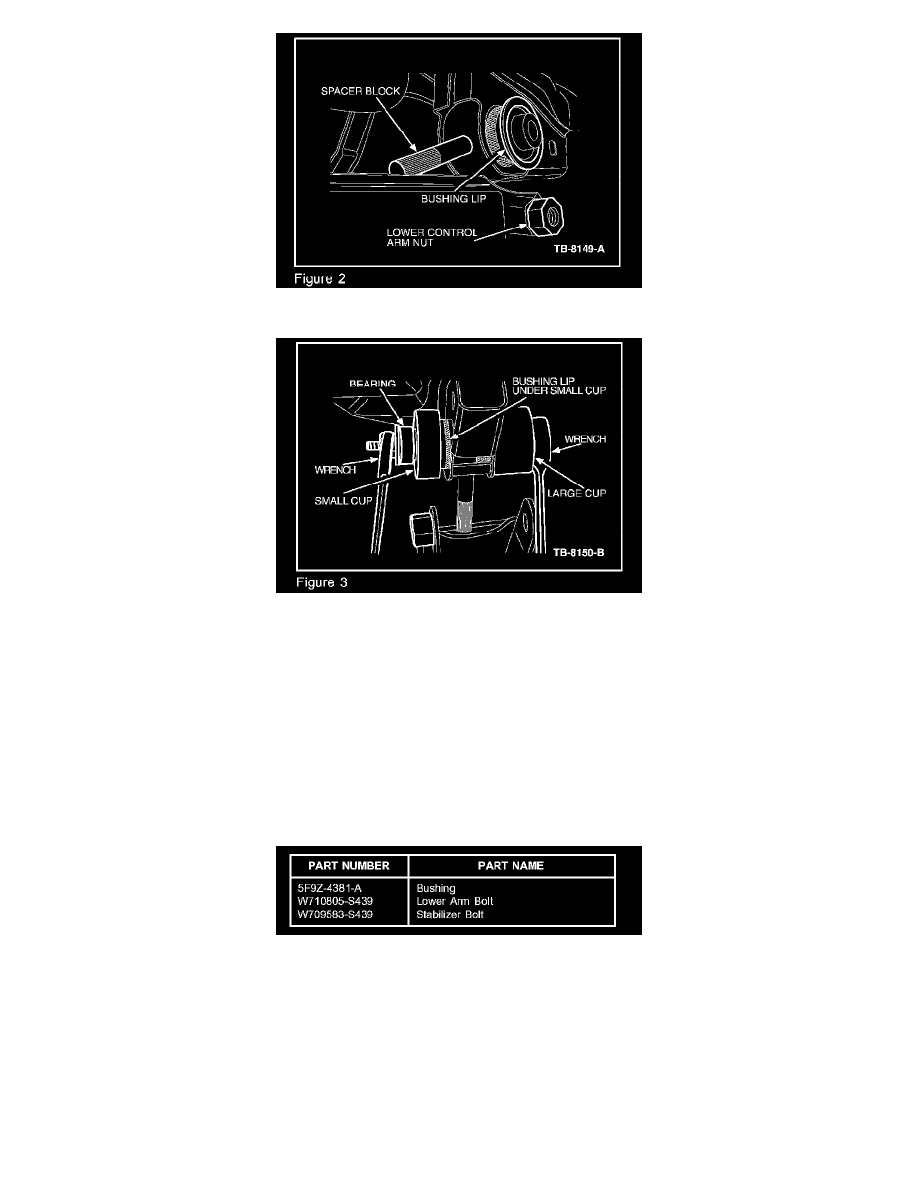
Insert the spacer block from the Lower Arm Bushing Installer Tool (204-589) (Figure 2).
10.
Position the Arm Bushing Installer Tool (204-589) over the new bushing with the small cup over the lip of the bushing (Figure 3).
11.
Tighten the lead screw of the installer tool until the lower control arm bushing is pressed into position and tool cups bottom out against frame.
12.
Remove the installer tool, position the lower control arm over the bushing and install a new lower control arm-to-subframe bolt. Some
prying/twisting of the lower control arm will be required to install the bolt, DO NOT PRY ON COIL SPRING.
13.
Before tightening the lower arm bolt, use a jack stand to raise the rear suspension until the distance between the center of the hub and the lip of the
fender is equal to the measurement taken in Step 1 (curb height). Torque bolt to 92 lb-ft (125 N.m).
14.
Reinstall stabilizer bar and new bolts, torque to 43 lb-ft (58 N.m).
15.
Reinstall tire/wheel and tighten the wheel nuts to 95 lb-ft (129 N.m) in a star-pattern sequence.
Parts Block
WARRANTY STATUS: Eligible Under Provisions Of New Vehicle Limited Warranty Coverage
OPERATION
DESCRIPTION
TIME
051004A
2005 Freestyle FWD, Five
0.8 Hr.
Hundred FWD, Montego
FWD: Replace The Rear
Lower Control Arm
Bushing One Side (Do Not