
Flex AWD V6-3.5L (2009)
5. Disconnect the 3 RH fuel injector electrical connectors.
6. Detach all of the wiring harness retainers from the RH valve cover stud bolts.
7. Remove the nut and the Power Steering Pressure (PSP) tube bracket from the valve cover stud bolt.
8. NOTE: It is necessary to reposition the A/C tubes to remove the valve cover.
Loosen the bolt, the 10 stud bolts and remove the RH valve cover.
-
Discard the gasket.
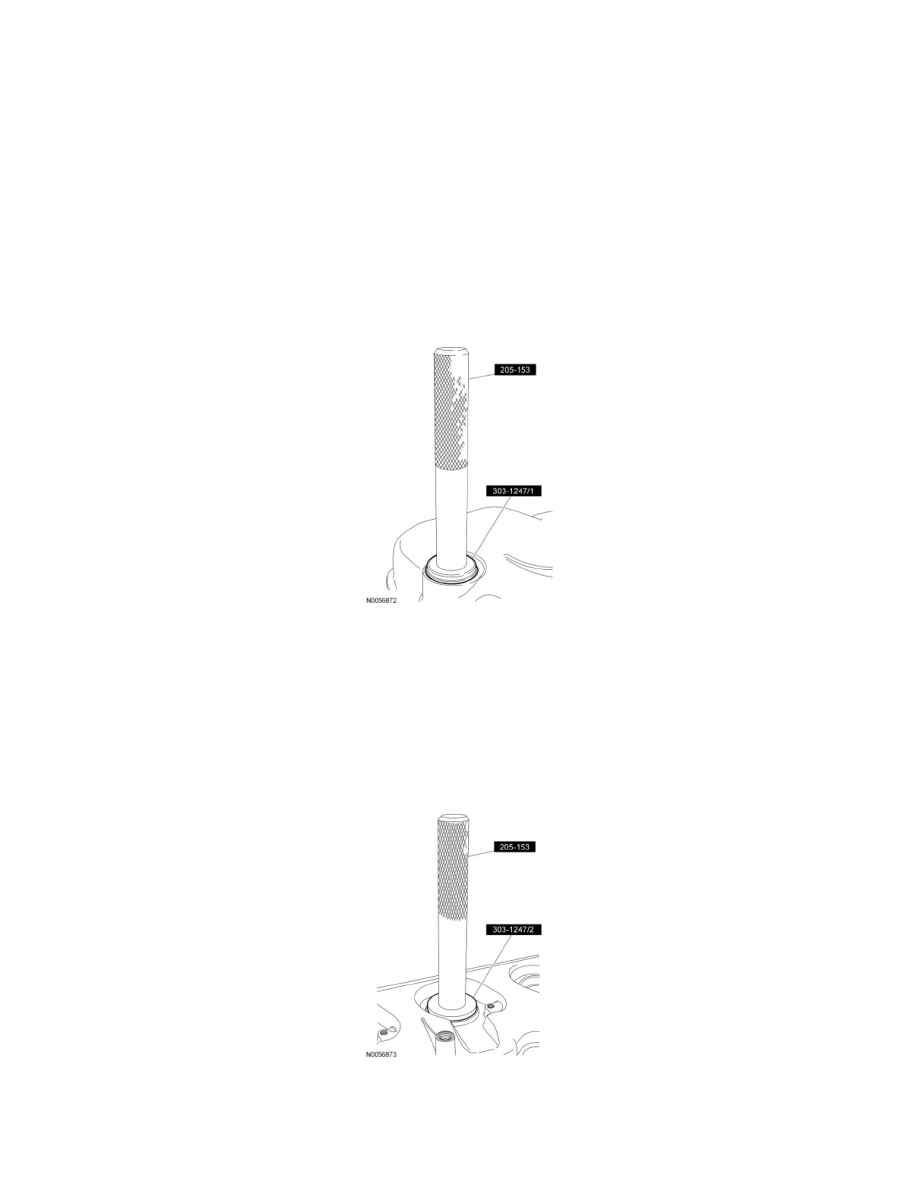
9. NOTE: VCT solenoid seal removal shown, spark plug tube seal removal similar.
Inspect the VCT solenoid seals and the spark plug tube seals. Remove any damaged seals.
-
Using the VCT Spark Plug Tube Seal Remover and Handle, remove the seal(s).
10. Clean the valve cover, cylinder head and engine front cover sealing surfaces with metal surface prep.
Installation
1. NOTE: Installation of new seals is only required if damaged seals were removed during disassembly of the engine.
NOTE: Spark plug tube seal installation shown, VCT solenoid seal installation similar.
Using the VCT Spark Plug Tube Seal Installer and Handle, install new VCT solenoid and/or spark plug tube seals.
2. NOTICE: Failure to use Motorcraft High Performance Engine RTV Silicone may cause the engine oil to foam excessively and result in
serious engine damage.
NOTE: If the valve cover is not installed and the fasteners tightened within 4 minutes, the sealant must be removed and the sealing area cleaned.