
Focus L4-2.0L (2009)
in major service expense. New parts must be installed with the same part numbers or equivalent part, if replacement is necessary. Do not use a
replacement part of lesser quality or substitute design. Torque values must be used as specified during reassembly to make sure correct retention of these
parts.
1. Loosen the 3 strut upper nuts 5 turns.
2. Remove the wheel and tire.
3. Remove and discard the wheel hub nut.
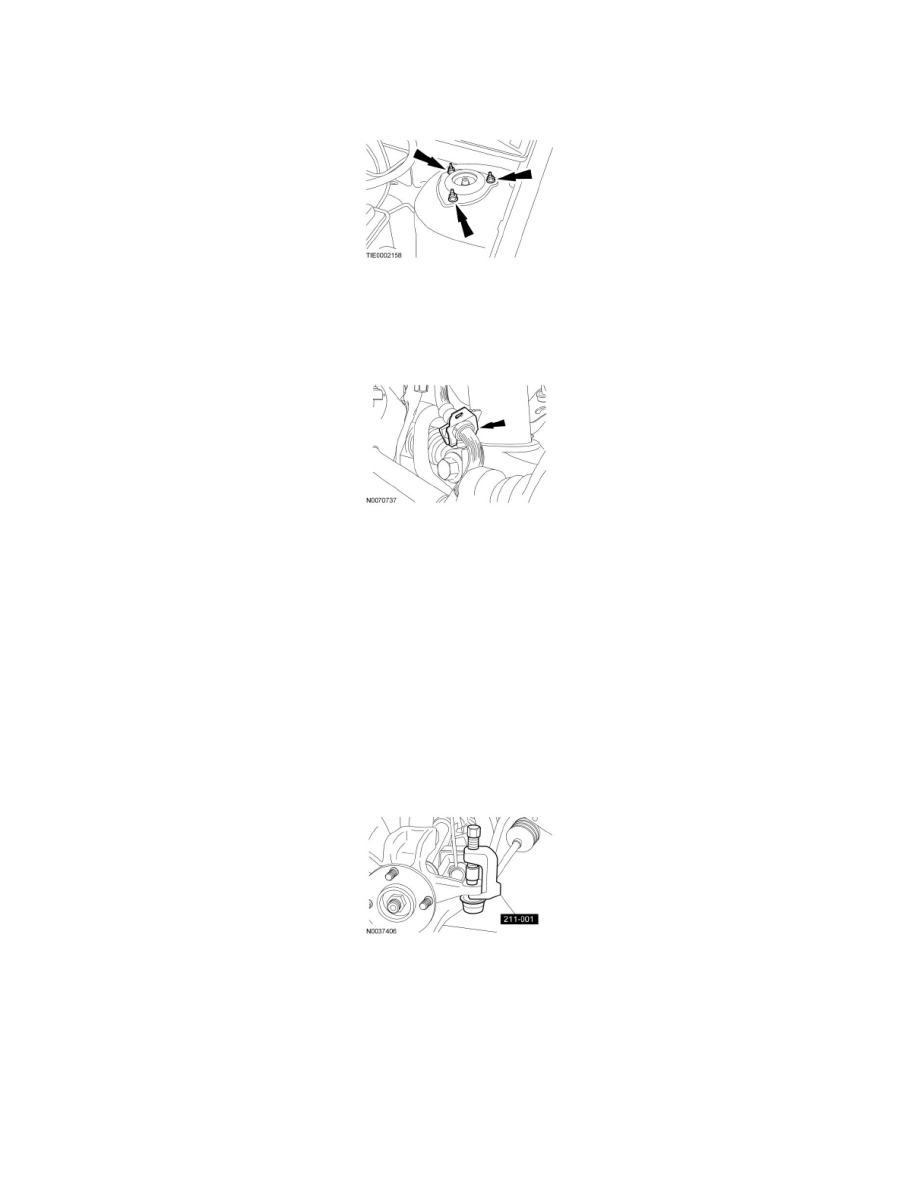
4. Remove the brake hose retainer.
5. NOTICE: Do not allow the brake caliper to hang from the brake hose or damage to the hose can occur.
Remove the 2 brake caliper guide pin bolts and position the caliper assembly aside.
-
Support the caliper assembly using mechanic's wire.
6. Remove the brake disc.
7. If equipped with ABS, remove the wheel speed sensor bolt and position the sensor aside.
8. NOTICE: Leave the tie-rod end nut in place or damage to the tie-rod end may occur.
Loosen the tie-rod end nut.
9. Using the Tie-Rod End Remover, detach the tie-rod end from the wheel knuckle.
-
Remove and discard the tie-rod end nut.
10. NOTICE: Do not use a prying device or separator fork between the ball joint and the wheel knuckle. Damage to the ball joint or ball
joint seal may result. Only use the pry bar by inserting it into the lower arm body opening.
NOTICE: Use care when releasing the lower arm and wheel knuckle into the resting position or damage to the ball joint seal may occur.
Remove and discard the ball joint nut and bolt.
-
Insert a pry bar in the lower arm body opening and separate the ball joint from the wheel knuckle.