
Focus L4-2.0L DOHC VIN 5 (2003)
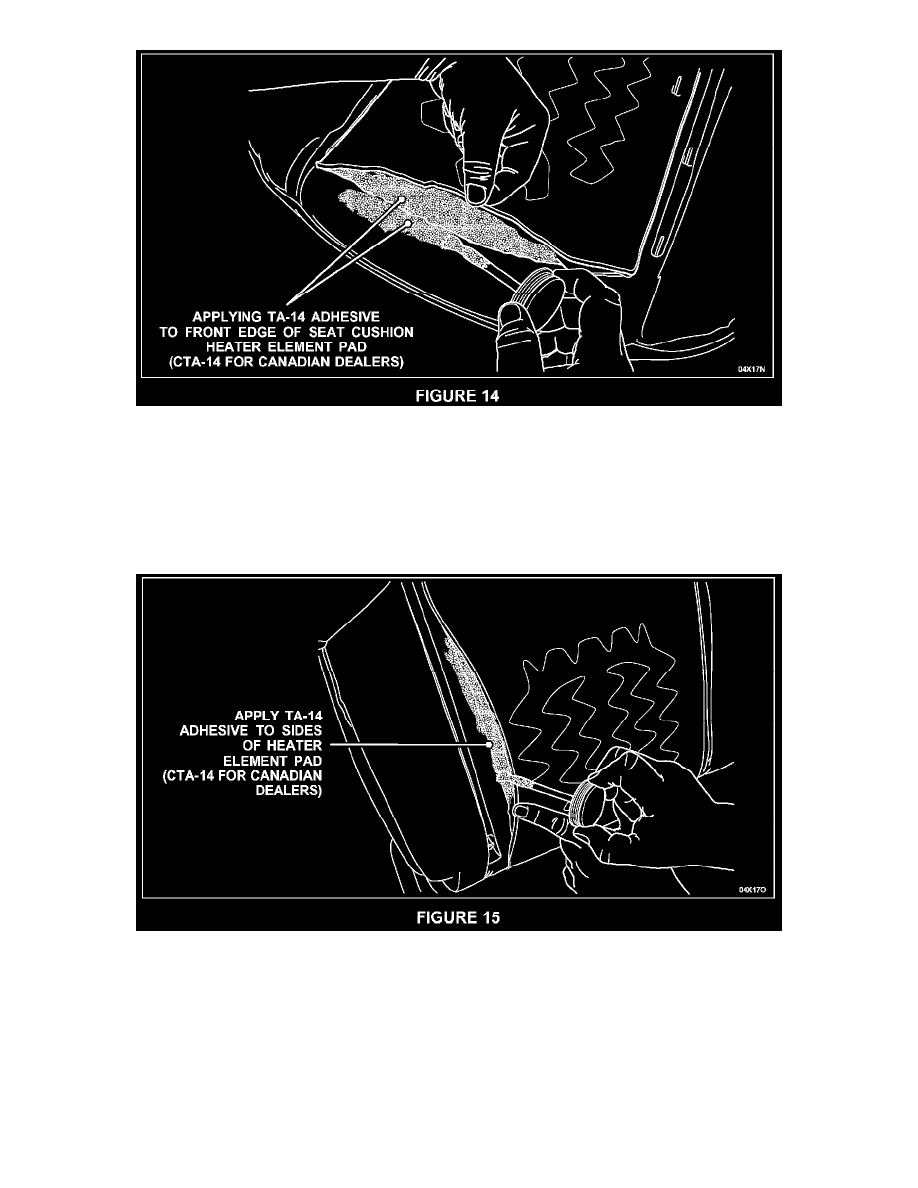
Neatly apply Motorcraft Trim and Weather Strip Adhesive (part number TA-14 or CTA-14 for Canadian dealers) on the entire front edge of the
heater element pad forward of the adhesive strip and on the mating surface on the foam. Pull the heater element pad into position and press the
leading edge down to adhere it to the foam. See Figure 14.
4.
CAUTION: Apply only enough adhesive to properly bond the pad to the foam. Applying too much adhesive can result in adhesive bleeding
through to the seat trim cover. Apply the adhesive in a strip no more than 25-mm (1-inch) wide along the outer edges of the heater element pad and
on the mating surfaces of the foam to ensure no adhesive is applied under the heater element wire. Also, DO NOT apply adhesive to an existing
adhesive strip on the element pad itself. Poor adhesion will result.
Neatly apply Motorcraft Trim and Weather Strip Adhesive (part number TA-14 or CTA-14 for Canadian dealers) on the side edges of the heater
element pad and the mating surfaces on the foam. Press the edges down while smoothing the heater element pad down to avoid wrinkling or
puckering. Allow the adhesive to dry for five (5) minutes before assembling the seat. Test the edges to make sure they adhere well enough to avoid
pulling the heater element pad up when the trim cover is reinstalled. See Figure 15.
5.
Proceed to the Seat Cushion and Seat Back Reassembly procedure in this Attachment III.
HEATER ELEMENT PAD REPLACEMENT
NOTE:
This repair applies to lower seat cushion heater element pads that: