
Focus L4-2.0L DOHC VIN 5 (2003)
Control Arm: Service and Repair
Front
Lower Arm
Removal
1. Loosen the wheel nuts
2. Raise and support the vehicle.
3. Remove the wheel.
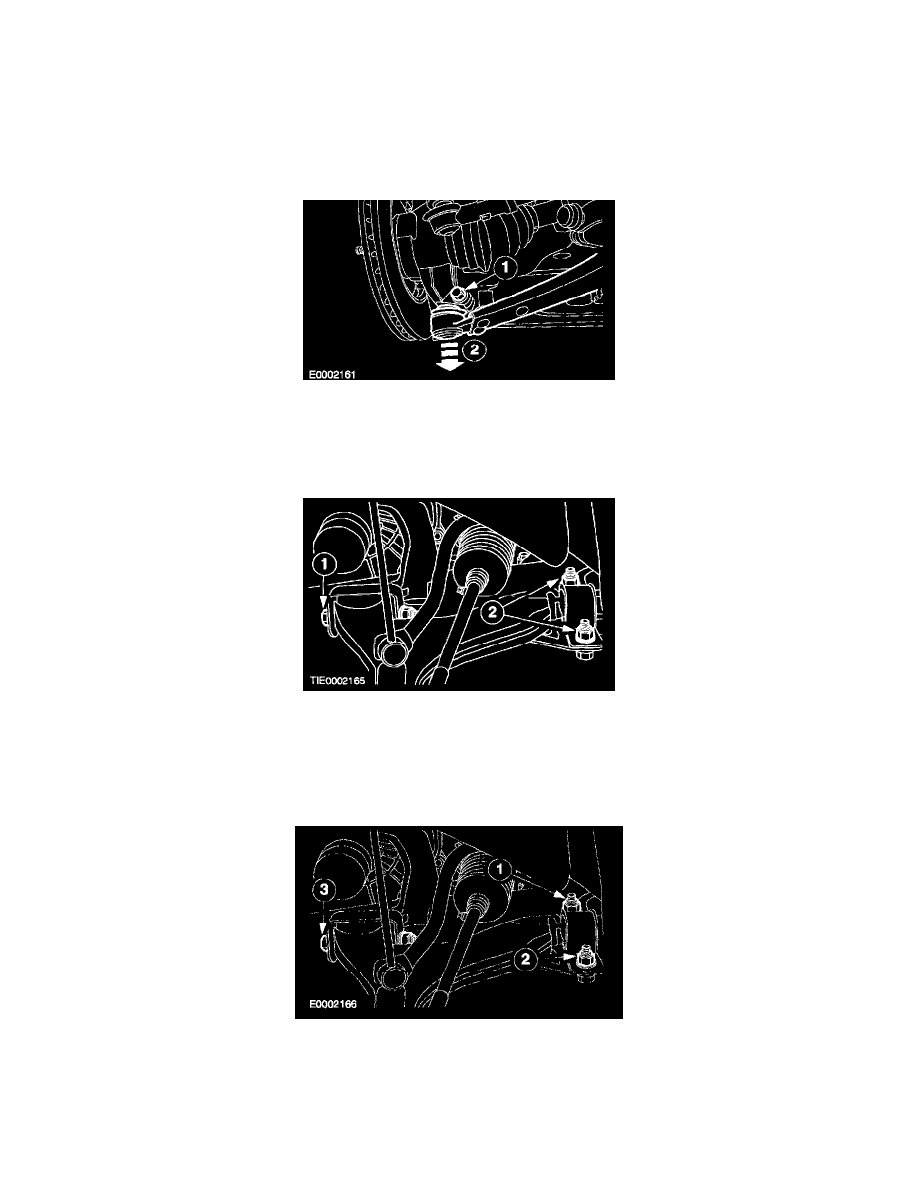
4. CAUTION: Protect the ball joint seal using a soft cloth to prevent damage.
Remove the lower arm ball joint.
1
Remove the bolt
2
Remove the lower arm ball joint
5. Remove the lower arm bolts.
1
Remove the front bolt.
2
Remove the rear clamp bolts.
6. Remove the lower arm.
Installation
1. NOTE: Bolts 1 and 3 are torque-to-yield. New nuts, bolts and ball bearing washers must be installed. Install the lower arm bolts.
^
Tighten the bolts in the sequence shown five stages.
^
Stage 1: Tighten nut 1 to 100 Nm.
^
Stage 2: Tighten nut 1 an additional 60 degrees.
^
Stage 3: Tighten nut 2 to 120 Nm.