
Focus L4-2.0L SOHC VIN P (2000)
3.
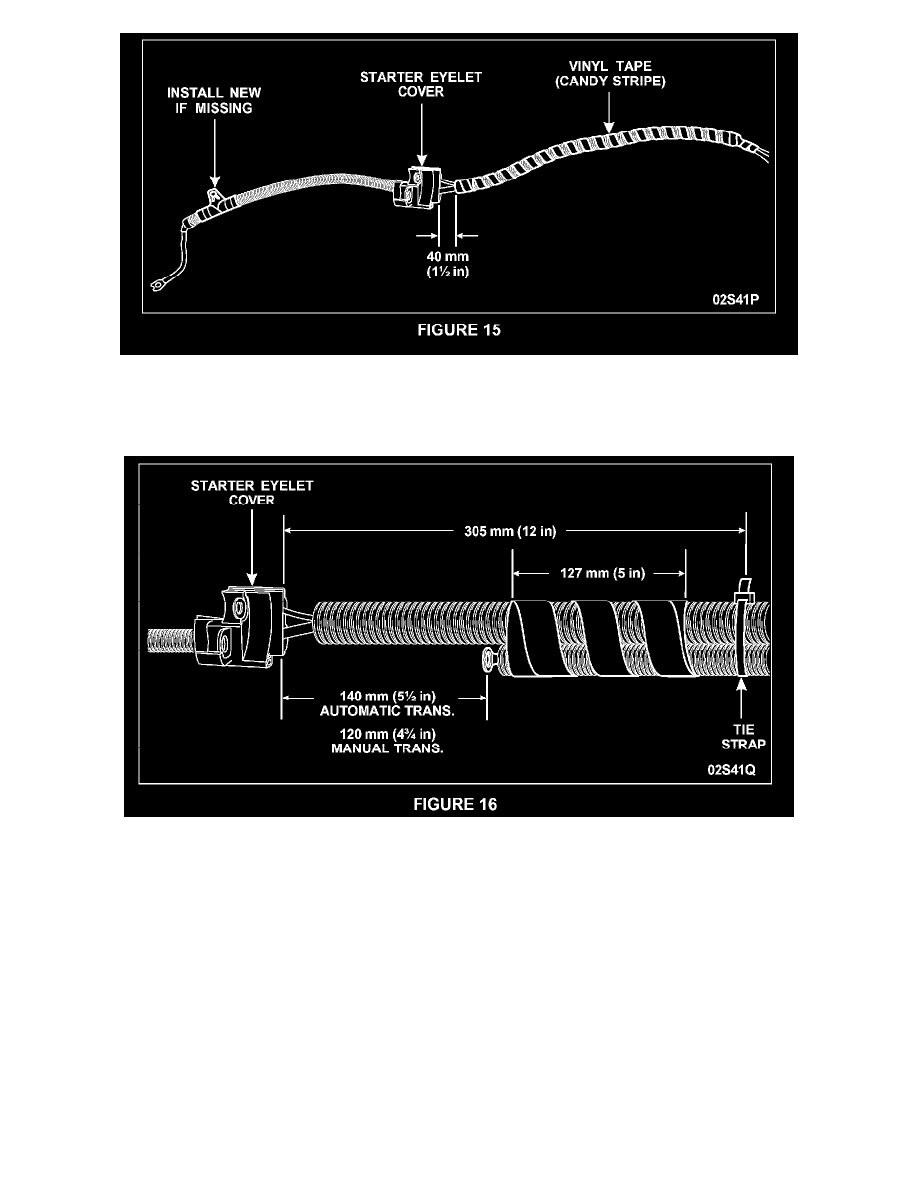
Install the supplied 430 mm (17 in) long convolute tube (Item No. 1) over the positive cable and the black starter solenoid wire. Secure the tube in
place with black vinyl tape on both ends beginning 40 mm (1-1/2 in) from the starter eyelet cover. Once the tube is in place, wrap a layer of vinyl
tape around the tube in a "candy stripe" pattern. If the generator wire harness anchor is missing, install the one provided in the modification kit
(Item No. 5). See Figure 15.
4.
Place the battery positive and negative cables side-by-side so the negative cable grounding eyelet is 140 mm (5-1/2 in) from the starter eyelet
cover for vehicles equipped with an automatic transmission, or 120 mm (4-3/4 in) for vehicles equipped with a manual transmission, and is
positioned in the same direction as the starter eyelet. Install the supplied tie strap (Item No. 7) 305 mm (12 in) from the starter eyelet cover to
secure the two cables together. Wrap the two cables in black vinyl tape for 127 mm (5 in), starting at the negative cable eyelet.
See Figure 16.
5.
Go to Battery Cable Harness Installation.
BATTERY CABLE HARNESS INSTALLATION
1.
CAUTION: Make sure the battery cable harness is properly routed.
NOTE:
Be sure to use the supplied new anchoring clips when installing the harness into the vehicle.
Install the new anchoring clip (Item No. 6) into place near the top of the transmission, then position the new, or modified, battery cable harness
into the vehicle. Do not secure the battery cable to the clip at this time.