
Freestar V6-4.2L VIN 2 (2004)
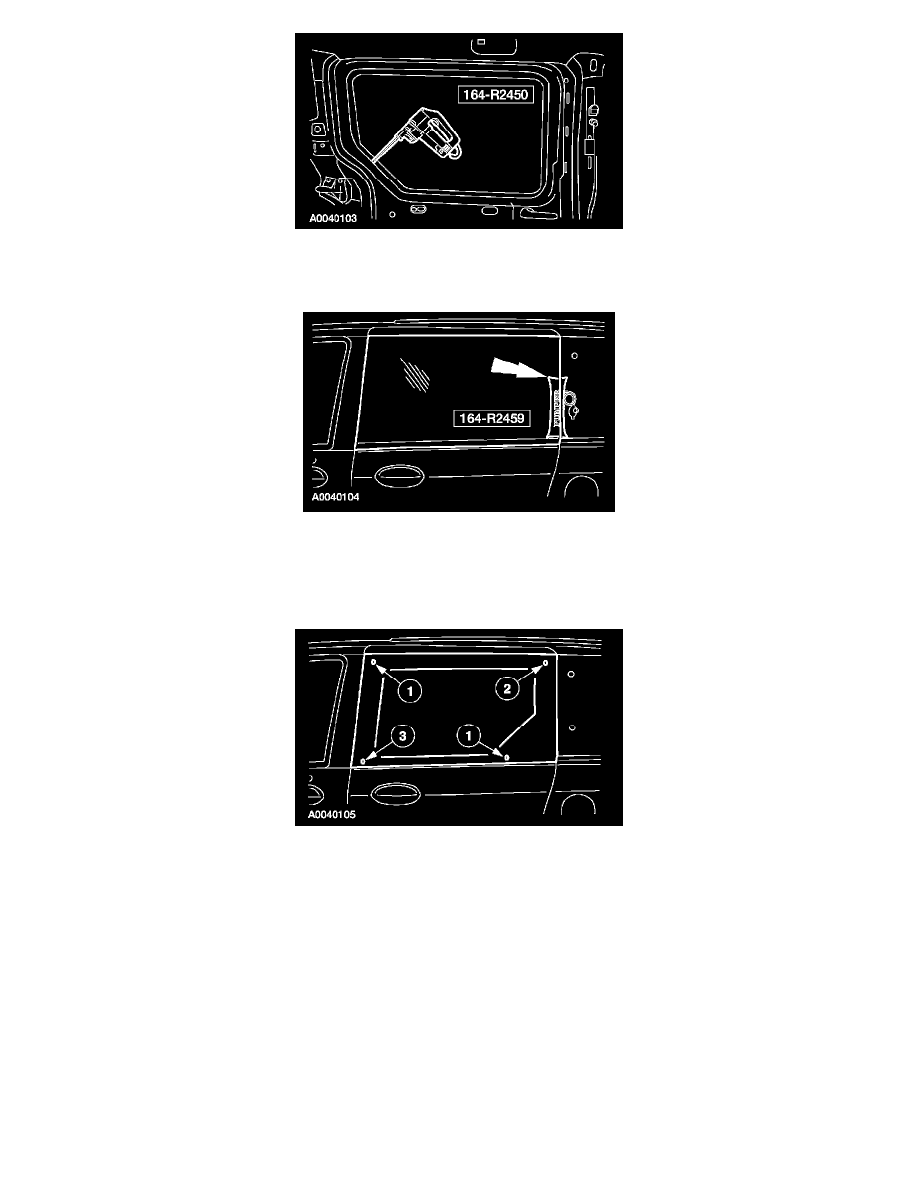
2. NOTE: Lubricate the existing adhesive with water to aid the special tool while cutting.
Using the special tool, cut the adhesive from the sliding door window glass.
3. NOTE:
-
There are 4 locator pins on the sliding door window glass that hold the glass in place during assembly.
-
An assistant may be required to avoid damaging the door when the door glass comes loose.
Using the special tool, distance the sliding door glass from the sliding door and discard the glass.
4. Remove the locator pins from the door skin and discard the pins.
1
Rock the pins back and forth applying pressure to remove the pins.
2
Rotate the pins 90 degrees left or right and remove the pin.
3
Using a suitable tool, cut the head off the pin and retrieve it from the bottom of the door.
5. Using a soft brush or vacuum, remove dirt and foreign material from the pinch weld.
INSTALLATION
1. To install, reverse the removal procedure.
Item 1: Sliding Door Window Glass Installation Note
CAUTION:
-
A new sliding door window glass must be installed to prevent wind noise or water leaks.
-
After installing the new sliding door window glass, the vehicle should not be driven until the urethane adhesive has cured. The curing
time at temperatures above 13°C (55°F) and relative humidity above 50% is 12-24 hours. (Refer to the Essex drive away chart for the
cure times as the temperatures and humidity vary). Inadequate curing of the urethane adhesive may adversely affect the strength of the
urethane adhesive bond.