
Fusion FWD V6-3.0L (2009)
13. Disconnect the Engine Oil Pressure (EOP) switch electrical connector and position the wiring harness aside.
14. Remove the stud bolt, the 2 bolts and position the generator aside.
15. Remove the 2 oil pan-to-front cover bolts.
16. Remove the 14 bolts, 2 stud bolts and the engine front cover.
-
Remove and discard the gaskets.
Installation
1. NOTICE: Do not use metal scrapers, wire brushes, power abrasive discs or other abrasive means to clean the sealing surfaces. These tools
cause scratches and gouges which make leak paths.
NOTE: Do not damage the oil pan gasket while cleaning the sealant from the lower cylinder block-to-oil pan joint.
Use a plastic scraping tool to remove all traces of sealant.
-
Clean all sealing surfaces with metal surface prep and install new gaskets.
2. NOTE: The engine front cover must be installed and the bolts tightened within 4 minutes of applying sealant.
Apply a 6 mm (0.23 in) diameter dot of silicone gasket and sealer to the cylinder block, lower cylinder block, cylinder head and oil pan mating
surfaces.
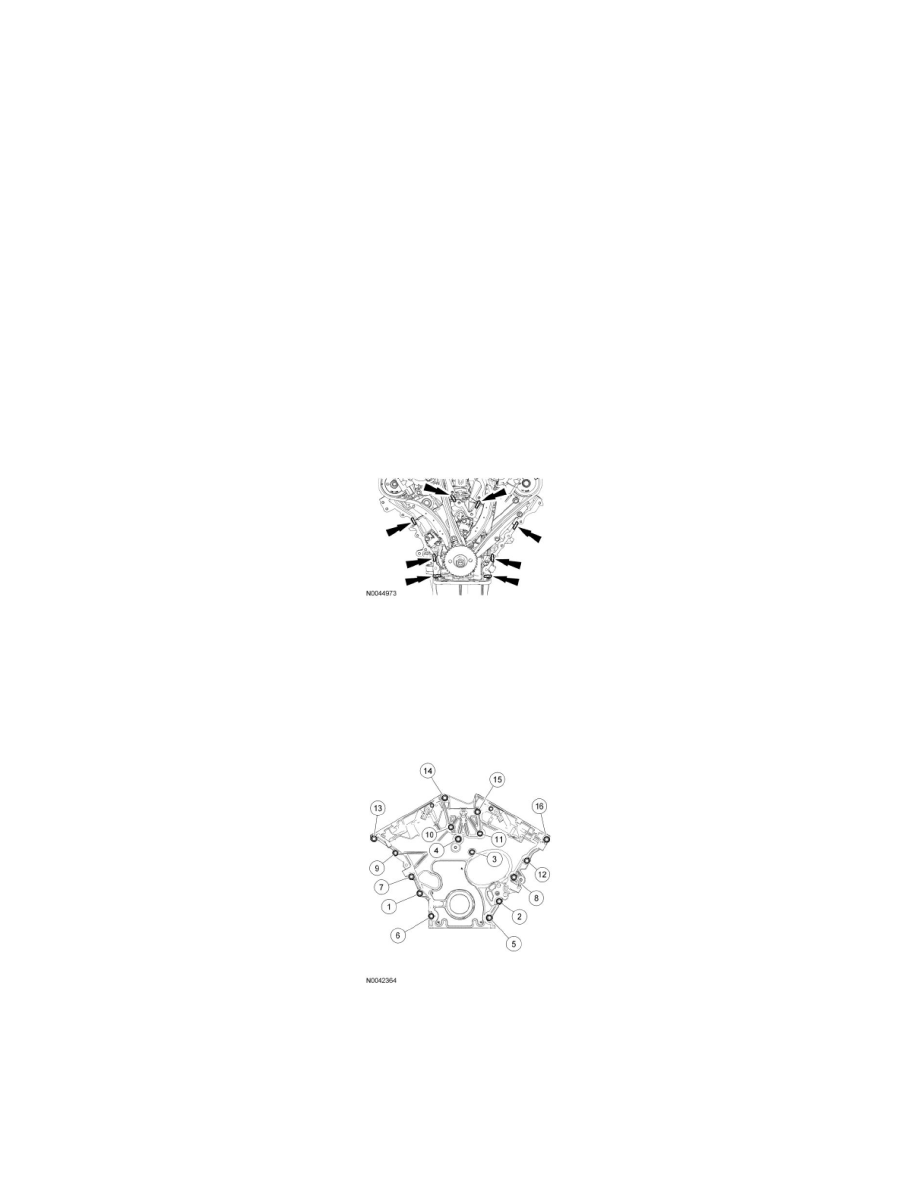
3. NOTE: Fasteners 1 and 13 are stud bolts.
Position the engine front cover and install the 14 bolts and the 2 stud bolts.
-
Tighten in the sequence shown to 25 Nm (18 lb-ft).
4. Install the 2 oil pan-to-front cover bolts.
-
Tighten to 25 Nm (18 lb-ft).
5. Remove the oil pan plug and drain the engine oil.
-
Install the plug and tighten to 26 Nm (19 lb-ft).
6. Install the generator, 2 bolts and the stud bolt.
-
Tighten to 48 Nm (35 lb-ft).