
LTD Crown Victoria V8-302 5.0L VIN F FI (1986)
Air Door Cable: Adjustments
PRE-SET AND SELF-ADJUSTMENT BEFORE INSTALLATION
NOTE: The temperature control cable is self-adjusting with a firm movement of the temperature control lever to the extreme right of the slot (WARM)
in the face of the control assembly. To prevent kinking of the control cable wire during cable installation, a preset adjustment should be made before
attempting to perform the sell-adjustment operation. The preset adjustment may be performed either in the vehicle, with the cable installed or before
installation.
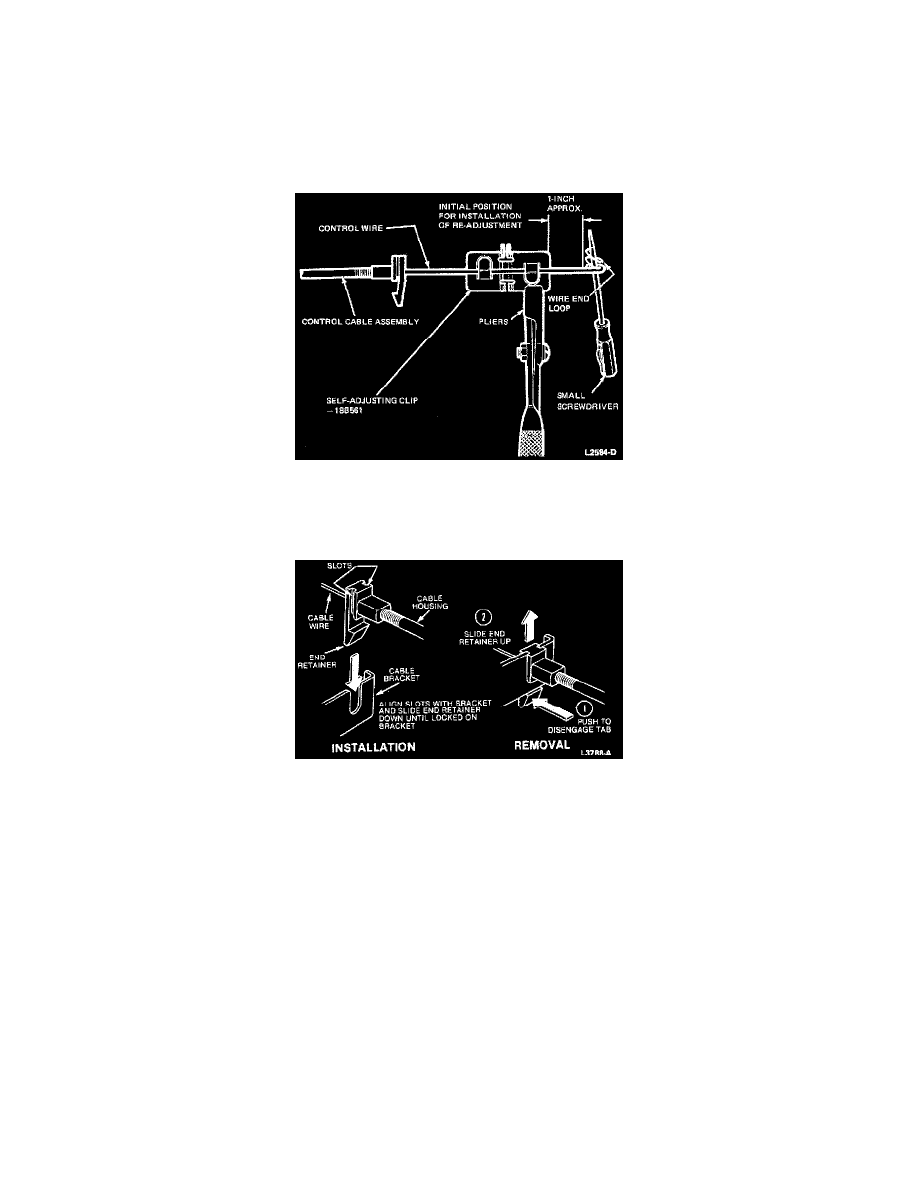
Control Cable Preset Adjustment
1. Insert the blade of a small pocket screwdriver into the wire end loop (crank arm end) of the control cable as shown.
2. Grip the self-adjusting clip with pliers and slide it down the control wire (away from the end loop) approximately 25.4 mm (1 inch).
Control Cable End Retainer
3. With the temperature selector lever in the maximum Cool position, snap the temperature cable housing into the mounting bracket as shown in the
image. Then attach the self-adjusting clip to the temperature door crank arm.
4. Firmly move the control lever to the extreme right of the slot (WARM) to position the self-adjusting clip.
5. Check for proper control operation.
PRE-SET AND SELF-ADJUSTMENT AFTER INSTALLATION
1. Move the control lever to the COOL position.
2. Hold the crank arm firmly in position, insert the blade of a small pocket screwdriver into the wire loops as shown, and pull the cable wire through
the self-adjusting clip until there is a space of approximately 25.4 mm (1 inch) between the clip and the wire end loop.
3. Firmly move the control lever to the extreme right of the slot (WARM) to position the self-adjusting clip.
4. Check for proper control operation.