LTD Crown Victoria V8-302 5.0L VIN F FI (1986)

Power Window Switch: Service and Repair
LH Front Door Window Switch
Removal and Installation
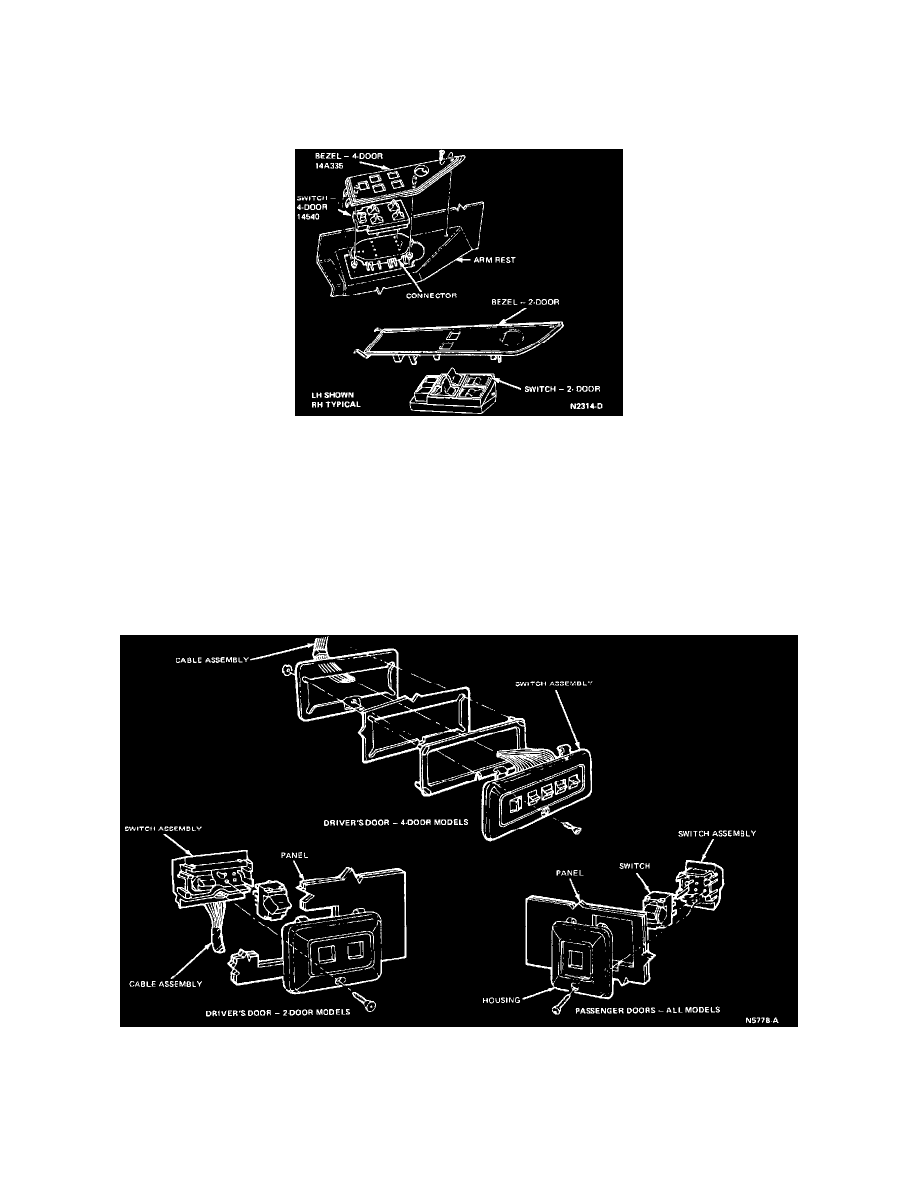
High Series (Low Series shown below)
1. Remove screw from the front end of the bezel and lift bezel and switch away from the armrest.
2. Remove bezel and nut from the mirror remote control, if so equipped.
3. Remove two retaining nuts from the bezel studs and separate the switch from the bezel.
4. Pull the switch from the switch connector.
5. To install, position the switch to the connector and press together firmly.
6. Position the switch to the bezel and install the two retaining nuts.
7. Install the bezel and nut on the outside mirror remote control, if so equipped.
8. Position the switch and bezel to the armrest and install the retaining screw.
Removal and Installation
Low Series
1. Remove the switch housing retaining screw from the bottom side of the switch and housing assembly (Fig. 5).
Pivot the lower edge of the housing out and up to remove the switch and housing assembly.
2. The switch is held in place by the electrical contact pins.
To remove the switch, carefully pry the switch from the connector with a small screwdriver.
3. To install, position switch to connector and press firmly into place.
4. Install the bezel on the door trim panel and install the bezel retaining screw.
