
LTD Crown Victoria V8-351 5.8L VIN G Windsor 2-bbl HP (1982)
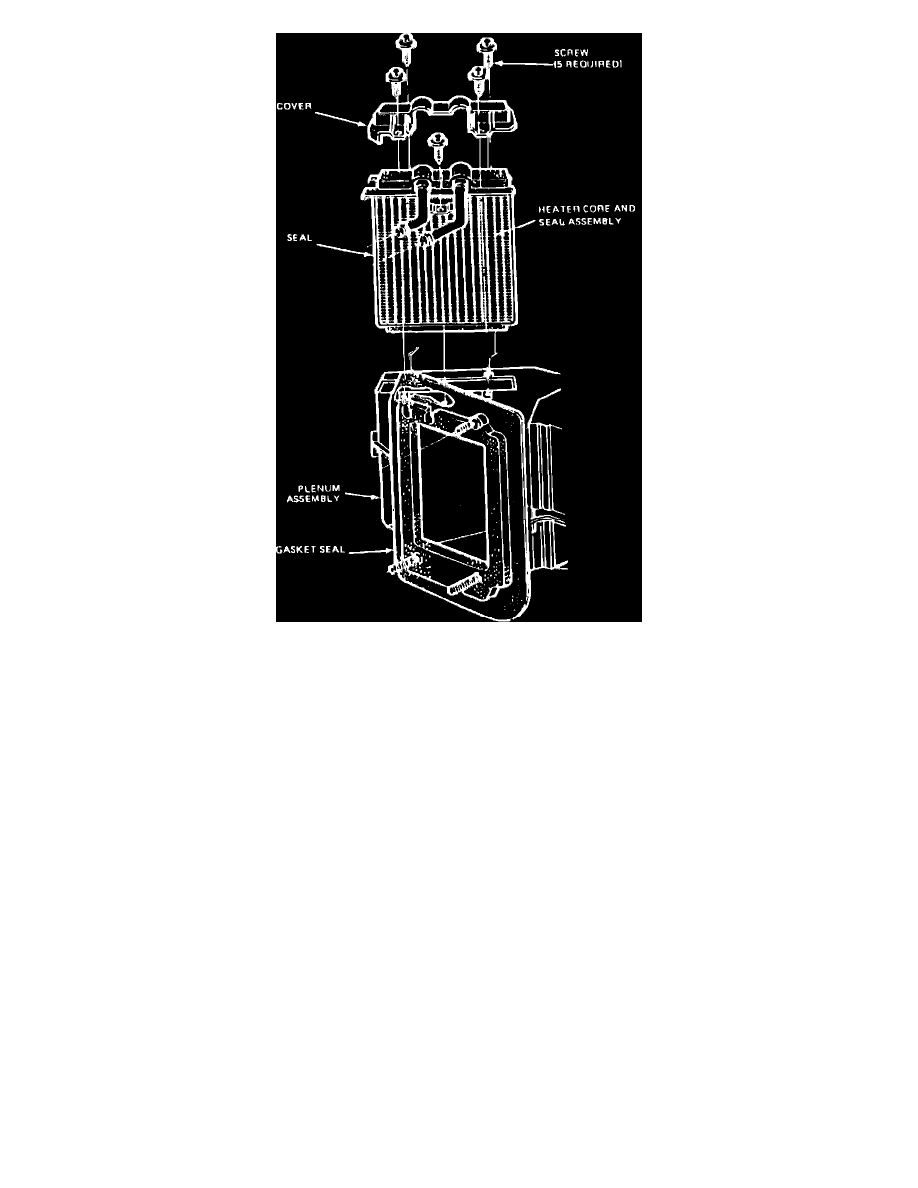
Fig. 5 Typical heater core removal. 1982---88
1982---88
1.
Disconnect battery ground cable, then drain cooling system.
2.
Disconnect heater hoses from heater core. Plug heater hoses and core fittings to prevent coolant spillage.
3.
Remove bolt located below windshield wiper motor, attaching left end of plenum to dash panel.
4.
Remove nut attaching upper lefthand corner of evaporator or heater case to dash panel.
5.
Disconnect vacuum control system supply hose from vacuum source, then push grommet and hose into passenger compartment.
6.
Remove glove box, then loosen right-hand door sill plate and remove side cowl trim panel.
7.
Remove bolt attaching right-hand side of instrument panel to side cowl.
8.
Remove instrument panel pad as follows:
a. Remove two screws from each defroster nozzle opening in pad.
b. From front lower edge of panel pad, remove five attaching screws.
c. From each end of pad, remove one attaching screw.
d. Lift pad assembly from instrument panel.
9.
On models less ATC, disconnect temperature control cable from plenum bracket and blend air door crank.
10.
On models equipped with ATC, disconnect temperature control cable and vacuum harness connector from ATC sensor. Disconnect ATC sensor
tube from sensor and evaporator case connector, then disconnect wire connector from EVE relay.
11.
On all models, remove push clip attaching center duct bracket to plenum, then rotate bracket upward and to the right.