
LTD Crown Victoria V8-351 5.8L VIN G Windsor 2-bbl HP (1982)
combinations.
a.
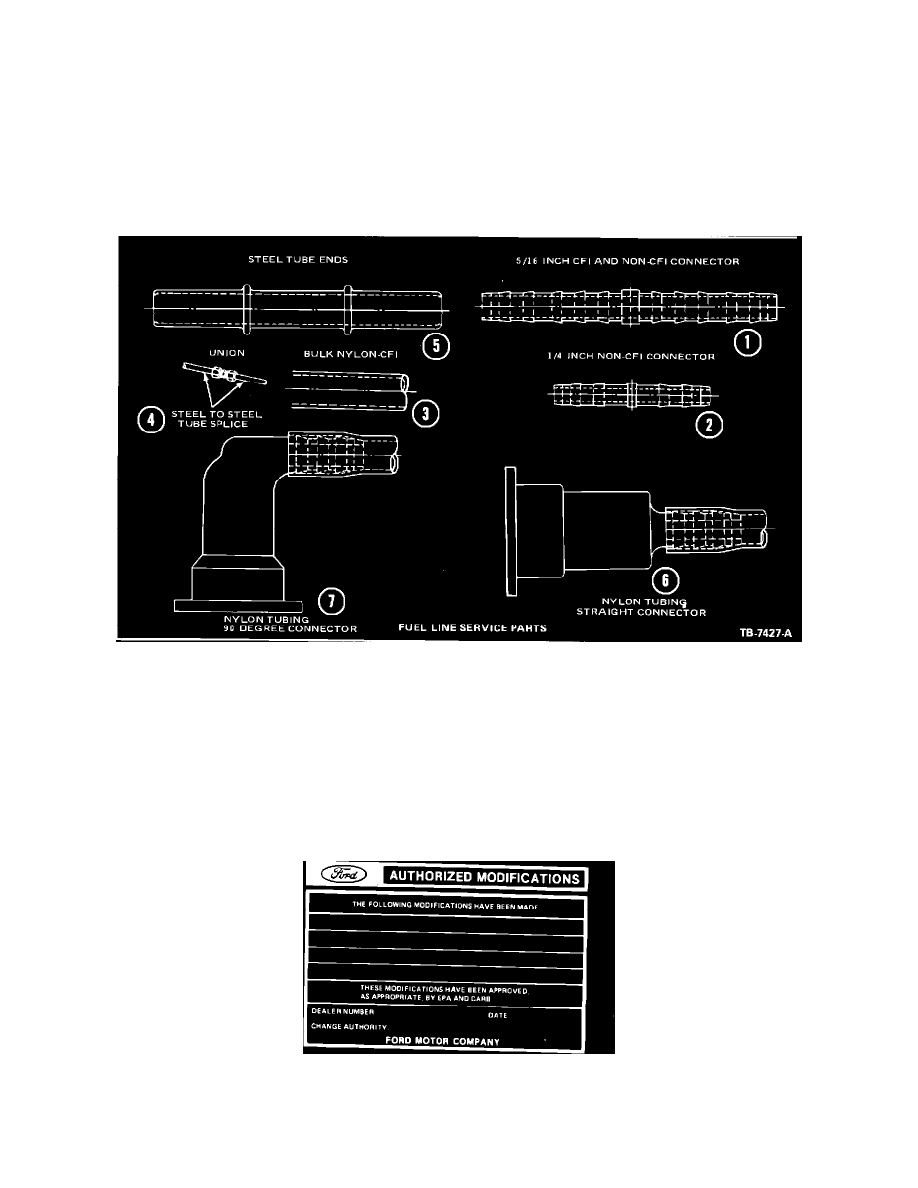
Put two (2) Keystone clamps (part no. 377931) onto the original nylon tubing (loosely) before beginning Step 6.
6.
Complete the splice by connecting the barbed connector to the original nylon. Refer to Figure 6 for the proper barb insertion.
a.
Tighten the clamps in the locations shown in Figure 6.
7.
Connect the new connector assembly to the steel tube end. Pull back on the connection to insure that the fittings have completely engaged and are
locked.
8.
Check that the underbody clips are properly securing the fuel tubes.
9.
Start engine and check for fuel leaks.
Replacing Damaged Steel Push Connect Tube Ends
1.
Relieve fuel system pressure as outlined in the 1983 Car Shop Manual - Powertrain Section 24-50. Read cautionary note prior to relieving
pressurized fuel systems.
FIGURE 5
2.
Using a tube cutter, remove the damaged push connect tube end at a convenient distance from the end.
NOTE:
Allow for adequate room to tighten a union with a wrench at this location.
3.
Choose a proper replacement push connect tube end (Figure 5).
4.
If required, form a new tube end to the same shape as the damaged tube end which was removed.
5.
Select the proper size union (Figure 5) and attach the new steel tube end to the original tube.
6.
Clean off the steel tube end and insert the push connector onto the tube. (A new retainer clip is recommended.) Pull back on the connection to
insure that fittings have completely engaged and are locked.
7.
Check that the underbody clips are properly securing the fuel tubes.
8.
Start engine and check for fuel leaks.
Obtain an Authorized Modifications decal and list the date, dealer number and summary of alterations performed. Select a prominent place adjacent to
the Vehicle Emission Control Information decal suitable for installing the Authorized Modifications decal. Clean the area, install the decal and cover it
with a clear plastic decal shield.
PART NUMBER
PART NAME
CLASS