
LTD Crown Victoria V8-351 5.8L VIN G Windsor 2-bbl HP (1982)
Ignition Rotor: Service and Repair
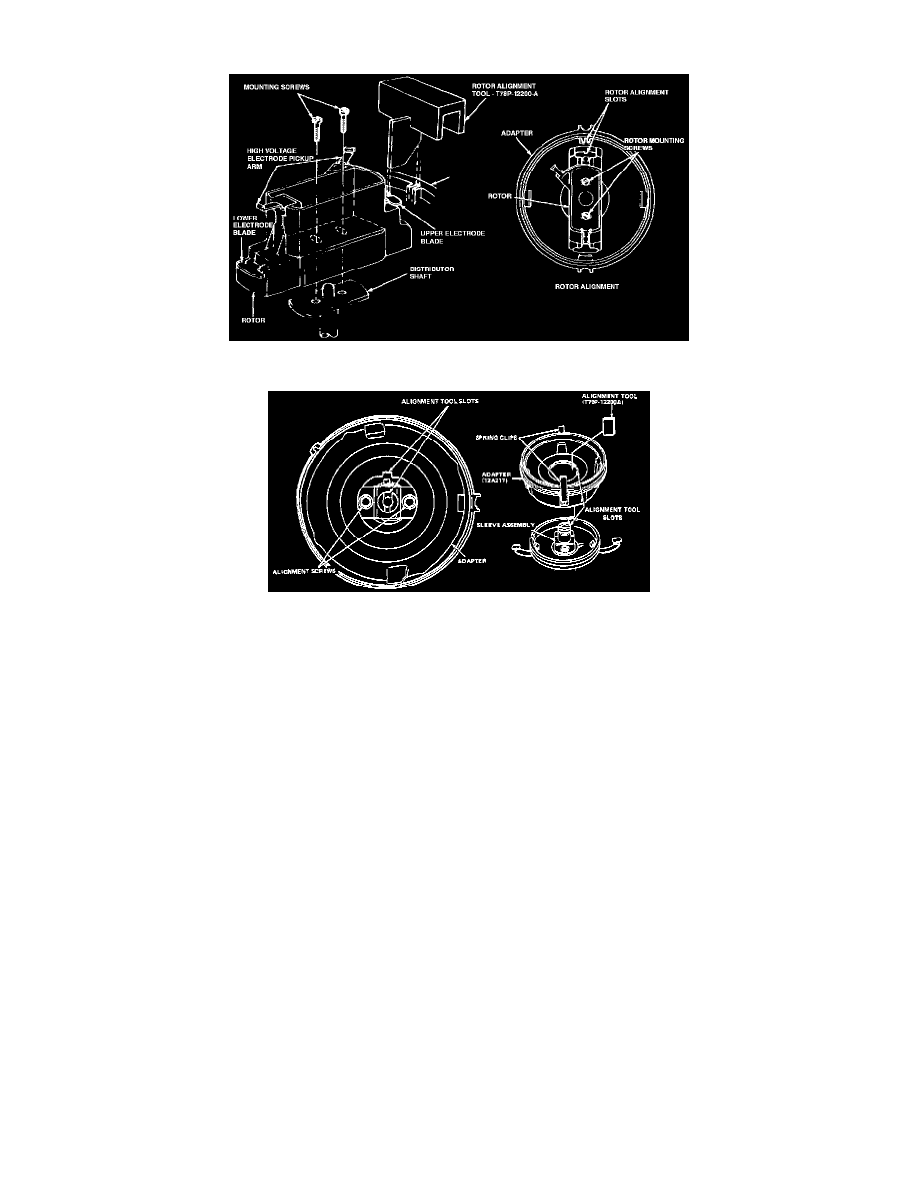
Fig. 1 Distributor Rotor Installation & Alignment
Late 1980-82 Rotor Alignment
1978-8O First Design Units
NOTE:
To obtain maximum timing advance without crossfire to adjacent distributor cap electrodes, proper distributor rotor alignment is necessary using
a rotor alignment tool.
1. Remove distributor cap by loosening the spring clips securing the cap to the adapter.
2. Crank the engine to align the rotor upper blade with the locating slot in the adapter so the distributor rotor alignment tool T7SP-12200-A will drop
into place, Fig. 1.
NOTE: If the rotor or adapter is damaged and alignment is not possible, position the crankshaft with number one piston at top dead center,
compression stroke.
3. Remove rotor alignment tool and the rotor attaching screws.
4. Remove rotor from distributor shaft.
CAUTION: Do not rotate engine after the rotor has been removed.
NOTE: When installing the rotor, coat the lower electrode blades with silicone grease approximately 1/16 inch thick.
5. Install the rotor on distributor shaft with the slot in the upper blade aligned with the locating notch on the adapter. Loosely install the attaching
screws.
6. Install rotor alignment tool in the adapter with the tang on the underside of the tool engaged in the locating notch in the adapter and the slot in the
rotor, Fig. 1.
7. Torque the rotor attaching screws to 15-20 inch lbs.
8. Remove rotor alignment tool and install distributor cap.
NOTE: When installing a new distributor cap, coat the brass center electrode tip with silicone grease.
Late 1979 & 1980-82 Second Design Units