LTD Wagon V8-302 5.0L VIN M 4-bbl HP (1984)

Cabin Temperature Sensor / Switch: Service and Repair
REMOVAL
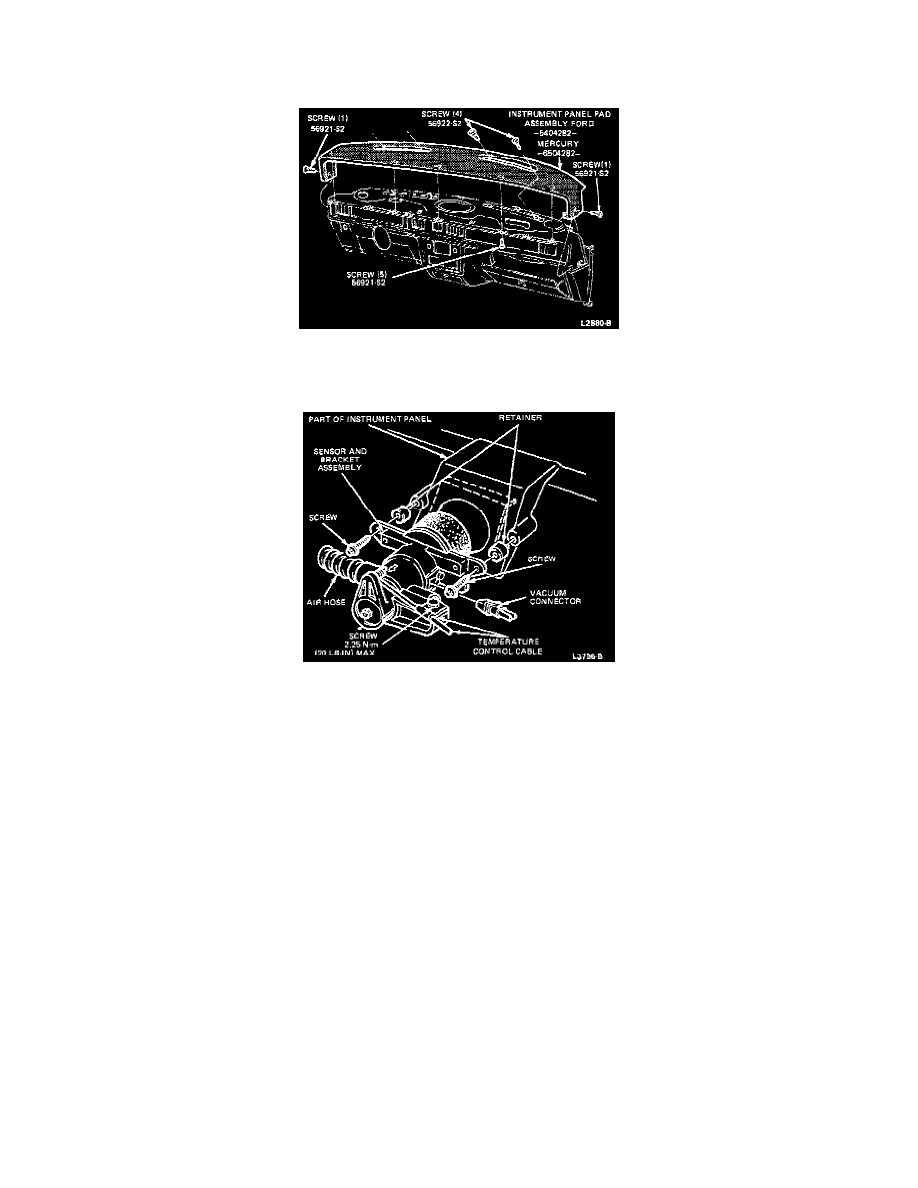
Instrument Panel Pad Removal And Installation
1. Remove the instrument panel pad.
ATC Temperature Sensor
2. Remove the two mounting screws from the sensor assembly.
3. Remove the control cable housing-to-sensor attaching screw.
4. Disconnect the cable end loop from the lever arm and remove the cable from the sensor assembly.
NOTE: Secure the control cable with tape or service wire to prevent it from falling from sight behind the instrument panel.
5. Disconnect the vacuum hose plug from the sensor assembly.
6. Remove the ambient air hose from the end of the sensor assembly by rotating the sensor assembly in a clockwise direction.
7. Remove the sensor assembly from the vehicle.
INSTALLATION
1. Connect the ambient air hose to the sensor by turning it in a counterclockwise direction.
2. Connect the vacuum harness connector to the sensor vacuum ports and ensure the locking tabs are snapped onto the sensor body.
3. Position the sensor assembly to the screw mounting bosses and install the two mounting screws.
NOTE: Use a mirror to help align the sensor screw holes to the mounting bosses. If necessary, position a trouble lamp on the windshield for
additional light. A small amount of body caulk in the end of the rachet socket will help prevent the screws from falling from the socket.
4. Remove the tape or service wire securing the cable and connect the control cable to the lever arm and loosely install the attaching screw.
5. Set the cable calibration.
6. Check the A/C system for proper operation.
7. Install the instrument panel pad.
SENSOR SEAL ASSEMBLY REMOVAL AND INSTALLATION
