| Removal and Installation Removal All Vehicles Right-hand drive vehicles | | -
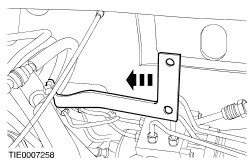
NOTE:Vehicles with air conditioning. Move the air conditioning hose support bracket to one side. | All Vehicles | | -
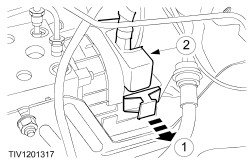
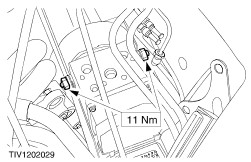
Disconnect the hydraulic control unit electrical connector. - Detach electrical connector clip.
- Disconnect the electrical connector.
| | | -
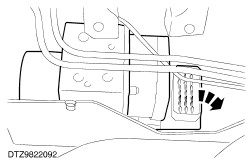
CAUTION:Make a note of the position of the brake tubes to aid installation. Remove the master cylinder brake fluid feed tubes. | | | -
CAUTION:Make a note of the position of the brake tubes to aid installation. Disconnect the hydraulic control unit brake tubes. | Right-hand drive vehicles | | -
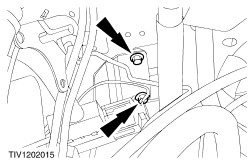
CAUTION:Observe the ground wire behind the lower bolt (where fitted). Remove the hydraulic control unit bracket right-hand side bolts. | | | -
CAUTION:Observe the ground wire behind the lower bolt (where fitted). Remove the hydraulic control unit bracket left-hand side bolts. | | | -
Pull the left-hand end of the bracket forwards as much as possible. | All Vehicles | | -
Remove the hydraulic control unit retaining nut. | | | -
Remove hydraulic control unit to the left, lowering the left-hand end. | Installation All Vehicles | | -
NOTE:On installation of the hydraulic control unit, make sure the brake tubes are fitted in the correct position. Bleed the brake system and prove correct tube connection using the bleeding routine and valve check in FDS2000. For additional information, refer to Section 206-00 Brake System - General Information. To install, reverse the removal procedure. | Right-hand drive vehicles All Vehicles |