| Diagnosis and Testing Inspection and Verification - Verify the customer concern.
- Visually inspect for obvious signs of electrical damage.
Visual Inspection Chart | Electrical | - Fuse(s)
- Bulb(s)
- Switch(es)
- Wiring harness
- Electrical connector(s)
- Generic electronic module (GEM)
| - If an obvious cause for an observed or reported concern is found, correct the cause (if possible) before proceeding to the next step.
- If the cause is not visually evident, verify the symptom and refer to the Symptom Chart.
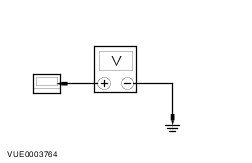
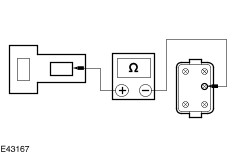
Symptom Chart | Symptom | Possible Sources | Action | | The battery saver does not operate correctly | * Fuse(s). * Circuit * GEM. | * REFER to WDS. | | The interior lamps are inoperative | * Circuit(s). * Battery saver relay. * Central junction box (CJB). | * | | The interior lamps do not turn on with one door open | * Circuit(s) * Interior front lamp. * Interior rear lamp. | * | | * Door ajar switch(es). * GEM | * REFER to WDS. | | The interior front lamp is inoperative | * Circuit(s). * CJB. * Interior front lamp. | * | | The interior rear lamp is inoperative | * Circuit(s). * CJB. * Interior rear lamp. | * | | The demand lighting is inoperative | * Circuit(s). * Interior front lamp. * Interior rear lamp. * Cargo space lamp. | * | | The luggage compartment lamp is inoperative | * Circuit(s). * Battery saver relay. * CJB. * Luggage compartment lamp. * Tailgate/decklid motor. | * | | The cargo space lamp is inoperative | * Circuit(s). * Battery saver relay. * CJB. * Cargo space lamp. * Tailgate/decklid motor. | * | Pinpoint Tests NOTE:Use a digital multimeter for all electrical measurements. | PINPOINT TEST A : THE INTERIOR LAMPS ARE INOPERATIVE | | TEST CONDITIONS | DETAILS/RESULTS/ACTIONS | | A1: BATTERY SAVER RELAY COMPONENT TEST | | | 1 Disconnect Battery Saver Relay K115. | | | 2 CARRY OUT a relay component test. REFER to the wiring diagrams in this section. | | | Is the relay OK? Yes INSTALL a new CJB. TEST the system for normal operation. No INSTALL a new battery saver relay. TEST the system for normal operation. | | PINPOINT TEST B : THE INTERIOR LAMPS DO NOT TURN ON WITH ONE DOOR OPEN | | TEST CONDITIONS | DETAILS/RESULTS/ACTIONS | | B1: CHECK THE OPERATION OF EACH INTERIOR LAMP | | | 1 Switch the interior front lamp and interior rear lamp to the DOOR position. | | | 2 Open the driver side door. | | | Do the interior lamps illuminate? Yes REFER to WDS. No CHECK the drivers side door switch. REFER to WDS. If the interior front lamp is inoperative, GO to B2. If the interior rear lamp is inoperative, GO to B3. If both the interior lamps are inoperative, GO to B4. | | B2: CHECK THE INTERIOR FRONT LAMP TO GEM FOR OPEN | | | 1 Disconnect Interior Front Lamp C424b. | | | 2 Disconnect GEM C427. | | | 3 Measure the resistance between the interior front lamp C424b pin 1, circuit 31S-LC7 (BK/BU), harness side and the GEM C427 pin 3, circuit 31S-LC7A (BK/BU), harness side. | | | Is the resistance less than 5 ohms? Yes INSTALL a new interior front lamp. TEST the system for normal operation. No REPAIR the circuit 31S-LC7 (BK/BU). TEST the system for normal operation. | | B3: CHECK THE INTERIOR REAR LAMP TO GEM FOR OPEN | | | 1 Disconnect Interior Rear Lamp C423. | | | 2 Disconnect GEM C427. | | | 3 Measure the resistance between the interior rear lamp C423 pin 1, circuit 31S-LC17 (BK/YE), harness side and the GEM C427 pin 3, circuit 31S-LC7A (BK/BU), harness side. | | | Is the resistance less than 5 ohms? Yes INSTALL a new interior rear lamp. TEST the system for normal operation. No REPAIR the circuit(s) 31S-LC17 (BK/YE). TEST the system for normal operation. | | B4: CHECK IN-LINE CONNECTOR C64 TO GEM FOR OPEN | | | 1 Disconnect In-Line Connector C64. | | | 2 Disconnect GEM C427. | | | 3 Measure the resistance between the in-line connector C64 pin 6, circuit 31S-LC7 (BK/BU), harness side and the GEM C427 pin 3, circuit 31S-LC7A (BK/BU), harness side | | | Is the resistance less than 5 ohms? Yes INSTALL a new GEM. TEST the system for normal operation. No REPAIR circuit(s) 31S-LC7 (BK/BU). TEST the system for normal operation. | | PINPOINT TEST C : THE INTERIOR FRONT LAMP IS INOPERATIVE | | TEST CONDITIONS | DETAILS/RESULTS/ACTIONS | | C1: CHECK CIRCUIT 29-LB13 (OG/BU) FOR VOLTAGE | | | 1 Disconnect Interior Front Lamp C424a. | | | 2 Measure the voltage between the interior front lamp C424a pin 1, circuit 29-LB13 (OG/BU), harness side and ground. | | | Is the voltage greater than 10 volts? Yes INSTALL a new interior front lamp. TEST the system for normal operation. No REPAIR the circuit. TEST the system for normal operation. | | PINPOINT TEST D : THE INTERIOR REAR LAMP IS INOPERATIVE | | TEST CONDITIONS | DETAILS/RESULTS/ACTIONS | | D1: CHECK CIRCUIT 29-LC17 (OG/YE) FOR VOLTAGE | | | 1 Disconnect Interior Rear Lamp C422. | | | 2 Measure the voltage between the interior rear lamp C422 pin 1, circuit 29-LC17 (OG/YE), harness side and ground. | | | Is the voltage greater than 10 volts? Yes INSTALL a new interior rear lamp. TEST the system for normal operation. No REPAIR the circuit. TEST the system for normal operation. | | PINPOINT TEST E : THE DEMAND LIGHTING IS INOPERATIVE | | TEST CONDITIONS | DETAILS/RESULTS/ACTIONS | | E1: CHECK THE DEMAND LIGHTING OPERATES CORRECTLY | | | 1 Switch the interior front lamp, interior rear lamp and cargo space lamp to the ON position. | | | Does the demand lighting operate on each lamp? Yes DISCONNECT the ground point G200. CLEAN and TIGHTEN the ground point. TEST the system for normal operation. No If the interior front lamp is inoperative, GO to E2. If the interior rear lamp is inoperative, GO to E3. If the cargo space lamp is inoperative, GO to E4. | | E2: CHECK CIRCUIT 31-LB13 (BK) TO GROUND | | | 1 Disconnect Interior Front Lamp C424b. | | | 2 Measure the resistance between the interior front lamp C424b pin 2, circuit 31-LB13 (BK), harness side and ground. | | | Is the resistance less than 5 ohms? Yes INSTALL a new interior front lamp. TEST the system for normal operation. No REPAIR the circuit. TEST the system for normal operation. | | E3: CHECK CIRCUIT 31-LC17 (BK) TO GROUND | | | 1 Disconnect Interior Rear Lamp C423. | | | 2 Measure the resistance between the interior rear lamp C423 pin 2, circuit 31-LC17 (BK), harness side and ground. | | | Is the resistance less than 5 ohms? Yes INSTALL a new interior rear lamp. TEST the system for normal operation. No REPAIR the circuit. TEST the system for normal operation. | | E4: CHECK CIRCUIT 31-LB26 (BK) TO GROUND | | | 1 Disconnect Cargo Space Lamp C477. | | | 2 Measure the resistance between the cargo space lamp C477 pin 2, circuit 31-LB26 (BK), harness side and ground. | | | Is the resistance less than 5 ohms? Yes INSTALL a new cargo space lamp. TEST the system for normal operation. No REPAIR the circuit. TEST the system for normal operation. | | PINPOINT TEST F : THE LUGGAGE COMPARTMENT LAMP IS INOPERATIVE | | TEST CONDITIONS | DETAILS/RESULTS/ACTIONS | | F1: CHECK CIRCUIT 29-LB26 (OG) FOR VOLTAGE | | | 1 Disconnect Luggage Compartment Lamp C477. | | | 2 Measure the voltage between the luggage compartment lamp C477 pin 2, circuit 29-LB26 (OG), harness side and ground. | | | Is the voltage greater than 10 volts? Yes No | | F2: CHECK THE LUGGAGE COMPARTMENT LAMP TO CJB FOR OPEN | | | 1 Disconnect CJB C506. | | | 2 Measure the resistance between the luggage compartment lamp C477 pin 2, circuit 29-LB26 (OG), harness side and the CJB C506 pin 14, circuit 29-LB26 (OG), harness side. | | | Is the resistance less than 5 ohms? Yes INSTALL a new CJB. TEST the system for normal operation. No REPAIR circuit 29-LB26 (OG). TEST the system for normal operation. | | F3: CHECK THE LUGGAGE COMPARTMENT LAMP SWITCH GROUND | | | 1 Open the tailgate/decklid. | | | 2 Measure the resistance between the luggage compartment lamp C477 pin 1, circuit 31S-LB26 (BK/OG), harness side and ground. | | | Is the resistance less than 5 ohms? Yes INSTALL a new luggage compartment lamp. TEST the system for normal operation. No | | F4: CHECK CIRCUIT 31S-LB26 (BK/OG) FOR OPEN | | | 1 Disconnect Tailgate/Decklid Motor C750. | | | 2 Measure the resistance between the luggage compartment lamp C477 pin 1, circuit 31S-LB26 (BK/OG), harness side and the tailgate/decklid motor C750 pin 4, circuit 31S-LB26 (BK/OG), harness side. | | | Is the resistance less than 5 ohms? Yes INSTALL a new tailgate/decklid motor. TEST the system for normal operation. No REPAIR the circuit. TEST the system for normal operation. | | PINPOINT TEST G : THE CARGO SPACE LAMP IS INOPERATIVE | | TEST CONDITIONS | DETAILS/RESULTS/ACTIONS | | G1: CHECK CIRCUIT 29-LB26 (OG) FOR VOLTAGE | | | 1 Disconnect Cargo Space Lamp C474. | | | 2 Measure the voltage between the cargo space lamp C474 pin 1, circuit 29-LB26 (OG), harness side and ground. | | | Is the voltage greater than 10 volts? Yes INSTALL a new cargo space lamp. TEST the system for normal operation. No REPAIR the circuit 29-LB26 (OG). TEST the system for normal operation. | |