| Removal and Installation Removal All vehicles | | -
Remove the floor console. For additional information, refer to Floor Console in this section. | Vehicles built up to 06/2003 | | -
Disconnect the liftgate or luggage compartment lid release switch electrical connector. | | | -
Disconnect the heated seats electrical connectors. | | | -
Remove the heater control trim panel. - Disconnect the clock electrical connector.
| All vehicles | | -
Remove the driver side footwell trim panel (if equipped). | | | -
Remove the passenger side footwell trim panel. | | | -
Detach the damper from the glove compartment. - Open the glove compartment to access the damper.
- Push the top of the damper away from the glove compartment.
| | | -
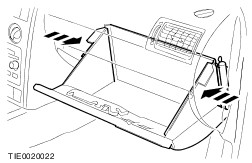
Fully open the glove compartment. - Press the sides of the glove compartment towards the center to release the glove compartment stops.
| | | -
Disconnect the auxiliary power electrical connector (if equipped). | | | -
Remove the glove compartment. | | | -
Detach the glove compartment latch from the instrument panel. | | | -
Detach the glove compartment lamp and remove the glove compartment latch. | | | -
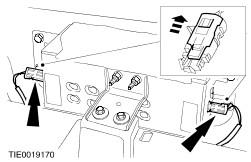
Detach the glove compartment lamp switch electrical connector from the instrument panel. | | | -
Detach the driver and passenger footwell lamps from the instrument panel (if equipped). | | | -
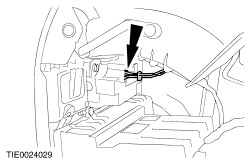
Detach the data link connector (DLC) from the instrument panel (left-hand drive shown). | | | -
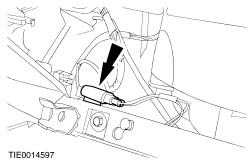
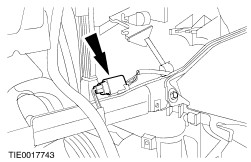
Detach the internal temperature sensor from the instrument panel (if equipped). | | | -
Disconnect the passenger air bag module electrical connectors. | | | -
CAUTION:The passenger air bag module retaining bolts must only be used three times. NOTE:After removal, stamp the passenger air bag module retaining bolts with a center punch to indicate usage. Detach the passenger air bag module from the cross-vehicle beam. | | | -
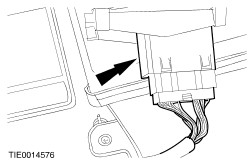
Disconnect the instrument cluster electrical connector. - Release the locking tang.
- Disconnect the electrical connector.
| | | -
Disconnect the instrument cluster lamp electrical connector. | | | -
Remove the keyless entry antenna (if equipped. - Detach the windshield register from the instrument panel.
- Disconnect the keyless entry antenna electrical connector.
| | | -
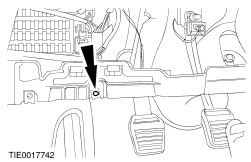
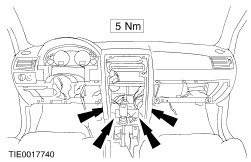
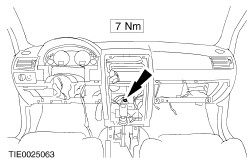
Remove the instrument panel support bracket retaining screws. | | | -
Remove the instrument panel support bracket retaining nut. | | | -
Detach the instrument panel from the cross-vehicle beam. | | | -
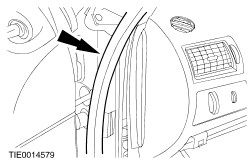
Detach the weatherstrips from the A-pillar on both sides (left-hand side shown). | | | -
Remove the instrument panel side trim panel on both sides (left-hand side shown) | | | -
Remove the instrument panel side retaining bolts on both sides (left-hand side shown). | | | -
CAUTION:The instrument cluster must be kept upright to avoid silicone liquid leaking from the gauges. Remove the instrument panel. | Vehicles with automatic transaxle | | -
Move the selector lever to the "P" (PARK) position. | Installation | | -
To install, reverse the removal procedure. | |