| Diagnosis and Testing Refer to Wiring Diagrams Section 501-16, for schematic and connector information. Special Tool(s) | | Terminal Probe Kit 29-011A | Inspection and Checking NOTE:The generic electronic module (GEM) forms part of the central junction box (CJB). NOTE:If the generic electronic module (GEM) is changed, the new one must be reconfigured. For this purpose, the vehicle-specific data is read out of the module to be replaced using WDS and is transferred to the new module. REFER to: Kommunikations-Netzwerk (418-00, Diagnosis and Testing), Zentralelektrikmodul (GEM) (419-10, Diagnosis and Testing). NOTE:Before reading out the vehicle-specific data, remake all the electrical connections which were separated in the vehicle, so that communication between the module and WDS is ensured. - Verify the customer concern.
- Visually check the following electrical or mechanical causes for the concern.
Visual Inspection | Mechanical | Electrical | - Wiper blade(s)
- Wiper arm pivot shaft
- Washer reservoir
- Hose(s)
- Nozzles
- Check that the windshield wiper blade on the passenger side is wiping the windshield clean in the area of the rain sensor.
- Check the adhesive pad between the rain sensor and the windshield for trapped air.
- Clean wax residues from the windshield in the vicinity of the rain sensor.
- Check the windshield for damage/cracks in the vicinity of the rain sensor.
- Check that the rain sensor retaining frame is correctly attached to the windshield.
| - Fuse(s)
- Wiring harness
- Connectors
- Washer pump(s)
- Wiper motor(s)
| - Resolve any obvious causes or concerns found during the visual inspection before carrying out any further tests.
- If the concern is not visually evident, refer to the Symptom Chart.
Symptom Chart Symptom Chart | Symptom | Possible Sources | Action | | Front and rear wipers are inoperative | * Fuse * Circuit * Wash/wipe system switch * Central junction box (CJB) | * | | Front wipers are inoperative (washer system OK) | * Circuit(s) * Front wiper motor | * LOCATE and RECTIFY the break in the circuit between the front wiper motor and soldered connection S317 using the Wiring Diagrams. CHECK the operation of the system. If the concern persists, RENEW the front wiper motor. CHECK the operation of the system. | | Slow wipe speed is inoperative | * Circuit(s) * Wash/wipe system switch * Front wiper motor | * | | Slow windshield wipe inoperative (intermittent mode OK) | * Wash/wipe system switch | * RENEW the wash/wipe system switch. CHECK the operation of the system. | | Fast wipe speed inoperative (intermittent mode OK) | * Circuit(s) * Wash/wipe system switch * Front wiper motor | * | | Windshield wiper runs continuously | * Circuit(s) * Windshield wiper relay * Wash/wipe system switch * Front wiper motor * Central junction box (CJB) * Generic electronic module (GEM) * Rain sensor module | * | | Intermittent / automatic wipe mode not operating properly (slow and fast wipe speed OK) | * Circuit(s) * Windshield wiper relay * Wash/wipe system switch * Generic electronic module (GEM) * Central junction box (CJB) * Rain sensor module * Rain sensor | * | | The windshield wiper does not return to the park position after being switched off | * Circuit(s) * Windshield wiper relay * Wash/wipe system switch * Front wiper motor * Central junction box (CJB) * Rain sensor module | * | | Windshield wipers inoperative when washer system is actuated | * Circuit(s) * Generic electronic module (GEM) | * REFER to: Zentralelektrikmodul (GEM) (419-10, Diagnosis and Testing). | | Washer pump inoperative | * Circuit(s) * Washer pump motor, front and rear * Wash/wipe system switch | * | | Windshield washer pump operates continuously | * Wash/wipe system switch | * RENEW the wash/wipe system switch. CHECK the operation of the system. | | Rear window wiper inoperative | * Fuse * Circuit(s) * Rear wiper relay * Rear wiper motor * Generic electronic module (GEM) * Wash/wipe system switch * Central junction box (CJB) | * | | Rear window wiper is permanently on | * Circuit(s) * Rear wiper relay * Rear wiper motor * Wash/wipe system switch * Generic electronic module (GEM) * Central junction box (CJB) | * | | The rear window wiper does not return to the park position after being switched off | * Circuit(s) * Rear wiper motor * Central junction box (CJB) | * | | Rear wiper inoperative when washer system is actuated | * Circuit(s) * Generic electronic module (GEM) | * REFER to: Zentralelektrikmodul (GEM) (419-10, Diagnosis and Testing). | | Headlamp washer system inoperative | * Fuse * Circuit(s) * Headlamp cleaning system relay * Headlamp washer pump * Central junction box (CJB) * Battery junction box (BJB) | * | | Headlamp washer pump operates continuously | * Headlamp cleaning system relay | * RENEW the headlamp cleaning system relay. CHECK the operation of the system. | | Windshield washer nozzle heater is inoperative | * Circuit(s) * Windshield washer nozzle heater | * | System Checks NOTE:Use a digital multimeter for all electrical measurements. | PINPOINT TEST A : FRONT AND REAR WIPERS ARE INOPERATIVE | | TEST CONDITIONS | DETAILS/RESULTS/ACTIONS | | A1: CHECK FUSE F94 (20 A) (CJB). | | | 1 Ignition switch in position 0. | | | 2 Disconnect Fuse F94 (20 A) (CJB). | | | 3 CHECK fuse F94 (20 A) (CJB). | | | Is the fuse OK.? Yes No RENEW fuse F94 (20 A) (CJB). If the fuse blows again, LOCATE and RECTIFY the short to ground using the Wiring Diagrams. CHECK the operation of the system. | | A2: CHECK THE VOLTAGE SUPPLY TO FUSE F94 (20 A) (CJB) FOR OPEN CIRCUIT | | | 1 Connect Fuse F94 (20 A) (CJB). | | | 2 Ignition switch in position II. | | | 3 Measure voltage between fuse F94 (20 A) (CJB) and ground. | | | Does the meter display battery voltage? Yes No RENEW the CJB. CHECK the operation of the system. | | A3: CHECK THE VOLTAGE SUPPLY TO THE WASH/WIPE SYSTEM SWITCH FOR OPEN CIRCUIT | | | 1 Ignition switch in position 0. | | | 2 Disconnect wash/wipe system switch from connector C530. | | | 3 Ignition switch in position II. | | | 4 Measure voltage between wiper/washer switch, connector C530, pin 6, circuit 15-KA19 (GN/OG), wiring harness side and ground. | | | Is battery voltage measured? Yes RENEW the wash/wipe system switch. CHECK the operation of the system. No | | A4: CHECK CIRCUIT 15-KA19 (GN/OG) FOR OPEN CIRCUIT | | | 1 Ignition switch in position 0. | | | 2 Disconnect CJB from connector C500. | | | 3 Measure resistance between CJB, connector C500, pin 10, circuit 15-KA19 (GN/OG), wiring harness side and wiper/washer switch, connector C530, pin 6, circuit 15-KA19 (GN/OG), wiring harness side. | | | Is a resistance of less than 2 Ohms registered? Yes RENEW the CJB. CHECK the operation of the system. No LOCATE and RECTIFY the break in the circuit between the CJB and the wash/wipe system switch using the Wiring Diagrams. CHECK the operation of the system. | | PINPOINT TEST B : SLOW WIPE SPEED IS INOPERATIVE | | TEST CONDITIONS | DETAILS/RESULTS/ACTIONS | | B1: CHECK THE WASH/WIPE SYSTEM SWITCH | | | 1 Ignition switch in position 0. | | | 2 Disconnect wash/wipe system switch from connector C530. | | | 3 Connect a fused jumper wire (20 A) to the wash/wipe system switch, connector C530, pin 6, circuit 15-KA19 (GN/OG) and pin 9, circuit 32-KA10 (WH/GN), wiring harness side. | | | 4 Ignition switch in position II. | | | Does the front wiper motor run at slow wipe speed? Yes RENEW the wash/wipe system switch. CHECK the operation of the system. No | | B2: CHECK THE FRONT WIPER MOTOR | NOTE:The fused jumper wire used in the previous test step is still connected to the wash/wipe system switch. | | | 1 Ignition switch in position 0. | | | 2 Disconnect Front wiper motor from connector C144. | | | 3 Ignition switch in position II. | | | 4 Measure the voltage between the front wiper motor, connector C144, pin 2, circuit 32-KA10 (WH/GN), wiring harness side and ground. | | | Does the meter display battery voltage? Yes RENEW the front wiper motor. CHECK the operation of the system. No LOCATE and RECTIFY the break in the circuit between the wash/wipe system switch and the front wiper motor using the Wiring Diagrams. CHECK the operation of the system. | | PINPOINT TEST C : FAST WIPE SPEED IS INOPERATIVE | | TEST CONDITIONS | DETAILS/RESULTS/ACTIONS | | C1: CHECK THE WASH/WIPE SYSTEM SWITCH | | | 1 Ignition switch in position 0. | | | 2 Disconnect wash/wipe system switch from connector C530. | | | 3 Connect a fused jumper wire (20 A) to the wash/wipe system switch, connector C530, pin 6, circuit 15-KA19 (GN/OG) and pin 8, circuit 32-KA11 (WH/BK), wiring harness side. | | | 4 Ignition switch in position II. | | | Does the front wiper motor run at fast wipe speed? Yes RENEW the wash/wipe system switch. CHECK the operation of the system. No | | C2: CHECK THE FRONT WIPER MOTOR | NOTE:The fused jumper wire used in the previous test step is still connected to the wash/wipe system switch. | | | 1 Ignition switch in position 0. | | | 2 Disconnect Front wiper motor from connector C144. | | | 3 Ignition switch in position II. | | | 4 Measure the voltage between the front wiper motor, connector C144, pin 1, circuit 32-KA11 (WH/BK), wiring harness side and ground. | | | Is battery voltage measured? Yes RENEW the front wiper motor. CHECK the operation of the system. No LOCATE and RECTIFY the break in the circuit between the wash/wipe system switch and the front wiper motor using the Wiring Diagrams. CHECK the operation of the system. | | PINPOINT TEST D : WINDSHIELD WIPER RUNS CONTINUOUSLY | | TEST CONDITIONS | DETAILS/RESULTS/ACTIONS | | D1: DETERMINE THE WINDSHIELD WIPER OPERATING SPEED | NOTE:The front wipers are SWITCHED OFF | | | 1 Ignition switch in position II. | | | 2 Check the wipers. | | | Does the front wiper motor run continuously at fast wipe speed? Yes No - Vehicles without rain sensor: GO to D6. | | D2: CHECK THE WASH/WIPE SYSTEM SWITCH | | | 1 Ignition switch in position 0. | | | 2 Disconnect wash/wipe system switch from connector C530. | | | 3 Ignition switch in position II. | | | 4 Check the wipers. | | | Does the front wiper motor run continuously at fast wipe speed? Yes - Vehicles without rain sensor: GO to D3. No RENEW the wash/wipe system switch. CHECK the operation of the system. | | D3: CHECK CIRCUIT 32-KA11 (WH/BK) FOR SHORT TO BATTERY VOLTAGE | | | 1 Ignition switch in position 0. | | | 2 Disconnect Front wiper motor from connector C144. | | | 3 Ignition switch in position II. | | | 4 Measure the voltage between the front wiper motor, connector C144, pin 1, circuit 32-KA11 (WH/BK), wiring harness side and ground. | | | Is battery voltage measured? Yes LOCATE and RECTIFY the short to battery voltage in the circuit between the wash/wipe system switch and the front wiper motor using the Wiring Diagrams. CHECK the operation of the system. No RENEW the front wiper motor. CHECK the operation of the system. | | D4: CHECK THE RAIN SENSOR MODULE | | | 1 Ignition switch in position 0. | | | 2 Disconnect Fuse F21 (15 A) (BJB). | | | 3 Disconnect Fuse F88 (15 A) (CJB). | | | 4 Disconnect Fuse F94 (7.5 A) (CJB). | | | 5 Ignition switch in position II. | | | 6 Check the wipers. | | | Does the front wiper motor run continuously at fast wipe speed? Yes No RENEW the rain sensor module. CHECK the operation of the system. | | D5: CHECK CIRCUIT 32-KA11(A)/(B) (WH/BK) FOR SHORT TO BATTERY VOLTAGE | | | 1 Ignition switch in position 0. | | | 2 Disconnect Front wiper motor from connector C144. | | | 3 Ignition switch in position II. | | | 4 Measure the voltage between the front wiper motor, connector C144, pin 1, circuit 32-KA11 (WH/BK), wiring harness side and ground. | | | Is battery voltage measured? Yes LOCATE and RECTIFY short to battery voltage in the circuits connected to the front wiper motor, connector C144, pin 1 using the Wiring Diagrams. CHECK the operation of the system. No RENEW the front wiper motor. CHECK the operation of the system. | | D6: CHECK THE FRONT WIPER MOTOR | | | 1 Ignition switch in position 0. | | | 2 Disconnect windshield wiper relay from socket C917. | | | 3 Ignition switch in position II. | | | 4 Measure the voltage between the windshield wiper relay, socket C917, pin 4, CJB side and ground. | | | Is battery voltage measured? Yes RENEW the front wiper motor. CHECK the operation of the system. No | | D7: CHECK CENTRAL JUNCTION BOX (CJB) FOR SHORT TO GROUND | | | 1 Ignition switch in position 0. | | | 2 Disconnect CJB from connector C501. | | | 3 Measure the resistance between the windshield wiper relay, socket C917, pin 1, CJB side and ground. | | | Is the resistance greater than 10,000 Ohms? Yes No RENEW the CJB. CHECK the operation of the system. | | D8: CHECK CONTROL CIRCUIT OF WINDSHIELD WIPER RELAY FOR SHORT TO GROUND | | | 1 Disconnect Generic electronic module (GEM) from connector C430. | | | 2 Measure resistance between CJB, connector C501, pin 12, circuit 31S-KA14 (BK/GN), wiring harness side and ground. | | | Is the resistance greater than 10,000 Ohms? Yes No LOCATE AND RECTIFY the short to ground in the circuit between the CJB and the generic electronic module (GEM) using the Wiring Diagrams. CHECK the operation of the system. | | D9: CHECK THE WINDSHIELD WIPER RELAY | | | 1 Connect Wiper / washer switch to connector C530. | | | 2 Connect Relay, windshield wiper to socket C917. | | | 3 Ignition switch in position II. | | | 4 Check the wipers. | | | Does the front wiper motor run continuously at slow wipe speed? Yes RENEW the windshield wiper relay. CHECK the operation of the system. No RENEW the generic electronic module (GEM). CHECK the operation of the system. | | D10: NARROW DOWN THE FAULT CONDITION | | | 1 Ignition switch in position 0. | | | 2 Disconnect wash/wipe system switch from connector C530. | | | 3 Ignition switch in position II. | | | 4 Check the wipers. | | | Does the front wiper motor run continuously at slow wipe speed? Yes No | | D11: CHECK THE RAIN SENSOR MODULE | | | 1 Ignition switch in position 0. | | | 2 Disconnect Fuse F21 (15 A) (BJB). | | | 3 Disconnect Fuse F88 (15 A) (CJB). | | | 4 Disconnect Fuse F94 (7.5 A) (CJB). | | | 5 Ignition switch in position II. | | | 6 Measure voltage between wiper/washer switch, connector C530, pin 7, circuit 32-KA10A (WH/BK), wiring harness side and ground. | | | Is battery voltage measured? Yes LOCATE and RECTIFY the short to battery voltage in the circuit between the rain sensor module and the wash/wipe system switch using the Wiring Diagrams. CHECK the operation of the system. No RENEW the rain sensor module. CHECK the operation of the system. | | D12: CHECK CIRCUIT 32-KA10 (WH/GN) FOR SHORT TO BATTERY VOLTAGE | | | 1 Ignition switch in position 0. | | | 2 Disconnect Front wiper motor from connector C144. | | | 3 Ignition switch in position II. | | | 4 Measure voltage between wiper/washer switch, connector C530, pin 9, circuit 32-KA10 (WH/GN), wiring harness side and ground. | | | Is battery voltage measured? Yes LOCATE and RECTIFY the short to battery voltage in the circuit between the wash/wipe system switch and the front wiper motor using the Wiring Diagrams. CHECK the operation of the system. No | | D13: CHECK THE FRONT WIPER MOTOR | | | 1 Ignition switch in position 0. | | | 2 Connect Wiper / washer switch to connector C530. | | | 3 Ignition switch in position II. | | | 4 Measure the voltage between the front wiper motor, connector C144, pin 2, circuit 32-KA10 (WH/GN), wiring harness side and ground. | | | Is battery voltage measured? Yes RENEW the front wash/wipe system switch. CHECK the operation of the system. No RENEW the front wiper motor. CHECK the operation of the system. | | PINPOINT TEST E : INTERMITTENT / AUTOMATIC WIPE MODE NOT OPERATING PROPERLY (SLOW AND FAST WIPE SPEED OK) | | TEST CONDITIONS | DETAILS/RESULTS/ACTIONS | | E1: DETERMINE THE FAULT CONDITION | | | 1 Ignition switch in position II. | | | 2 SWITCH ON slow wipe speed. | | | 3 SWITCH OFF slow wipe speed. | | | Does the windshield wiper return to the park position? Yes No | | E2: CHECK THE EQUIPMENT LEVEL OF THE VEHICLE | | | 1 Check the equipment level of the vehicle | | | Is the vehicle equipped with a rain sensor? Yes No | | E3: CHECK THE GENERIC ELECTRONIC MODULE (GEM). | | | 1 Check central locking system. | | | Is the central locking system operative? Yes No | | E4: READ OUT THE FAULT MEMORY | | | 1 Connect the diagnostic tool. | | | 2 Check the GEM using WDS. | | | Are any trouble codes (DTCs) displayed? Yes RECTIFY the faults according to the WDS instructions. CLEAR the fault memory and CHECK the operation of the system. No | | E5: CHECK THE VOLTAGE AT THE WINDSHIELD WIPER RELAY (PIN 2) | | | 1 Ignition switch in position 0. | | | 2 Disconnect windshield wiper relay from socket C917. | | | 3 Ignition switch in position II. | | | 4 Measure the voltage between the windshield wiper relay, socket C917, pin 2, CJB side and ground. | | | Is battery voltage measured? Yes No RENEW the CJB. CHECK the operation of the system. | | E6: CHECK THE VOLTAGE AT THE WINDSHIELD WIPER RELAY (PIN 5) | | | 1 Measure the voltage between the windshield wiper relay, socket C917, pin 5, CJB side and ground. | | | Is battery voltage measured? Yes No RENEW the CJB. CHECK the operation of the system. | | E7: CHECK CONTROL CIRCUIT OF WINDSHIELD WIPER RELAY FOR SHORT TO BATTERY VOLTAGE | | | 1 Measure the voltage between the windshield wiper relay, socket C917, pin 1, CJB side and ground. | | | Is battery voltage measured? Yes LOCATE AND RECTIFY the short to battery voltage in the circuit between the windshield wiper relay and the generic electronic module (GEM) using the Wiring Diagrams. If necessary RENEW the CJB. CHECK the operation of the system. No | | E8: CHECK CIRCUIT 32-KA39 (WH/BK) FOR OPEN CIRCUIT | | | 1 Ignition switch in position 0. | | | 2 Disconnect Generic electronic module (GEM) from connector C426. | | | 3 Measure the resistance between the windshield wiper relay, socket C917, pin 4, CJB side and the GEM, connector C426, pin 2, circuit 32-KA39 (WH/BK), wiring harness side. | | | Is a resistance of less than 2 Ohms registered? Yes No LOCATE and RECTIFY the break in the circuit between the windshield wiper relay and the GEM using the Wiring Diagrams. CHECK the operation of the system. | | E9: CHECK THE WINDSHIELD WIPER RELAY | | | 1 Check the windshield wiper relay according to the component tests at the end of this subsection: - Test the windshield wiper relay socket C917 at pins 1, 2, 3, 4 and 5.
| | | Is the relay OK? Yes No RENEW the windshield wiper relay. CHECK the operation of the system. | | E10: CHECK THE WASH/WIPE SYSTEM SWITCH | | | 1 Disconnect wash/wipe system switch from connector C530. | | | 2 Check the wiper washer switch according to the component tests at the end of this subsection: - Test the washer / wiper switch connector C530 at pins 1, 6, 7, 9 and 10.
| | | Is the switch OK? Yes No RENEW the wash/wipe system switch. CHECK the operation of the system. | | E11: CHECK CONTROL CIRCUIT OF WINDSHIELD WIPER RELAY FOR OPEN CIRCUIT | | | 1 Measure resistance between windshield wiper relay socket C917, pin 1, CJB side and GEM, connector C430, pin 21, circuit 31S-KA14 (BK/GN), wiring harness side. | | | Is a resistance of less than 2 Ohms registered? Yes - Intermittent mode inoperative: LOCATE and RECTIFY the break in circuit 8-KA19 (WH/BK) between the wash/wipe system switch, connector C530, pin 10 and the GEM, connector C429, pin 4 using the Wiring Diagrams. CHECK the operation of the system. - Intermittent speed cannot be controlled (potentiometer): LOCATE and RECTIFY the break in circuit 8-KA18 (WH) between the wash/wipe system switch, connector C530, pin 1 and the GEM, connector C430, pin 4 using the Wiring Diagrams. CHECK the operation of the system. No LOCATE and RECTIFY the break in the circuit between the windshield wiper relay and the GEM using the Wiring Diagrams. If necessary RENEW the CJB. CHECK the operation of the system. | | E12: DETERMINE THE FAULT CONDITION | | | 1 SWITCH ON automatic mode at the wash/wipe system switch. | | | Does the front wiper motor perform a wipe cycle every six seconds? Yes No - Auto function sensitivity cannot be ADJUSTED: Vehicles from MY 2005: GO to E13. | | E13: CHECK THE WASH/WIPE SYSTEM SWITCH | | | 1 Ignition switch in position 0. | | | 2 Disconnect wash/wipe system switch from connector C530. | | | 3 CHECK the wash/wipe system switch according to the component check at the end of this section. - Perform check on wash/wipe system switch, connector C530 at pins 1 and 10.
| | | Is the wash/wipe system switch OK? Yes No RENEW the wash/wipe system switch. CHECK the operation of the system. | | E14: CHECK CIRCUIT 8-KA18 (WH) FOR OPEN CIRCUIT | | | 1 Disconnect Rain sensor module from connector C536. | | | 2 Measure the resistance between the rain sensor module, connector C536, pin 7, circuit 8-KA18 (WH), wiring harness side and the wash/wipe system switch, connector C530, pin 1, circuit 8-KA18 (WH), wiring harness side. | | | Is a resistance of less than 2 Ohms registered? Yes RENEW the rain sensor module. CHECK the operation of the system. No LOCATE and RECTIFY the break in the circuit between the rain sensor module and the wash/wipe system switch using the Wiring Diagrams. CHECK the operation of the system. | | E15: CHECK THE WASH/WIPE SYSTEM SWITCH | NOTE:Wet the windshield several times with a small amount of water in the vicinity of the rain sensor, in order to check whether the front wiper motor runs at slow wipe speed. | NOTE:Wet the windshield several times with a large amount of water in the vicinity of the rain sensor, in order to check whether the front wiper motor runs at fast wipe speed. | | | 1 Ignition switch in position 0. | | | 2 Disconnect Wash/wipe system switch from connector C530. | | | 3 Fused jumper wire (20 A) at the wash/wipe system switch: - Connector C530, pin 6, circuit 15-KA19 (GN/OG) and pin 10, circuit 8-KA19 (WH/BK), wiring harness side.
- Connector C530, pin 7, circuit 32-KA10A (WH/GN) and pin 9, circuit 32-KA10 (WH/GN), wiring harness side.
| | | 4 Ignition switch in position II. | | | Does the front wiper motor always run when the windshield is coated with water? Yes RENEW the wash/wipe system switch. CHECK the operation of the system. No - Front wiper motor is not running: GO to E16. - The front wiper motor does not run at slow wipe speed: GO to E19. - The front wiper motor does not run at fast wipe speed: GO to E20. | | E16: CHECK CIRCUIT 8-KA19 (WH/BK) FOR OPEN CIRCUIT | | | 1 Disconnect Rain sensor module from connector C536. | | | 2 Vehicles built up to 04/2005 | | | 3 Measure the resistance between the rain sensor module, connector C536, pin 10, circuit 8-KA19 (WH/BK), wiring harness side and the wash/wipe system switch, connector C530, pin 10, circuit 8-KA19 (WH/BK), wiring harness side. | | | 4 Vehicles built from 04/2005 | | | 5 Measure the resistance between the rain sensor module, connector C536, pin 10, circuit 8-KA19 (WH/BK), wiring harness side and the wash/wipe system switch, connector C530, pin 10, circuit 8-KA19 (WH/BK), wiring harness side. | | | Is a resistance of less than 2 Ohms registered? Yes No LOCATE and RECTIFY the break in the circuit between the rain sensor module and the wash/wipe system switch using the Wiring Diagrams. CHECK the operation of the system. | | E17: CHECK THE VOLTAGE SUPPLY TO THE RAIN SENSOR MODULE FOR OPEN CIRCUIT | | | 1 Ignition switch in position II. | | | 2 Vehicles built up to 04/2005 | | | 3 Measure the voltage between the rain sensor module, connector C536, pin 12, circuit 15-KA9B (GN/RD), wiring harness side and ground. | | | 4 Vehicles built from 04/2005 | | | 5 Measure the voltage between the rain sensor module, connector C536, pin 12, circuit 15-KA9B (GN/RD), wiring harness side and ground. | | | Is battery voltage measured? Yes No LOCATE and RECTIFY the break in the circuit between the rain sensor module and soldered connection S349 using the Wiring Diagrams. CHECK the operation of the system. | | E18: CHECK THE GROUND CONNECTION OF THE RAIN SENSOR MODULE FOR OPEN CIRCUIT | | | 1 Ignition switch in position 0. | | | 2 Vehicles built up to 04/2005 | | | 3 Measure the resistance between the rain sensor module, connector C536, pin 5, circuit 31-KA41 (BK), wiring harness side and ground. | | | 4 Vehicles built from 04/2005 | | | 5 Measure the resistance between the rain sensor module, connector C536, pin 5, circuit 31-KA41 (BK), wiring harness side and ground. | | | Is a resistance of less than 2 Ohms registered? Yes RENEW the rain sensor module. CHECK the operation of the system. No LOCATE AND RECTIFY the break in the circuit between the rain sensor module and ground connection G204 using the Wiring Diagrams. CHECK the operation of the system. | | E19: CHECK CIRCUIT 32-KA10A (WH/GN) FOR OPEN CIRCUIT | | | 1 Ignition switch in position 0. | | | 2 Disconnect Rain sensor module from connector C536. | | | 3 Vehicles built up to 04/2005 | | | 4 Measure the resistance between the rain sensor module from connector C536, pin 13, circuit 32-KA10A (WH/GN), wiring harness side and the wash/wipe system switch, connector C530, pin 7, circuit 32-KA10A (WH/GN), wiring harness side. | | | 5 Vehicles built from 04/2005 | | | 6 Measure the resistance between the rain sensor module from connector C536, pin 13, circuit 32-KA10A (WH/GN), wiring harness side and the wash/wipe system switch, connector C530, pin 7, circuit 32-KA10A (WH/GN), wiring harness side. | | | Is a resistance of less than 2 Ohms registered? Yes RENEW the wash/wipe system switch. CHECK the operation of the system. No LOCATE and RECTIFY the break in the circuit between the rain sensor module and the wash/wipe system switch using the Wiring Diagrams. CHECK the operation of the system. | | E20: CHECK CIRCUIT 32-KA11B (WH/BK) FOR OPEN CIRCUIT | | | 1 Ignition switch in position 0. | | | 2 Disconnect Rain sensor module from connector C536. | | | 3 Connect Wiper / washer switch to connector C530. | | | 4 Ignition switch in position II. | | | 5 SWITCH ON fast wipe speed. | | | 6 Vehicles built up to 04/2005 | | | 7 Measure the voltage between the rain sensor module, connector C536, pin 11, circuit 32-KA11B (WH/BK), wiring harness side and ground. | | | 8 Vehicles built from 04/2005 | | | 9 Measure the voltage between the rain sensor module, connector C536, pin 11, circuit 32-KA11B (WH/BK), wiring harness side and ground. | | | Does the meter display battery voltage? Yes RENEW the rain sensor module. CHECK the operation of the system. No LOCATE and RECTIFY the break in the circuit between the rain sensor module and soldered connection S183 using the Wiring Diagrams. CHECK the operation of the system. | | E21: CHECK VOLTAGE SUPPLY TO RAIN SENSOR FOR OPEN CIRCUIT | | | 1 Ignition switch in position 0. | | | 2 Connect Rain sensor module to connector C536. | | | 3 Disconnect rain sensor from connector C528. | | | 4 Ignition switch in position II. | | | 5 Vehicles built up to 04/2005 | | | 6 Measure voltage between rain sensor, connector C528, pin 1, circuit 15-KA41 (GN/BK), wiring harness side and ground. | | | 7 Vehicles built from 04/2005 | | | 8 Measure the voltage between the rain sensor, connector C528, pin 1, circuit 15-KA41 (GN/BK), wiring harness side and ground. | | | Is battery voltage measured? Yes No LOCATE and RECTIFY the break in the circuit between the rain sensor and soldered connection S732 using the Wiring Diagrams. CHECK the operation of the system. | | E22: CHECK THE GROUND CONNECTION OF THE RAIN SENSOR FOR OPEN CIRCUIT | | | 1 Ignition switch in position 0. | | | 2 Vehicles built up to 04/2005 | | | 3 Measure the resistance between the rain sensor, connector C528, pin 2, circuit 91-KA41 (BK/GN), wiring harness side and ground. | | | 4 Vehicles built from 04/2005 | | | 5 Measure resistance between rain sensor, connector C528, pin 2, circuit 91-KA41 (GN/BK), wiring harness side and ground. | | | Is a resistance of less than 2 Ohms registered? Yes No LOCATE AND RECTIFY the break in the circuit between the rain sensor and ground connection G202 using the Wiring Diagrams. CHECK the operation of the system. | | E23: CHECK SIGNAL CABLE OF RAIN SENSOR FOR SHORT TO BATTERY VOLTAGE | | | 1 Ignition switch in position II. | | | 2 Vehicles built up to 04/2005 | | | 3 Measure voltage between rain sensor, connector C528, pin 3, circuit 8-KA41 (WH/GN), wiring harness side and ground. | | | 4 Vehicles built from 04/2005 | | | 5 Measure voltage between rain sensor, connector C528, pin 3, circuit 8-KA41 (WH/GN), wiring harness side and ground. | | | Is battery voltage measured? Yes No | | E24: CHECK THE RAIN SENSOR MODULE FOR SHORT TO BATTERY VOLTAGE | | | 1 Ignition switch in position 0. | | | 2 Disconnect Rain sensor module from connector C536. | | | 3 Ignition switch in position II. | | | 4 Vehicles built up to 04/2005 | | | 5 Measure the voltage between the rain sensor, connector C528, pin 3, circuit 8-KA41 (WH/GN), wiring harness side and ground. | | | 6 Vehicles built from 04/2005 | | | 7 Measure the voltage between the rain sensor, connector C528, pin 3, circuit 8-KA41 (WH/GN), wiring harness side and ground. | | | Is battery voltage measured? Yes LOCATE and RECTIFY the short to battery voltage in the circuit between the rain sensor module and the rain sensor using the Wiring Diagrams. CHECK the operation of the system. No RENEW the rain sensor module. CHECK the operation of the system. | | E25: CHECK THE SIGNAL CABLE OF THE RAIN SENSOR MODULE FOR SHORT TO GROUND | | | 1 Ignition switch in position 0. | | | 2 Disconnect Rain sensor module from connector C536. | | | 3 Vehicles built up to 04/2005 | | | 4 Measure the resistance between the rain sensor, connector C528, pin 3, circuit 8-KA41 (WH/GN), wiring harness side and ground. | | | 5 Vehicles built from 04/2005 | | | 6 Measure resistance between rain sensor, connector C528, pin 3, circuit 8-KA41 (WH/GN), wiring harness side and ground. | | | Is the resistance greater than 10,000 Ohms? Yes No LOCATE and RECTIFY the short to ground in the circuit between the rain sensor module and the rain sensor using the Wiring Diagrams. CHECK the operation of the system. | | E26: CHECK SIGNAL CABLE OF RAIN SENSOR FOR OPEN CIRCUIT | | | 1 Vehicles built up to 04/2005 | | | 2 Measure the resistance between the rain sensor module, connector C536, pin 1, circuit 8-KA41 (WH/GN), wiring harness side and the rain sensor, connector C528, pin 3, circuit 8-KA41 (WH/GN), wiring harness side. | | | 3 Vehicles built from 04/2005 | | | 4 Measure the resistance between the rain sensor module, connector C536, pin 1, circuit 8-KA41 (WH/GN), wiring harness side and the rain sensor, connector C528, pin 3, circuit 8-KA41 (WH/GN), wiring harness side. | | | Is a resistance of less than 2 Ohms registered? Yes RENEW the rain sensor. CHECK the operation of the system. If the concern persists, RENEW the rain sensor module. CHECK the operation of the system. No LOCATE and RECTIFY the break in the circuit between the rain sensor module and the rain sensor using the Wiring Diagrams. CHECK the operation of the system. | | PINPOINT TEST F : THE WINDSHIELD WIPER DOES NOT RETURN TO THE PARK POSITION AFTER BEING SWITCHED OFF | | TEST CONDITIONS | DETAILS/RESULTS/ACTIONS | | F1: CHECK THE EQUIPMENT LEVEL OF THE VEHICLE | | | 1 Check the equipment level of the vehicle | | | Is the vehicle equipped with a rain sensor? Yes No | | F2: CHECK THE WINDSHIELD WIPER RELAY | | | 1 Ignition switch in position 0. | | | 2 Disconnect windshield wiper relay from socket C917. | | | 3 Connect a fused jumper wire (20A) to the windshield wiper relay, socket C917, pin 3 and pin 4, CJB side. | | | 4 Ignition switch in position II. | | | 5 Actuate brief wipe. | | | 6 Check the wipers. | | | Do the wipers return to the park position? Yes RENEW the windshield wiper relay. CHECK the operation of the system. No | | F3: CHECK OPERATION OF WINDSHIELD INTERMITTENT WIPE | | | 1 Ignition switch in position 0. | | | 2 Connect Relay, windshield wiper to socket C917. | | | 3 Ignition switch in position II. | | | 4 SWITCH ON intermittent wipe. | | | 5 Check the wipers. | | | Do the windshield wipers work for intermittent wipe? Yes No | | F4: CHECK THE WASH/WIPE SYSTEM SWITCH | | | 1 Ignition switch in position 0. | | | 2 Disconnect wash/wipe system switch from connector C530. | | | 3 Check the wiper washer switch according to the component tests at the end of this subsection: - washer / wiper switch connector C530 at pins 7 and 9.
| | | Is the switch OK? Yes LOCATE and RECTIFY the break in circuit 32-KA19 (WH/BK) between the windshield wiper relay, connector C917, pin 3 and wash/wipe system switch, connector C530, pin 7 using the Wiring Diagrams. If necessary RENEW the CJB. CHECK the operation of the system. No RENEW the wash/wipe system switch. CHECK the operation of the system. | | F5: CHECK THE VOLTAGE AT THE FRONT WIPER MOTOR | | | 1 Ignition switch in position 0. | | | 2 Disconnect Front wiper motor from connector C144. | | | 3 Ignition switch in position II. | | | 4 Measure the voltage between the front wiper motor, connector C144, pin 4, circuit 15-KA9 (GN/RD), wiring harness side and ground. | | | Is battery voltage measured? Yes No LOCATE and RECTIFY the break in the circuit between fuse F94 (CJB) and the front wiper motor using the Wiring Diagrams. If necessary RENEW the CJB. CHECK the operation of the system. | | F6: CHECK CIRCUIT 32-KA9 (WH/BU) FOR OPEN CIRCUIT | | | 1 Ignition switch in position 0. | | | 2 Disconnect windshield wiper relay from socket C917. | | | 3 Measure the resistance between the windshield wiper relay C917, pin 4, CJB side and the front wiper motor, connector C144, pin 3, circuit 32-KA9 (WH/BU), wiring harness side. | | | Is a resistance of less than 2 Ohms registered? Yes RENEW the wiper motor. CHECK the operation of the system. No LOCATE and RECTIFY the break in the circuit between the windshield wiper relay and the front wiper motor using the Wiring Diagrams. If necessary RENEW the CJB. CHECK the operation of the system. | | F7: CHECK THE WASH/WIPE SYSTEM SWITCH | | | 1 Ignition switch in position 0. | | | 2 Disconnect wash/wipe system switch from connector C530. | | | 3 Check the wiper washer switch according to the component tests at the end of this subsection: - washer / wiper switch connector C530 at pins 7 and 9.
| | | Is the switch OK? Yes No RENEW the wash/wipe system switch. CHECK the operation of the system. | | F8: CHECK CIRCUIT 32-KA10A (WH/GN) FOR OPEN CIRCUIT | | | 1 Disconnect Rain sensor module from connector C536. | | | 2 Vehicles built up to 04/2005 | | | 3 Measure the resistance between the rain sensor module from connector C536, pin 13, circuit 32-KA10A (WH/GN), wiring harness side and the wash/wipe system switch, connector C530, pin 7, circuit 32-KA10A (WH/GN), wiring harness side. | | | 4 Vehicles built from 04/2005 | | | 5 Measure the resistance between the rain sensor module from connector C536, pin 13, circuit 32-KA10A (WH/GN), wiring harness side and the wash/wipe system switch, connector C530, pin 7, circuit 32-KA10A (WH/GN), wiring harness side. | | | Is a resistance of less than 2 Ohms registered? Yes No LOCATE and RECTIFY the break in the circuit between the rain sensor module and the wash/wipe system switch using the Wiring Diagrams. CHECK the operation of the system. | | F9: CHECK THE VOLTAGE SUPPLY TO THE RAIN SENSOR MODULE FOR OPEN CIRCUIT | | | 1 Ignition switch in position II. | | | 2 Vehicles built up to 04/2005 | | | 3 Measure the voltage between the rain sensor module, connector C536, pin 12, circuit 15-KA9B (GN/RD), wiring harness side and ground. | | | 4 Vehicles built from 04/2005 | | | 5 Measure the voltage between the rain sensor module, connector C536, pin 12, circuit 15-KA9B (GN/RD), wiring harness side and ground. | | | Is battery voltage measured? Yes No LOCATE and RECTIFY the break in the circuit between the rain sensor module and soldered connection S349 using the Wiring Diagrams. CHECK the operation of the system. | | F10: CHECK THE GROUND CONNECTION OF THE RAIN SENSOR MODULE FOR OPEN CIRCUIT | | | 1 Ignition switch in position 0. | | | 2 Vehicles built up to 04/2005 | | | 3 Measure the resistance between the rain sensor module, connector C536, pin 5, circuit 31-KA41 (BK), wiring harness side and ground. | | | 4 Vehicles built from 04/2005 | | | 5 Measure the resistance between the rain sensor module, connector C536, pin 5, circuit 31-KA41 (BK), wiring harness side and ground. | | | Is a resistance of less than 2 Ohms registered? Yes No LOCATE AND RECTIFY the break in the circuit between the rain sensor module and ground connection G204 using the Wiring Diagrams. CHECK the operation of the system. | | F11: CHECK THE VOLTAGE AT THE FRONT WIPER MOTOR | | | 1 Disconnect Front wiper motor from connector C144. | | | 2 Ignition switch in position II. | | | 3 Measure the voltage between the front wiper motor, connector C144, pin 4, circuit 15-KA9 (GN/RD), wiring harness side and ground. | | | Is battery voltage measured? Yes No LOCATE and RECTIFY the break in the circuit between fuse F94 (CJB) and the front wiper motor using the Wiring Diagrams. If necessary RENEW the CJB. CHECK the operation of the system. | | F12: CHECK CIRCUIT 32-KA9(B) (WH/BU) FOR OPEN CIRCUIT | | | 1 Ignition switch in position 0. | | | 2 Vehicles built up to 04/2005 | | | 3 Measure the resistance between the rain sensor module, connector C536, pin 14, circuit 32-KA9B (WH/BU), wiring harness side and the front wiper motor, connector C144, pin 3, circuit 32-KA9 (WH/BU), wiring harness side. | | | 4 Vehicles built from 04/2005 | | | 5 Measure the resistance between the rain sensor module, connector C536, pin 14, circuit 32-KA9B (WH/BU), wiring harness side and the front wiper motor, connector C144, pin 3, circuit 32-KA9 (WH/BU), wiring harness side. | | | Is a resistance of less than 2 Ohms registered? Yes No LOCATE and RECTIFY the break in the circuit between the rain sensor module and the front wiper motor using the Wiring Diagrams. If necessary RENEW the CJB. CHECK the operation of the system. | | F13: CHECK THE FRONT WIPER MOTOR | | | 1 Check the front wiper motor according to the component tests at the end of this subsection: - Front wiper motor connector C144 at pins 3, 4 and 5.
| | | Is the front wiper motor OK? Yes RENEW the rain sensor module. CHECK the operation of the system. No RENEW the front wiper motor. CHECK the operation of the system. | | PINPOINT TEST G : WASHER PUMP INOPERATIVE | | TEST CONDITIONS | DETAILS/RESULTS/ACTIONS | | G1: CHECK THE VOLTAGE AT THE FRONT AND REAR WASHER PUMP MOTOR | | | 1 Ignition switch in position 0. | | | 2 Disconnect Front and rear washer pump motor from connector C184. | | | 3 Ignition switch in position II. | | | 4 Vehicles built up to 04/2005 | | | 5 Measure the voltage between the front and rear washer pump motor, connector C184, pin 1, circuit 32-KA34 (WH/BK), wiring harness side and ground. | | | 6 Vehicles built from 04/2005 | | | 7 Measure the voltage between the front and rear washer pump motor, connector C184, pin 1, circuit 32-KA34 (WH/BK), wiring harness side and ground. | | | Is battery voltage measured? Yes No | | G2: CHECK CIRCUIT 32-KA34 (WH/BK) FOR OPEN CIRCUIT | | | 1 Ignition switch in position 0. | | | 2 Disconnect wash/wipe system switch from connector C530. | | | 3 Vehicles built up to 04/2005 | | | 4 Measure the resistance between the wash/wipe system switch C530, pin 4, circuit 32-KA34 (WH/BK)/32-KA46 (WH/BK), wiring harness side and the front and rear washer pump motor, connector C184, pin 1, circuit 32-KA34 (WH/BK), wiring harness side. | | | 5 Vehicles built from 04/2005 | | | 6 Measure the resistance between the wash/wipe system switch C530, pin 4, circuit 32-KA34 (WH/BK)/32-KA46 (WH/BK), wiring harness side and the front and rear washer pump motor, connector C184, pin 1, circuit 32-KA34 (WH/BK), wiring harness side. | | | Is a resistance of less than 2 Ohms registered? Yes RENEW the wash/wipe system switch. CHECK the operation of the system. No LOCATE and RECTIFY the break in the circuit between the wash/wipe system switch and the front and rear washer pump motor using the Wiring Diagrams. CHECK the operation of the system. | | G3: CHECK THE VOLTAGE AT THE FRONT AND REAR WASHER PUMP MOTOR | | | 1 Vehicles built up to 04/2005 | | | 2 Measure the voltage between the front and rear washer pump motor, connector C184, pin 2, circuit 33-KA34 (YE/BK), wiring harness side and ground. | | | 3 Vehicles built from 04/2005 | | | 4 Measure the voltage between the front and rear washer pump motor, connector C184, pin 2, circuit 33-KA34 (YE/BK), wiring harness side and ground. | | | Is battery voltage measured? Yes No | | G4: CHECK CIRCUIT 33-KA34 (YE/BK) FOR OPEN CIRCUIT | | | 1 Ignition switch in position 0. | | | 2 Disconnect Wash/wipe system switch from connector C530. | | | 3 Vehicles built up to 04/2005 | | | 4 Measure the resistance between the wash/wipe system switch C530, pin 2, circuit 33-KA34 (YE/BK)/33-KA7 (YE/VT), wiring harness side and the front and rear washer pump motor, connector C184, pin 2, circuit 33-KA34 (YE/BK), wiring harness side. | | | 5 Vehicles built from 04/2005 | | | 6 Measure the resistance between the wash/wipe system switch C530, pin 2, circuit 33-KA34 (YE/BK)/33-KA7 (YE/VT), wiring harness side and the front and rear washer pump motor, connector C184, pin 2, circuit 33-KA34 (YE/BK), wiring harness side. | | | Is a resistance of less than 2 Ohms registered? Yes RENEW the wash/wipe system switch. CHECK the operation of the system. No - Vehicles without rain sensor: LOCATE and RECTIFY the break in the circuit between the wash/wipe system switch and the front and rear washer pump motor using the Wiring Diagrams. CHECK the operation of the system. - Vehicles with rain sensor: LOCATE and RECTIFY the break in the circuit between soldered connection S185 and the front and rear washer pump motor, using the Wiring Diagrams. CHECK the operation of the system. | | G5: CHECK CIRCUIT 31-KA19 (BK) FOR OPEN CIRCUIT | | | 1 Measure resistance between wiper/washer switch, connector C530, pin 3, circuit 31-KA19 (BK), wiring harness side and ground. | | | Is a resistance of less than 2 Ohms registered? Yes No LOCATE and RECTIFY the break in the circuit between the wash/wipe system switch and soldered connection S116 using the Wiring Diagrams. CHECK the operation of the system. | | G6: CHECK THE WASH/WIPE SYSTEM SWITCH | | | 1 Check the wiper washer switch according to the component tests at the end of this subsection: - washer / wiper switch connector C530 at pins 2, 3, 4, 5 and 6.
| | | Is the switch OK? Yes INSTALL A NEW front and rear washer pump motor CHECK the operation of the system. No RENEW the wash/wipe system switch. CHECK the operation of the system. | | PINPOINT TEST H : REAR WINDOW WIPER INOPERATIVE | | TEST CONDITIONS | DETAILS/RESULTS/ACTIONS | | H1: DETERMINE THE FAULT CONDITION | | | 1 Ignition switch in position II. | | | 2 Switch on the REAR WIPER. | | | 3 Switch on the WINDSHIELD WIPER and engage REVERSE GEAR. | | | 4 CHECK rear window wiper and reversing lamps. | | | Is the rear window wiper operative in normal wipe mode? Yes - Vehicles without rain sensor: Rear window wiper inoperative with windshield wiper switched on and reverse gear engaged (reversing lamps operative): GO to H15. - Vehicles with rain sensor: Rear window wiper inoperative with windshield wiper switched on and reverse gear engaged (reversing lamps operative): GO to H16. - rear wiper inoperative when front wiper switched on and reverse gear engaged (reversing lights inoperative):
REFER to: Rückfahrscheinwerfer (417-01, Diagnosis and Testing).
No - rear wiper does not work during normal wipe function: GO to H13. | | H2: CHECK FUSE F90 (15 A) (CJB). | | | 1 Ignition switch in position 0. | | | 2 Disconnect Fuse F90 (15 A) (CJB). | | | 3 CHECK Fuse F90 (15 A) (CJB). | | | Is the fuse OK.? Yes No RENEW fuse F90 (15 A) (CJB). If the fuse blows again, LOCATE and REPAIR the short to ground using the Wiring Diagrams. CHECK the operation of the system. | | H3: CHECK THE VOLTAGE SUPPLY TO FUSE F90 (15 A) (CJB) FOR OPEN CIRCUIT | | | 1 Ignition switch in position 0. | | | 2 Connect Fuse F90 (15 A) (CJB). | | | 3 Ignition switch in position II. | | | 4 Measure voltage between fuse F90 (15 A) (CJB) and ground. | | | Is battery voltage measured? Yes No RENEW the CJB. CHECK the operation of the system. | | H4: CHECK THE GENERIC ELECTRONIC MODULE (GEM). | | | 1 Check central locking system. | | | Is the central locking system operative? Yes No | | H5: READ OUT THE FAULT MEMORY | | | 1 Ignition switch in position 0. | | | 2 Connect the diagnostic tool. | | | 3 Check the GEM using WDS. | | | Are any trouble codes (DTCs) displayed? Yes RESOLVE the faults according to the WDS instructions. CLEAR the fault memory and CHECK the operation of the system No | | H6: CHECK VOLTAGE AT THE REAR WINDOW WIPER RELAY (PIN 2) | | | 1 Ignition switch in position 0. | | | 2 Disconnect rear window wiper relay from socket C916. | | | 3 Ignition switch in position II. | | | 4 Measure the voltage between the rear window wiper relay, socket C916, pin 2, CJB side and ground. | | | Is battery voltage measured? Yes No RENEW the CJB. CHECK the operation of the system. | | H7: CHECK VOLTAGE AT THE REAR WINDOW WIPER RELAY (PIN 5) | | | 1 Measure the voltage between the rear window wiper relay, socket C916, pin 5, CJB side and ground. | | | Is battery voltage measured? Yes No RENEW the CJB. CHECK the operation of the system. | | H8: CHECK WORKING CIRCUIT OF REAR WIPER RELAY | | | 1 Ignition switch in position 0. | | | 2 Connect a fused jumper wire (15 A) to the rear wiper relay, socket C916, pin 3 and pin 5, CJB side. | | | 3 Ignition switch in position II. | | | 4 Check the wipers. | | | Do the rear wipers operate? Yes No | | H9: CHECK CIRCUIT 32-KA28 (WH/RD) FOR OPEN CIRCUIT | | | 1 Ignition switch in position 0. | | | 2 Disconnect Rear wiper motor from connector C745. | | | 3 Connect a fused jumper wire (15 A) to the rear wiper relay, socket C916, pin 3 and pin 5, CJB side. | | | 4 Ignition switch in position II. | | | 5 Measure the voltage between the rear wiper motor, connector C745, pin 2, circuit 32-KA28 (WH/RD), wiring harness side and ground. | | | Is battery voltage measured? Yes No LOCATE and RECTIFY the break in the circuit between the rear wiper relay and the rear wiper motor using the Wiring Diagrams. If necessary RENEW the CJB. CHECK the operation of the system. | | H10: CHECK THE GROUND CONNECTION OF THE REAR WIPER MOTOR FOR OPEN CIRCUIT | | | 1 Ignition switch in position 0. | | | 2 Measure the resistance between the rear wiper motor, connector C745, pin 3, circuit 31-KA28 (BK), wiring harness side and ground. | | | Is a resistance of less than 2 Ohms registered? Yes INSTALL a new rear wiper motor. CHECK the operation of the system. No LOCATE and RECTIFY the break in the circuit between the rear wiper motor and soldered connection S518 using the Wiring Diagrams. CHECK the operation of the system. | | H11: CHECK THE REAR WINDOW WIPER RELAY | | | 1 Ignition switch in position 0. | | | 2 Check the rear wiper relay according to the component tests at the end of this subsection: - Perform check on rear window wiper relay, socket C916 at pins 1, 2, 3 and 5.
| | | Is the relay OK? Yes No RENEW the rear wiper relay. CHECK the operation of the system. | | H12: CHECK THE CONTROL CIRCUIT OF THE REAR WIPER RELAY FOR OPEN CIRCUIT | | | 1 Connect Relay, rear wiper to socket C916. | | | 2 Disconnect Generic electronic module (GEM) from connector C430. | | | 3 Connect a fused jumper wire (10 A) between the GEM, connector C430, pin 17, circuit 31S-KA29 (BK/YE), wiring harness side and ground. | | | 4 Ignition switch in position II. | | | 5 Check the rear window wiper. | | | Is the rear window wiper operative? Yes RENEW the GEM. CHECK the operation of the system. No LOCATE and RECTIFY the break in the circuit between the rear window wiper relay and the GEM using the Wiring Diagrams. If necessary RENEW the CJB. CHECK the operation of the system. | | H13: CHECK THE WASH/WIPE SYSTEM SWITCH | | | 1 Connect Relay, rear wiper to socket C916. | | | 2 Disconnect wash/wipe system switch from connector C530. | | | 3 Check the wiper washer switch according to the component tests at the end of this subsection: - washer / wiper switch connector C530 at pins 3, 4, 5 and 6.
| | | Is the switch OK? Yes No RENEW the wash/wipe system switch. CHECK the operation of the system. | | H14: CHECK CIRCUIT 32-KA35 (WH/RD) FOR OPEN CIRCUIT | | | 1 Connect Wiper / washer switch to connector C530. | | | 2 Disconnect Generic electronic module (GEM) from connector C430. | | | 3 Ignition switch in position II. | | | 4 Switch on the REAR WIPER. | | | 5 Measure voltage between GEM, connector C430, pin 3, circuit 32-KA35 (WH/RD), wiring harness side and ground. | | | Is battery voltage measured? Yes LOCATE and RECTIFY the break in circuit 32-KA6 (WH/BK) between the wash/wipe system switch and the GEM using the Wiring Diagrams. CHECK the operation of the system. No LOCATE and RECTIFY the break in circuit 32-KA35 (WH/RD) between the wash/wipe system switch and the GEM using the Wiring Diagrams. CHECK the operation of the system. | | H15: CHECK CIRCUIT 32-KA39 (WH/BK) FOR OPEN CIRCUIT | | | 1 Ignition switch in position 0. | | | 2 Disconnect Generic electronic module (GEM) from connector C426. | | | 3 Disconnect windshield wiper relay from socket C917. | | | 4 Measure resistance between windshield wiper relay C917, pin 4, CJB side and GEM, connector C426, pin 2, circuit 32-KA39 (WH/BK), wiring harness side. | | | Is a resistance of less than 2 Ohms registered? Yes No LOCATE and RECTIFY the break in the circuit between the windshield wiper relay and the GEM using the Wiring Diagrams. CHECK the operation of the system. | | H16: CHECK CIRCUIT 32-KA39 (WH/BK), 32-KA9(A) (WH/BU) FOR OPEN CIRCUIT | | | 1 Ignition switch in position 0. | | | 2 Disconnect Generic electronic module (GEM) from connector C426. | | | 3 Disconnect Front wiper motor from connector C144. | | | 4 Measure the resistance between the front wiper motor C144, pin 3, circuit 32-KA9 (WH/BU), wiring harness side and the GEM, connector C426, pin 2, circuit 32-KA39 (WH/BK), wiring harness side. | | | Is a resistance of less than 2 Ohms registered? Yes No LOCATE and RECTIFY the break in the circuit between soldered connection S1006 and the GEM using the Wiring Diagrams. If necessary RENEW the CJB. CHECK the operation of the system. | | H17: CHECK CIRCUIT 15S-LG39 (GN/OG), 15S-LG9 (GN/BK) FOR OPEN CIRCUIT | | | 1 Disconnect Generic electronic module (GEM) from connector C428. | | | 2 Ignition switch in position II. | | | 3 SWITCH ON windshield wipers and ENGAGE reverse gear. | | | 4 Measure voltage between GEM, connector C428, pin 20, circuit 15S-LG39 (GN/OG), 15S-LG9 (GN/BK), wiring harness side and ground. | | | Is battery voltage measured? Yes RENEW the GEM. CHECK the operation of the system. No LOCATE AND RECTIFY the break in the circuit between soldered connection S232 and the GEM using the Wiring Diagrams. CHECK the operation of the system. | | PINPOINT TEST I : REAR WINDOW WIPER IS PERMANENTLY ON | | TEST CONDITIONS | DETAILS/RESULTS/ACTIONS | | I1: CHECK THE GENERIC ELECTRONIC MODULE (GEM). | | | 1 Check central locking system. | | | Is the central locking system operative? Yes No | | I2: READ OUT THE FAULT MEMORY | | | 1 Connect the diagnostic tool. | | | 2 Check the GEM using WDS. | | | Are any trouble codes (DTCs) displayed? Yes RECTIFY the faults according to the WDS instructions. CLEAR the fault memory and CHECK the operation of the system. No | | I3: NARROW DOWN THE LOCATION OF THE SHORT TO BATTERY VOLTAGE | | | 1 Ignition switch in position 0. | | | 2 Disconnect rear window wiper relay from socket C916. | | | 3 Ignition switch in position II. | | | 4 Check the wipers. | | | Are the rear wipers operating continuously? Yes No | | I4: CHECK WORKING CIRCUIT OF REAR WIPER RELAY FOR SHORT TO BATTERY VOLTAGE | | | 1 Ignition switch in position 0. | | | 2 Disconnect Rear wiper motor from connector C745. | | | 3 Ignition switch in position II. | | | 4 Measure the voltage between the rear window wiper relay, socket C916, pin 3, circuit 32-KA28 (WH/RD), CJB side and ground. | | | Is battery voltage measured? Yes LOCATE and RECTIFY the short to battery voltage in the circuit between the rear wiper relay and the rear wiper motor using the Wiring Diagrams. If necessary RENEW the CJB. CHECK the operation of the system. No INSTALL a new rear wiper motor. CHECK the operation of the system. | | I5: CHECK THE WASH/WIPE SYSTEM SWITCH | | | 1 Ignition switch in position 0. | | | 2 Disconnect wash/wipe system switch from connector C530. | | | 3 Connect Relay, rear wiper to socket C916. | | | 4 Ignition switch in position II. | | | 5 Check the wipers. | | | Are the rear wipers operating continuously? Yes No RENEW the wash/wipe system switch. CHECK the operation of the system. | | I6: CHECK CIRCUIT 32-KA35 (WH/RD) FOR SHORT TO GROUND | | | 1 Ignition switch in position 0. | | | 2 Disconnect Generic electronic module (GEM) from connector C430. | | | 3 Measure resistance between GEM, C430, pin 3, circuit 32-KA35 (WH/RD), wiring harness side and ground. | | | Is the resistance greater than 10,000 Ohms? Yes No LOCATE and RECTIFY the short to ground in the circuit between the wash/wipe system switch and the GEM using the Wiring Diagrams. CHECK the operation of the system. | | I7: CHECK THE REAR WIPER RELAY | | | 1 Connect Generic electronic module (GEM) to connector C430. | | | 2 Disconnect rear window wiper relay from socket C916. | | | 3 Measure the voltage at the rear window wiper relay, socket C916, between pin 1 and pin 2, CJB side. | | | Is battery voltage measured? Yes No RENEW the rear window wiper relay. CHECK the operation of the system. | | I8: CHECK CONTROL CIRCUIT OF REAR WIPER RELAY FOR SHORT TO GROUND | | | 1 Ignition switch in position 0. | | | 2 Disconnect Generic electronic module (GEM) from connector C430. | | | 3 Measure the voltage at the rear window wiper relay, socket C916, between pin 1 and pin 2, CJB side. | | | Is battery voltage measured? Yes LOCATE and RECTIFY the short to ground in circuit 31S-KA29 (BK/YE) between the rear wiper relay and the GEM using the Wiring Diagrams. If necessary RENEW the CJB. CHECK the operation of the system. No RENEW the generic electronic module (GEM). CHECK the operation of the system. | | PINPOINT TEST J : THE REAR WINDOW WIPER DOES NOT RETURN TO THE PARK POSITION AFTER BEING SWITCHED OFF | | TEST CONDITIONS | DETAILS/RESULTS/ACTIONS | | J1: CHECK THE REAR WIPER MOTOR | | | 1 Ignition switch in position 0. | | | 2 Disconnect Rear wiper motor from connector C745. | | | 3 Ignition switch in position II. | | | 4 Measure the voltage between the rear wiper motor, connector C745, pin 1, circuit 29-KA28 (OG/BU), wiring harness side and ground. | | | Is battery voltage measured? Yes INSTALL a new rear wiper motor. CHECK the operation of the system. No | | J2: CHECK CIRCUIT 29-KA28 (OG/BU) FOR OPEN CIRCUIT | | | 1 Ignition switch in position 0. | | | 2 Disconnect Central junction box (CJB) from connector C506. | | | 3 Measure the resistance between the CJB, connector C506, pin 16, circuit 29-KA28 (OG/BU), wiring harness side and the rear wiper motor, connector C745, pin 1, circuit 29-KA28 (OG/BU), wiring harness side. | | | Is a resistance of less than 2 Ohms registered? Yes RENEW the CJB. CHECK the operation of the system. No LOCATE and RECTIFY the break in the circuit between the CJB and the rear wiper motor using the Wiring Diagrams. CHECK the operation of the system. | | PINPOINT TEST K : HEADLAMP WASHER SYSTEM INOPERATIVE | | TEST CONDITIONS | DETAILS/RESULTS/ACTIONS | | K1: CHECK FUSE F22 (20 A) (BJB). | | | 1 Ignition switch in position 0. | | | 2 Disconnect Fuse F22 (20 A) (BJB). | | | 3 CHECK Fuse F22 (20 A) (BJB). | | | Is the fuse OK.? Yes No RENEW fuse F22 (20 A) (BJB) If the fuse blows again, LOCATE and RECTIFY the short to ground using the Wiring Diagrams. CHECK the operation of the system. | | K2: CHECK THE VOLTAGE SUPPLY TO FUSE F22 (20 A) (BJB) FOR OPEN CIRCUIT | | | 1 Ignition switch in position 0. | | | 2 Connect Fuse F22 (20 A) (BJB). | | | 3 Ignition switch in position II. | | | 4 Measure voltage between fuse F22 (20 A) (BJB) and ground. | | | Is battery voltage measured? Yes No CHECK BJB and if necessary RENEW. CHECK the operation of the system. | | K3: CHECK CIRCUIT 31-KA21 (BK) FOR OPEN CIRCUIT | | | 1 Ignition switch in position 0. | | | 2 Disconnect Headlamp washer pump from connector C145. | | | 3 Vehicles built up to 04/2005 | | | 4 Measure the resistance between the headlamp washer pump, connector C145, pin 2, circuit 31-KA21 (BK), wiring harness side and ground. | | | 5 Vehicles built from 04/2005 | | | 6 Measure the resistance between the headlamp washer pump, connector C145, pin 2, circuit 31-KA21 (BK), wiring harness side and ground. | | | Is a resistance of less than 2 Ohms registered? Yes No LOCATE and REPAIR the break in the circuit between the headlamp washer pump and soldered connection S317 using the Wiring Diagrams. CHECK the operation of the system. | | K4: CHECK THE HEADLAMP WASHER PUMP | | | 1 Ignition switch in position II. | | | 2 Switch on DIPPED BEAM. | | | 3 Switch on the WINDSHIELD WASHER SYSTEM. | | | 4 Vehicles built up to 04/2005 | | | 5 Measure the voltage between the headlamp washer pump, connector C145, pin 1, circuit 15S-KA21 (GN/YE), wiring harness side and ground. | | | 6 Vehicles built from 04/2005 | | | 7 Measure the voltage between the headlamp washer pump, connector C145, pin 1, circuit 15S-KA21 (GN/YE), wiring harness side and ground. | | | Is battery voltage measured? Yes RENEW the headlamp washer pump. CHECK the operation of the system. No | | K5: CHECK CIRCUIT 15S-KA21 (GN/YE) FOR OPEN CIRCUIT | | | 1 Ignition switch in position 0. | | | 2 Disconnect headlamp cleaning system relay from socket C439. | | | 3 Vehicles built up to 04/2005 | | | 4 Measure the resistance between the headlamp washer pump, connector C145, pin 1, circuit 15S-KA21 (GN/YE), wiring harness side and the headlamp washer relay, socket C439, pin 3, circuit 15S-KA21 (GN/YE), wiring harness side. | | | 5 Vehicles built from 04/2005 | | | 6 Measure the resistance between the headlamp washer pump, connector C145, pin 1, circuit 15S-KA21 (GN/YE), wiring harness side and the headlamp washer relay, socket C439, pin 3, circuit 15S-KA21 (GN/YE), wiring harness side. | | | Is a resistance of less than 2 Ohms registered? Yes No LOCATE and RECTIFY the break in the circuit between the headlamp washer pump and the headlamp cleaning system relay using the Wiring Diagrams. CHECK the operation of the system. | | K6: CHECK CIRCUIT 30-KA23 (RD) FOR OPEN CIRCUIT | | | 1 Measure voltage between headlamp washer relay, socket C439, pin 5, circuit 30-KA23 (RD), wiring harness side and ground. | | | Is battery voltage measured? Yes No LOCATE and RECTIFY the break in the circuit between the headlamp cleaning system relay and fuse F22 using the Wiring Diagrams. CHECK the operation of the system. | | K7: CHECK CIRCUIT 15S-KA22 (GN/BU) FOR OPEN CIRCUIT | | | 1 Ignition switch in position II. | | | 2 Switch on DIPPED BEAM. | | | 3 Measure voltage between headlamp washer relay, socket C439, pin 4, circuit 15S-KA22 (GN/BU), wiring harness side and ground. | | | Is battery voltage measured? Yes No - Vehicles with gas discharge headlamps: LOCATE and RECTIFY the break in the circuit between fuse F95 and the headlamp cleaning system relay using the Wiring Diagrams. CHECK the operation of the system. - vehicles without gas discharge headlamps without daytime running lamps: GO to K8. - Vehicles without gas discharge headlamps with daytime running lamps: LOCATE and RECTIFY the break in the circuit between soldered connection S133 and the headlamp cleaning system relay using the Wiring Diagrams. CHECK the operation of the system. | | K8: CHECK CIRCUIT 15S-KA22 (GN/BU) FOR OPEN CIRCUIT | | | 1 Ignition switch in position 0. | | | 2 Disconnect CJB from connector C501. | | | 3 Measure resistance between CJB, connector C501, pin 4, circuit 15S-KA22 (GN/BU), wiring harness side and headlamp washer relay, connector C439, pin 4, circuit 15S-KA22 (GN/BU), wiring harness side. | | | Is a resistance of less than 2 Ohms registered? Yes RENEW the CJB. CHECK the operation of the system. No LOCATE and RECTIFY the break in the circuit between the CJB and the headlamp cleaning system relay using the Wiring Diagrams. CHECK the operationof the system. | | K9: CHECK THE GROUND CONNECTION OF THE HEADLAMP CLEANING SYSTEM RELAY FOR OPEN CIRCUIT | | | 1 Ignition switch in position 0. | | | 2 Measure resistance between headlamp washer relay, socket C439, pin 2, circuit 31-KA22 (BK), wiring harness side and ground. | | | Is a resistance of less than 2 Ohms registered? Yes RENEW the headlamp cleaning system relay. CHECK the operation of the system. No LOCATE and RECTIFY the break in the circuit between the headlamp cleaning system relay and soldered connection S311 using the Wiring Diagrams. CHECK the operation of the system. | | PINPOINT TEST L : WINDSHIELD WASHER NOZZLE HEATER IS INOPERATIVE | | TEST CONDITIONS | DETAILS/RESULTS/ACTIONS | | L1: CHECK THE WINDSHIELD WASHER NOZZLE HEATER | | | 1 Ignition switch in position II. | | | 2 Determine which windshield washer nozzle heater is inoperative. | | | Is the left-hand windshield washer nozzle heater inoperative? Yes No Right-hand windshield washer nozzle heater is inoperative: GO to L4. | | L2: CHECK CIRCUIT 15S-HB13 (GN/BU) FOR OPEN CIRCUIT | | | 1 Ignition switch in position 0. | | | 2 Disconnect Left-hand windshield washer nozzle heater from connector C165. | | | 3 Ignition switch in position II. | | | 4 Measure the voltage between the left-hand windshield washer nozzle heater, connector C165, pin 2, circuit 15S-HB13 (GN/BU), wiring harness side and ground. | | | Is battery voltage measured? Yes No LOCATE and RECTIFY the break in the circuit between the left-hand windshield washer nozzle heater and the CJB, connector C509 using the Wiring Diagrams. CHECK the operation of the system. | | L3: CHECK CIRCUIT 31-HB13 (BK) FOR OPEN CIRCUIT | | | 1 Ignition switch in position 0. | | | 2 Measure the resistance between the left-hand windshield washer nozzle heater, connector C165, pin 1, circuit 31-HB13 (BK), wiring harness side and ground. | | | Is a resistance of less than 2 Ohms registered? Yes RENEW the left-hand windshield washer nozzle heater. CHECK the operation of the system. No LOCATE and RECTIFY the break in the circuit between the left-hand windshield washer nozzle heater and soldered connection S311 using the Wiring Diagrams. CHECK the operation of the system. | | L4: CHECK CIRCUIT 15S-HB26 (GN/RD) FOR OPEN CIRCUIT | | | 1 Ignition switch in position 0. | | | 2 Disconnect Right-hand windshield washer nozzle heater from connector C166. | | | 3 Ignition switch in position II. | | | 4 Measure the voltage between the right-hand windshield washer nozzle heater, connector C166, pin 2, circuit 15S-HB26 (GN/RD), wiring harness side and ground. | | | Is battery voltage measured? Yes No LOCATE and RECTIFY the break in the circuit between the right-hand windshield washer nozzle heater and the CJB, connector C509 using the Wiring Diagrams. CHECK the operation of the system. | | L5: CHECK CIRCUIT 31-HB26 (BK) FOR OPEN CIRCUIT | | | 1 Ignition switch in position 0. | | | 2 Measure the resistance between the right-hand windshield washer nozzle heater, socket C166, pin 1, circuit 31-HB26 (BK), wiring harness side and ground. | | | Is a resistance of less than 2 Ohms registered? Yes RENEW the right-hand windshield washer nozzle heater. CHECK the operation of the system. No LOCATE and RECTIFY the break in the circuit between the right-hand windshield washer nozzle heater and soldered connection S311 using the Wiring Diagrams. CHECK the operation of the system. | Component Test Wash/wipe system switch Pin occupation, component side: | Circuit to test | Connect a digital multimeter with the following connections | Set the switch to the following position | Switch is OK when the following test readings are seen | | Variable wipe times | 1 and 10 | 1 | 1 kOhms | | | | 2 | 10 kOhms | | | | 3 | 20 kOhms | | | | 4 | 30 kOhms | | | | 5 | 40 kOhms | | | | 6 | 47 kOhms | | Windshield one touch wipe | 6 and 9 | One Touch | closed circuit | | | | Off | open circuit | | | | Intermittent | open circuit | | | | Normal | closed circuit | | | | Fast | open circuit | | Intermittent windshield wiper | 6 and 10 | One Touch | open circuit | | | | Off | open circuit | | | | Intermittent | closed circuit | | | | Normal | open circuit | | | | Fast | open circuit | | | 7 and 9 | One Touch | open circuit | | | | Off | closed circuit | | | | Intermittent | closed circuit | | | | Normal | open circuit | | | | Fast | open circuit | | Normal windshield wiper | 6 and 9 | One Touch | closed circuit | | | | Off | open circuit | | | | Intermittent | open circuit | | | | Normal | closed circuit | | | | Fast | open circuit | | Fast windshield wiper | 6 and 8 | One Touch | open circuit | | | | Off | open circuit | | | | Intermittent | open circuit | | | | Normal | open circuit | | | | Fast | closed circuit | | Front washers on | 6 and 2 | Off | open circuit | | | | Front washers on | open circuit | | | 2 and 3 | Off | open circuit | | | | Front washers on | closed circuit | | Rear washers on | 6 and 5 | Off | open circuit | | | | Rear wipers on | closed circuit | | | | Rear washers on | closed circuit | | | 3 and 4 | Off | open circuit | | | | Rear wipers on | open circuit | | | | Rear washers on | closed circuit | | Rear wipers on | 5 and 3 | Off | closed circuit | | | | Rear wipers on | open circuit | | | | Rear washers on | open circuit | | | 4 and 6 | Off | closed circuit | | | | Rear wipers on | closed circuit | | | | Rear washers on | open circuit | | | 5 and 6 | Off | open circuit | | | | Rear wipers on | closed circuit | | | | Rear washers on | closed circuit | Front wiper motor - Check windshield wiper motor in PARK POSITION:
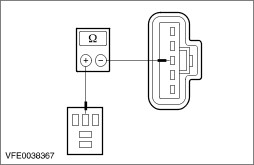
- The front wiper motor is in the parked position.
- Measure the resistance at the front wiper motor between pin 3 and pin 5, component side (or the housing of the wiper motor).
- Check windshield wiper motor OUT OF the PARK POSITION:
- The front wiper motor is not in the parked position.
- Measure the resistance at the front wiper motor, between pin 3 and pin 4, component side.
Windshield wiper relay - Check the working contact (normally closed) in unswitched state:
- Measure resistance at relay between pin 3 component side and pin 4 component side.
- Check the working contact (normally open) in unswitched state:
- Measure resistance at relay between pin 3 component side and pin 5 component side.
- Check the working contact (normally open) in switched state:
- Use a fused test cable (3 A) at relay pin 2, component side, to connect to the positive pole of the battery.
- Use a test cable at relay pin 1, component side, to connect to the negative pole of the battery.
- Measure resistance at relay between pin 3 component side and pin 4 component side.
- Check the working contact (normally closed) in switched state:
- Use a fused test cable (3 A) at relay pin 2, component side, to connect to the positive pole of the battery.
- Use a test cable at relay pin 1, component side, to connect to the negative pole of the battery.
- Measure the resistance at the relay between pin 3, component side, and pin 5, component side.
- Is a resistance of less than 2 Ohm registered?
1. If yes, then the relay is OK. 2. If no, INSTALL a new relay. Rear wiper relay - Check the working contact (normally open) in unswitched state:
- Measure the resistance at the relay between pin 3, component side, and pin 5, component side.
- Check the working contact (normally closed) in switched state:
- Use a fused test cable (3 A) at relay pin 2, component side, to connect to the positive pole of the battery.
- Use a test cable at relay pin 1, component side, to connect to the negative pole of the battery.
- Measure the resistance at the relay between pin 3, component side, and pin 5, component side.
- Is a resistance of less than 2 Ohm registered?
1. If yes, then the relay is OK. 2. If no, INSTALL a new relay. |