
Mustang L4-140 2.3L SOHC (1982)
T-Top Lock: Technical Service Bulletins
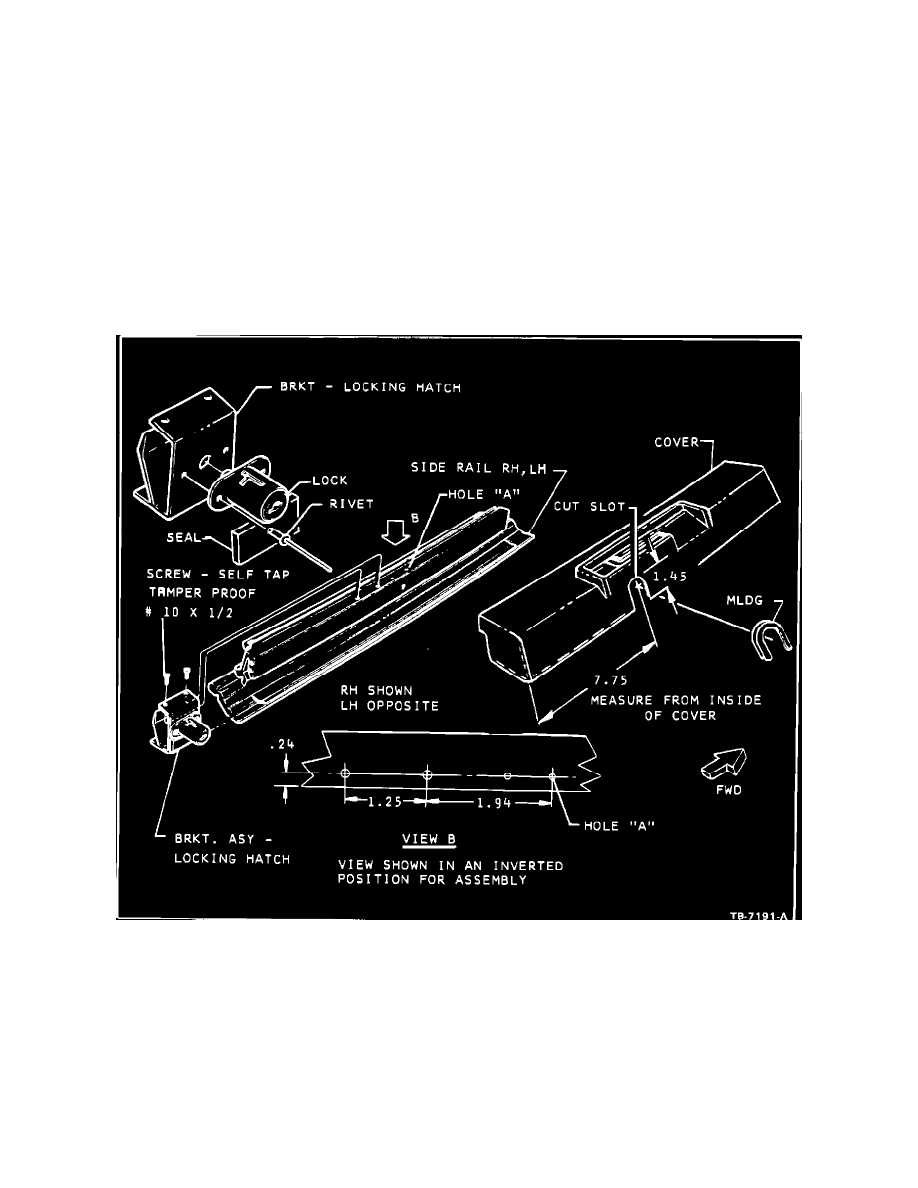
T-Roof - Optional Lock System installation
Article No. 83-23-3
T-ROOF - HATCH LOCK AVAILABILITY - ANTI-THEFT
FORD 1981-83 MUSTANG
LINCOLN-MERCURY 1981-83 CAPRI
There is an optional lock system available for Mustang and Capri T-Roof Latch panels. Installation of these parts is outlined in the following
instructions.
1.
Remove the hatch panel from the vehicle and place it on a padded bench on its top.
2.
Remove the two screws holding the garnish moulding and slip the moulding off the hatch assembly.
Figure 3
3.
Mark the location of the latch pin guide plate and remove the two screws and the latching pin guide plate from the back edge of the hatch assembly
(Figure 3).
4.
Measure from the front latch mounting hole rearward 1.94 inches and 3.19 inches and mark with a center punch two-hole locations .24 inch in
from the edge (Figure 3). 5.Drill two .177 (#16 drill) diameter holes at the punch marks.
6.
Attach the lock assembly to the locking latch bracket with the pop rivets (Figure 3).
7.
Apply a 1-1/2 inch strip of foam under the lock on the bracket as shown (Figure 3).
8.
Slide the locking latch bracket into the groove in the hatch assembly up to the two holes drilled in the hatch frame.
9.
Aftach the bracket to the frame using the #10 x 1/2 self-tapping tamperproof screws.
10.
Measure along the inside of the top edge of the garnish moulding a distance of 7.75 inches (7-3/7) and mark a point 1.125 inches (1-1/2") from the
edge.