
Mustang L4-140 2.3L Turbo VIN W FI (1984)
8.
Apply a 1/8 inch bead of Silicone Rubber Adhesive/Sealant, D6AZ-19562-B (or equivalent), along the edge of the frame to roof mating surface.
9.
Position the roof moulding, roof felt and install 1/8 inch attaching rivets.
10.
Repeat the water test.
11.
If the water leak persists, remove the headliner to expose all possible hatch leak points and repeat the water test.
WATER LEAKS - LEAK REPAIRS
Striker Area
1.
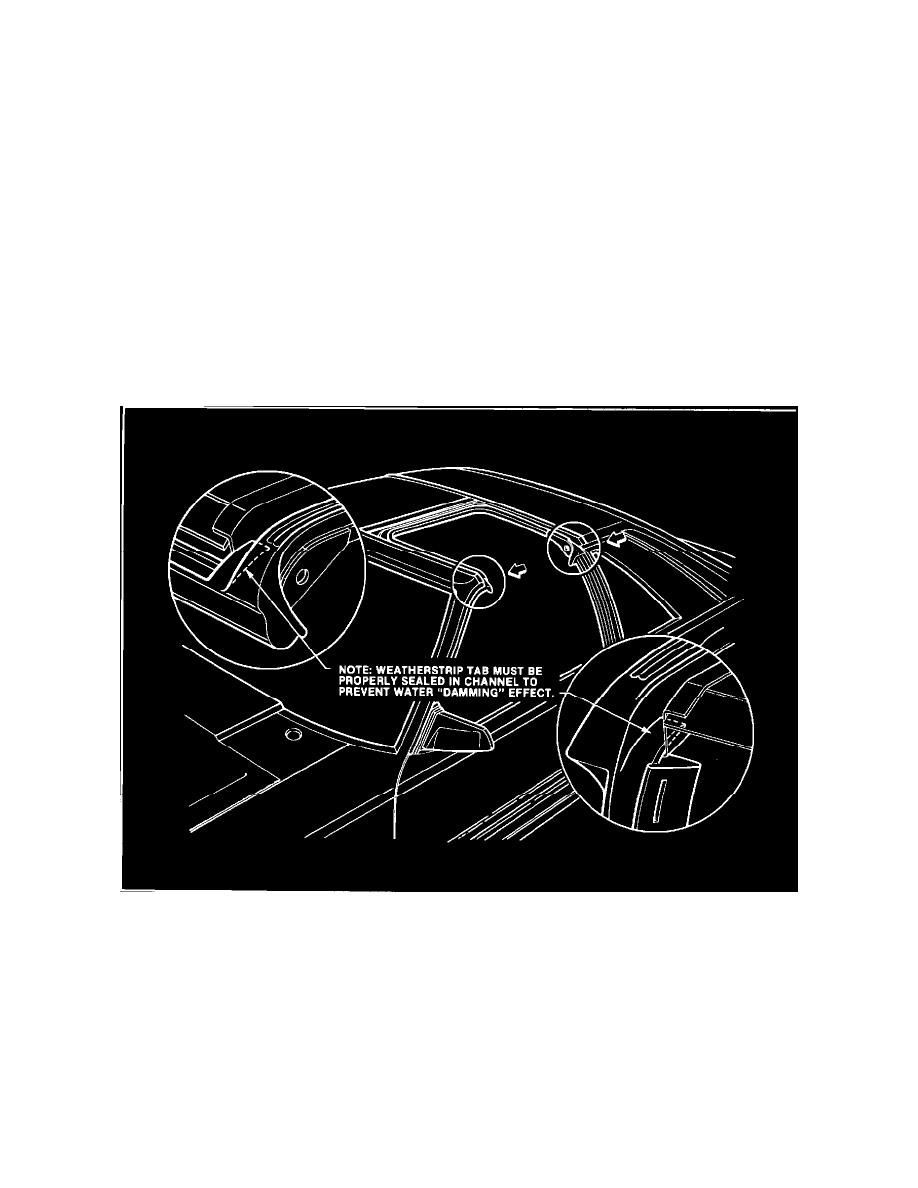
Inspect the weatherstrip tab in the drain trough (front and/or rear).
-
If any voids or gaps are visible in the sealant, the tab requires resealing.
-
If the trough is plugged with sealant, remove the excess sealant and reseal the tabs.
2.
Remove the striker plate cover(s).
3.
Remove all sealant from the drain trough area.
Figure 95
4.
Clean the drain trough sealing area.
5.
Apply a 1/8 inch of Silicone Rubber Adhesive/ Sealant, D6AZ-19562-B (or equivalent), around the drain trough tab.
NOTE:
Use only enough sealer to cover the tab edge. Excessive amounts of sealer can plug the drain trough creating a damming effect. The water
backing up behind this dam may cause leaks in other areas.
6.
Repeat the water test.
WATER TEST - LEAK REPAIRS
Hatch Weatherstrip