
Mustang L4-140 2.3L Turbo VIN W FI (1984)
from rack and place ball socket on lefthand side of rack to prevent damage to oil seal.
10.
Install rubber O-ring on rack bushing.
11.
Using tool No. T74P-3504-F, or equivalent, install oil seal in rack bushing with lip spring facing bushing, Fig. 20.
12.
Lubricate short protective sleeve on rack end and rubber O-ring on rack bushing with power steering fluid.
13.
Position bushing on rack with seal facing outward. Push bushing and seal over protective sleeve and into housing bore until housing bore lock nut
threads are visible. Remove protective sleeve, Fig. 21.
14.
On all models except 1982 Mustang, Capri and 1984---86 Mustang SVO position rack bushing locknut over rack and start threading into gear
housing. Engage tabs of tool No. T74P-3504-B, or equivalent, into slots on locknut, Fig. 12. Then torque locknut to 80 to 120 ft. lbs.
15.
On 1982 Mustang, Capri and Mustang SVO, position rack bushing lock ring over the rack into the housing bore, Fig. 22. Position lock ring tool
T-77P-3504-A, or equivalent, over the end of the rack and engage the slots of lock ring. Rotate lock ring until wire groove is positioned at the slot
in housing and engage retaining wire. Rotate the lock ring until the wire is fully engaged and wire end is 180 degrees opposite the slot.
16.
Install tie rod ball sockets as described previously.
17.
Install input shaft and valve assembly as described under ``Valve and Valve Housing.''
18.
Install yoke bearing, spring, plug and locknut. Prior to torquing locknut, adjust yoke bearing preload as described under Rack Yoke Bearing
Preload Adjustment.
19.
Install bellows and tie rod ends.
DISASSEMBLE
On some models, a power steering pressure switch is installed in the power steering pressure line. The purpose of this switch is to activate the throttle
kicker during periods of high power steering pump pressure, such as parking. On vehicles equipped with air conditioning the power steering pressure
switch will also open the air conditioning clutch circuit.
Input Shaft Seal
Fig. 3 Checking pinion shaft cover alignment. 1982---85 Escort, EXP, Lynx, LN7, & 1984---85 Tempo & Topaz
1.
Clean input shaft and seal area. Use care not to scratch or damage pinion shaft.
2.
Pry pinion seal from its bore and discard.
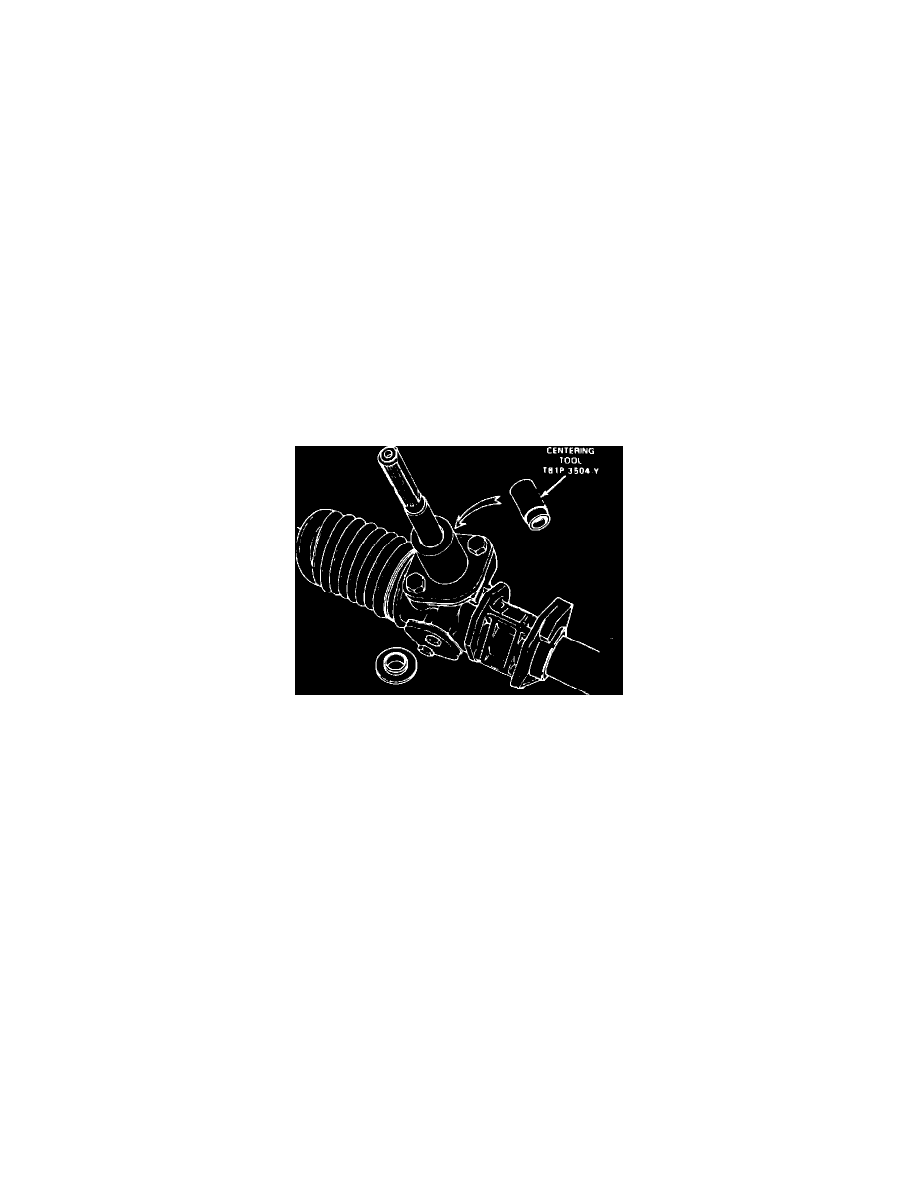
3.
On 1982---85 Escort, EXP, Lynx and LN7, and 1984---85 Tempo and Topaz, ensure the pinion cover is centered by using tool No. T8IP-3504-Y,
Fig. 3.
4.
Apply a suitable lubricant to seal, then install seal over shaft.
5.
Use a piece of tubing to engage outer flange of seal and press or tap seal into its bore until flange is flush with shoulder of bore. If outer edge of
seal is not engaged at assembly, damage to the seal will result.
Pinion Cover, Gasket, Pinion Shaft, Spacer, Shims
Disassembly
1.
Clean exterior of steering gear, then place gear in bench fixture T57L-500-B or a suitable vise.
2.
Remove yoke cover attaching bolts, yoke cover, gasket, shims, spring and yoke from housing.
3.
On 1982---83 Fairmont, Zephyr, 1982---85 Capri, Mustang, 1984---85 Mustang SVO, 1982 Cougar, Granada, 1983 LTD, Marquis, 1982---85
Escort, EXP, Lynx, LN7, and 1984---85 Tempo and Topaz, remove right ball housing/tie rod assembly from rack as described under ``Tie Rod
Ends, Bellows & Joint Sockets.''
5.
On 1982---83 Fairmont, Zephyr, 1982---85 Capri, Mustang, 1984---85 Mustang SVO, 1982 Cougar, Granada, 1983 LTD, Marquis, 1982---85
Escort, EXP, Lynx, LN7, 1984---85 Tempo and Topaz, move rack to right turn stop and note position of groove on input shaft. The flat must be
aligned in this position during assembly, otherwise steering gear will not be centered.
6.
Remove pinion cover bolts, pinion cover, gasket, pinion shaft, spacer shims and upper bearing.
7.
Remove rack from housing.
8.
Remove lower bearing through pinion shaft bore.
Assembly