
Mustang V6-232 3.8L VIN 3 TBI (1984)
Heater Core: Service and Repair
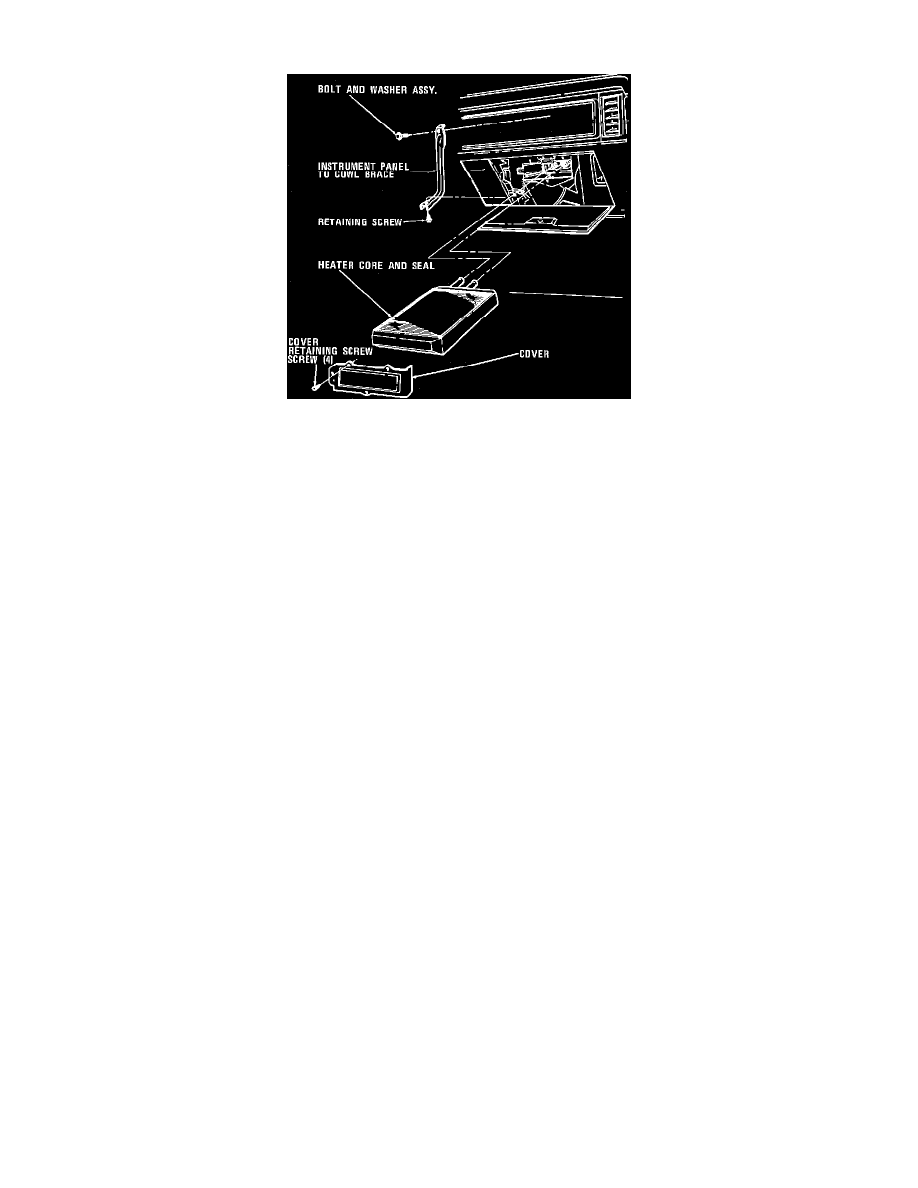
Fig. 4 Heater Core Replacement. Less A/C
LESS AIR CONDITIONING
1.
Drain cooling system and disconnect battery ground cable.
2.
Disconnect heater hoses from heater core and plug core openings.
3.
Remove glove box liner.
4.
Remove instrument panel to cowl brace retaining screws and the brace.
5.
Move temperature control lever to warm position.
6.
Remove the four heater core cover retaining screws, then the cover through the glove box opening.
7.
Remove heater core assembly mounting stud nuts from engine compartment.
8.
Push core tubes and seal toward passenger compartment to loosen core from case assembly.
9.
Remove heater core from case through the glove box opening, Fig. 5.
10.
Reverse procedure to install.
WITH AIR CONDITIONING
1.
Disconnect battery ground cable.
2.
Remove screws securing the left side of instrument panel pad retaining tabs to the instrument panel, in the upper right and left corners of the
instrument panel cluster area.
3.
Remove screws securing the right side of instrument panel pad retaining tabs to instrument panel, located in the two openings at the top edge of the
right instrument panel trim applique, above the glove box.
4.
Remove screws securing leading edge of instrument panel pad to defroster openings. Use a magnetic or locking tang type Phillips screwdriver. Do
not let screws drop into defroster openings since plenum door damage may result.
5.
Raise the overhanging edge of the instrument panel pad to clear retaining tabs and pull pad rearward to remove from top of instrument panel.
6.
Remove screws attaching steering column opening lower cover to instrument panel, then the cover.
7.
Remove steering column trim shrouds.
8.
Remove nuts securing steering column to brake pedal support and lower steering column for access to gearshift selector lever and cable assembly.
9.
Reach between steering column and instrument panel and lift selector lever cable off selector lever. Then, remove cable clamp from steering
column tube.
10.
Rest steering column on front seat.
11.
Remove screw attaching instrument panel to brake pedal support at steering column opening.
12.
Remove screw attaching lower brace to lower edge of instrument panel, below the radio.
13.
Remove screw attaching brace to lower edge of instrument panel.
14.
Disconnect temperature control cable from temperature blend door and evaporator case bracket.
15.
Disconnect seven-port vacuum hose connectors at evaporator case.
16.
Disconnect blower resistor wire connector from resistor and the blower motor feed wire at in-line connector near the blower resistor wire
connector.
17.
Support instrument panel and remove three screws securing top of instrument panel to the cowl.
18.
Remove screw at each side of instrument panel securing instrument panel to cowl side panels.
19.
Move instrument panel rearward and disconnect speedometer cable and any wiring that will not permit the panel to lay on the front seat.
20.
Drain cooling system.
21.
Discharge refrigerant from A/C system at the service valve on suction line. When system is fully discharged, disconnect and cap high and low
pressure lines.
22.
Disconnect hoses from heater core. Cover hoses and heater core tubes to prevent leakage.