
Mustang V8-302 5.0L COBRA (1995)
Side Air Bag: Service and Repair
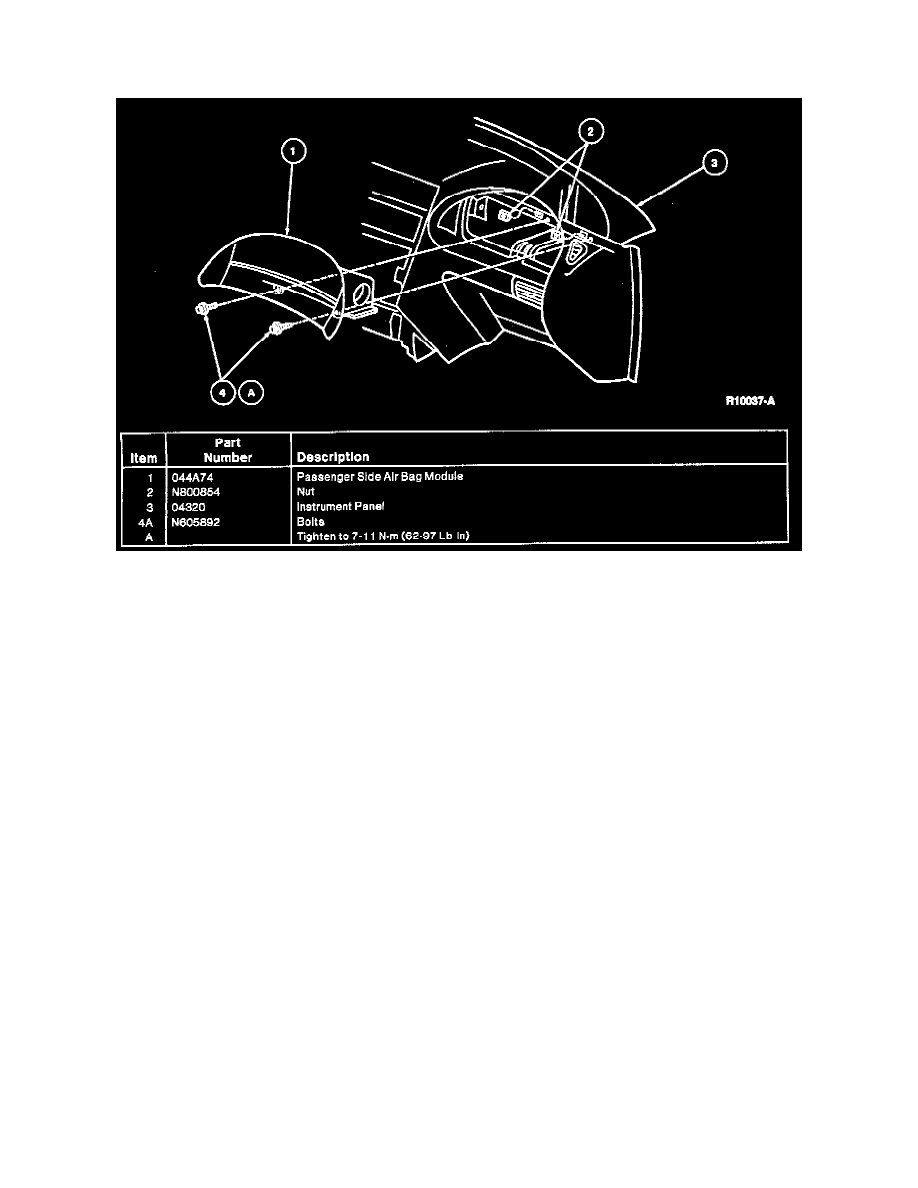
Passenger Side Air Bag
REMOVAL
1. Disconnect battery ground cable.
2. Wait one minute for backup power supply energy to be depleted.
3. Open glove compartment. Drop glove compartment to the floor by pushing sides of glove compartment towards each other.
4. Remove two screws that attach RH A/C duct and remove duct.
5. Remove two fore-aft air bag attachment bolts that attach passenger side air bag module to instrument panel steel reinforcement.
6. Disconnect air bag electrical connector on LH lower rear corner of passenger side air bag module.
7. Remove air bag connector from steel reinforcement by prying "X-mas" tree out of hole in steel reinforcement.
8. Pull each corner of air bag cover to disengage cover-to-instrument panel attachments.
9. Gently push passenger side air bag module from behind, out of the instrument panel opening in order to pull passenger side air bag module out
completely with both hands.
WARNING: PLACE AIR BAG MODULE ON BENCH WITH TRIM COVER FACING UP TO AVOID PERSONAL INJURY.
INSTALLATION
1. Position passenger side air bag module in instrument panel opening and slide into position.
2. Push "X-mas" tree into its hole in the instrument panel steel reinforcement.
3. Connect the air bag connector.
4. Attach two fore-aft air bag attachment bolts to the instrument panel steel reinforcement. Tighten to 7-11 N.m (62-97 lb-in).
5. Push each air bag cover corner to engage cover-to-instrument panel attachment.
6. Install RH A/C duct.
7. Push sides of glove compartment toward each other to put glove compartment back into position.
8. Close glove compartment.
10. Reconnect battery ground cable.
11. Prove-out air bag system.